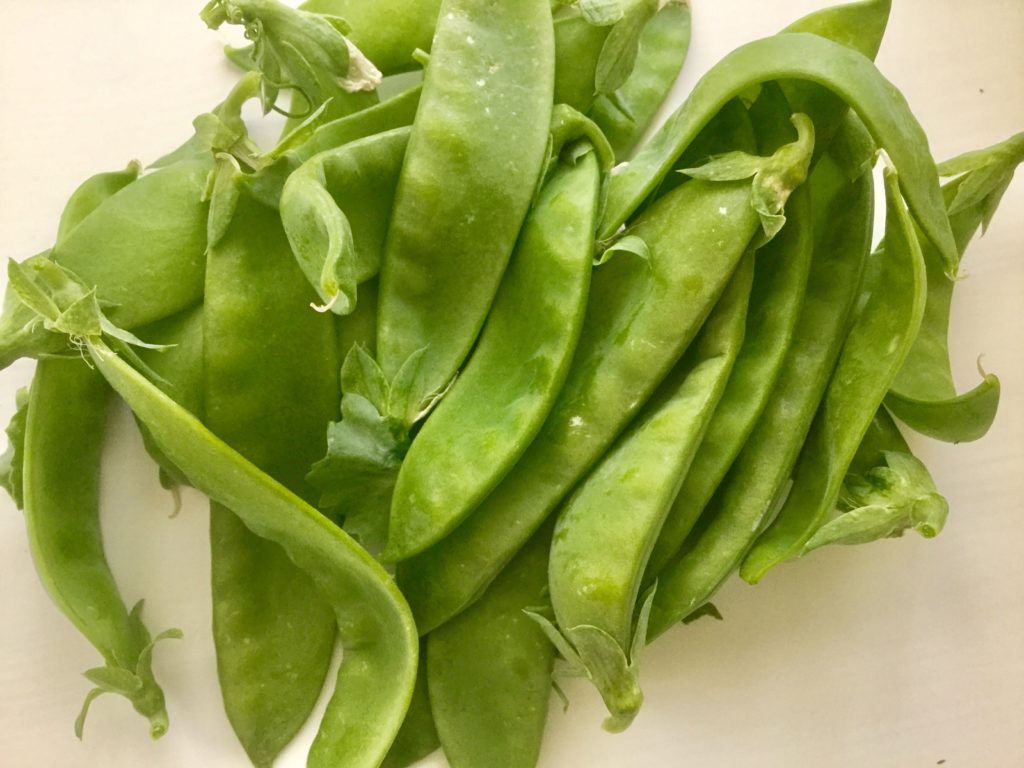
Today as I was out checking the garden I noticed that there were peas on the vines! The end of June our spring peas decided it was too hot and in a pout stopped flowering. They ended up in the compost pile and a new set of pea seeds were planted. I had been noticing a flower or two the last week, what I hadn’t noticed that under the leaves there were many more flowers than I had known. Today I saw them, beautiful snow peas, they should be productive well into October and I am so excited!
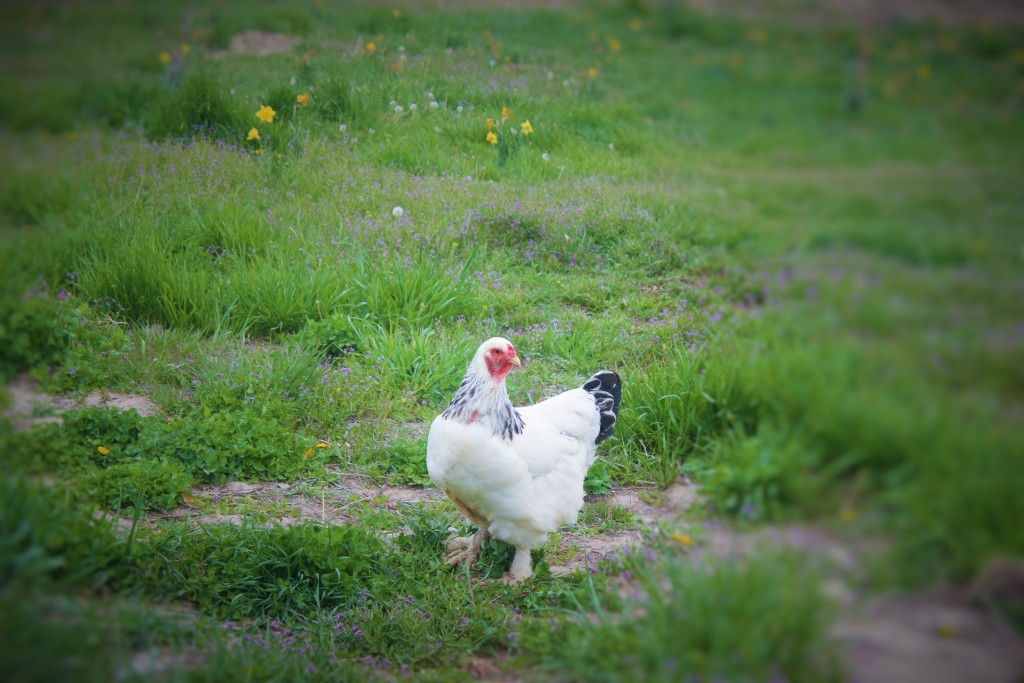
Chickens have a very important roll here on the farm. One of the first purchases we made when we moved here was a bunch of baby chicks shipped in when they were a day old, soon we had a big chicken coop up and our relationship with chickens on the farm began. We had kept chickens at our old house, but this was going to be different. Before we only kept 10 or 12 chicken and they were housed in a small coop with a tiny yard and fed kitchen scraps and basic chicken feed. Here we had 30+ chickens, they had free access to the entire five acres, we did still feel them kitchen scraps and chicken feed, but they were also eating bugs, weeds and grass.
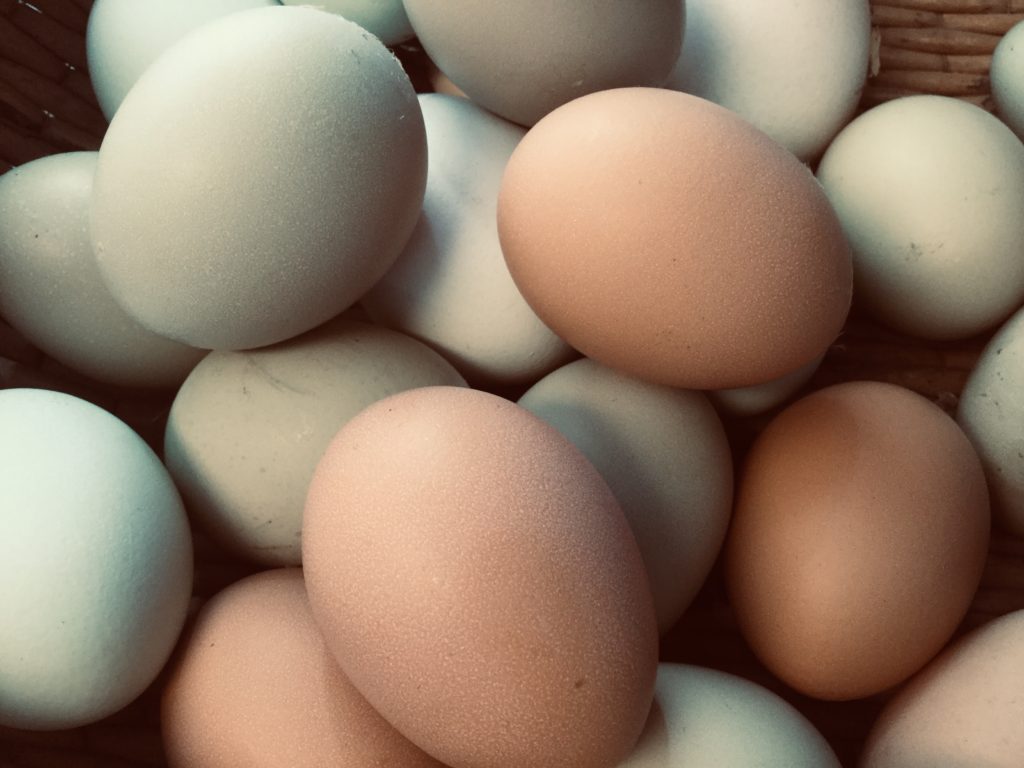
This year has been what I like to call a “building year”. Chickens are at the peak of their production when they are one and two years old and then fade off a different rates depending on the breed, feed and how the winters are managed. To keep up egg production, without a period of lag, new chickens need to be added to the flock yearly or at least every other year and the old hens culled out. After the first few years we had gotten off track and this past fall our girls were tired and old, some hens had just finished their fourth summer, it was time for retirement, to the stew pot. We kept about five hens and a rooster, the rooster had been hatched and raised here on the farm and so had a couple of the hens and then there were a few favorites that got to stay. It was nice to only care for six chickens over the winter, but I did miss fresh eggs, especially as I bought boxes of eggs from Costco.
This spring we started the flock over fresh with a new bunch of little pullets and recently they began to lay eggs. New pullet eggs are small and cute and I just love them. The plan is that next summer we will have enough to start selling them again.
Not only do chicken provide eggs and a little bit of income from eggs, they are little workers. They can clear a plot of land from weeds in an afternoon and turn a pile of manure, straw and pine shavings into usable compost in a couple weeks. Tomorrow I will manually turn the compost pile they have been currently working on and I anticipate it will be ready to be moved and covered with a tarp while it waits to be used and a new pile started. Our little flock is valuable part of our quest to build fertility and practice regenerative agriculture.
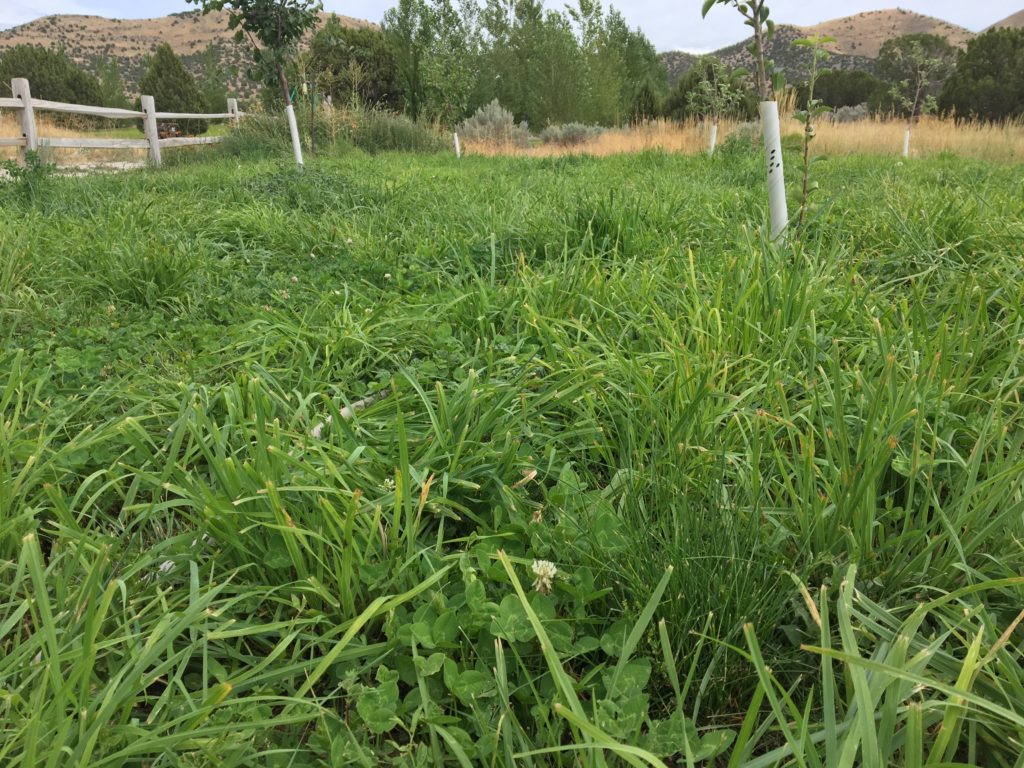
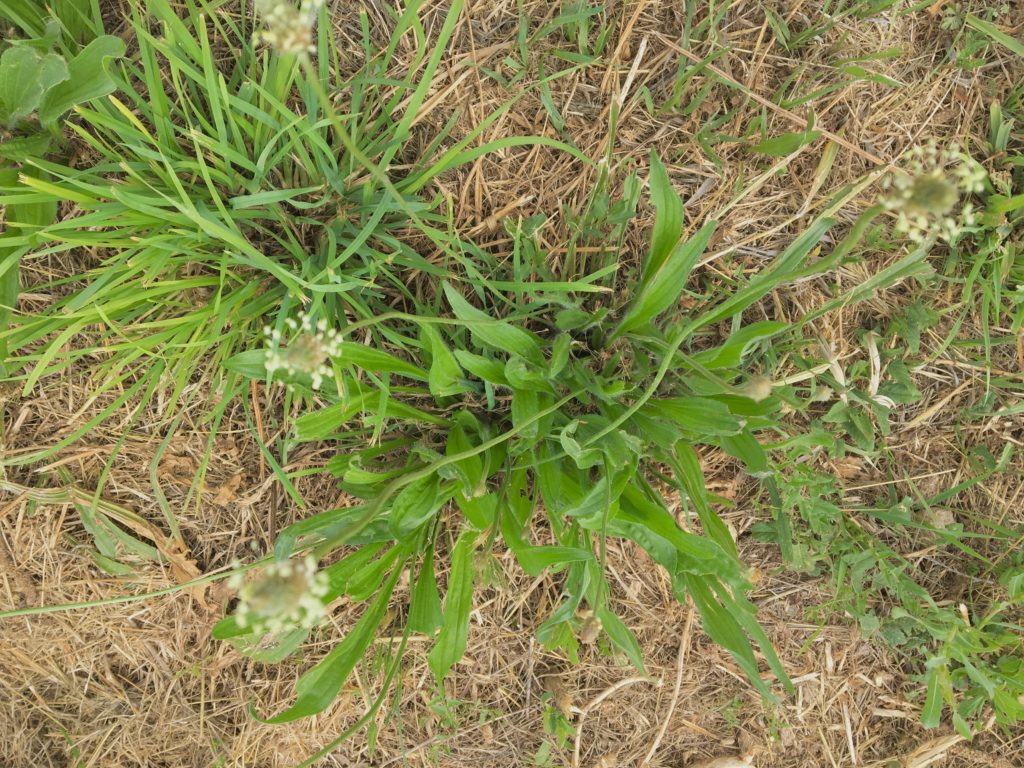
The “Orchard Meadow” thick and green, full of a variety of grasses and perennial weeds.
When we moved to the farm almost seven years ago the area that we now call the “Orchard Meadow” was barren, except for tumble weeds, some cheat grass and burrs. It was pretty sad. Our efforts to reclaim the land, to restore and add fertility and productivity were really quite simple. All land will eventually restore itself and naturally move towards supporting life and fertility within its sphere, we were looking to accelerate that process and add a bit more.
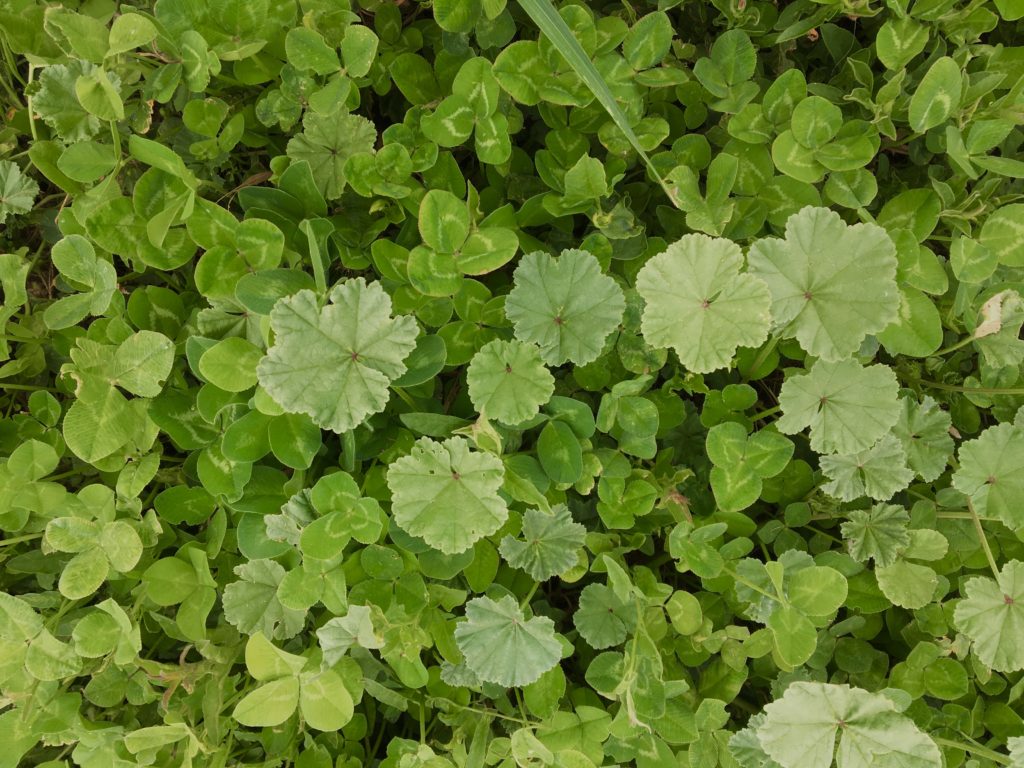
Common Mallow and White Clover, both have a very important roll in the health and vigor of the meadow.
To begin with we mowed down all the weeds and planted trees, mulching them deeply with horse manure, straw and wood chips. The second winter we over seeded the whole thing with drought tolerant pasture grasses and in the spring white clover and sweet clover. We irrigated the entire meadow and let the grass, clover and weeds grow.
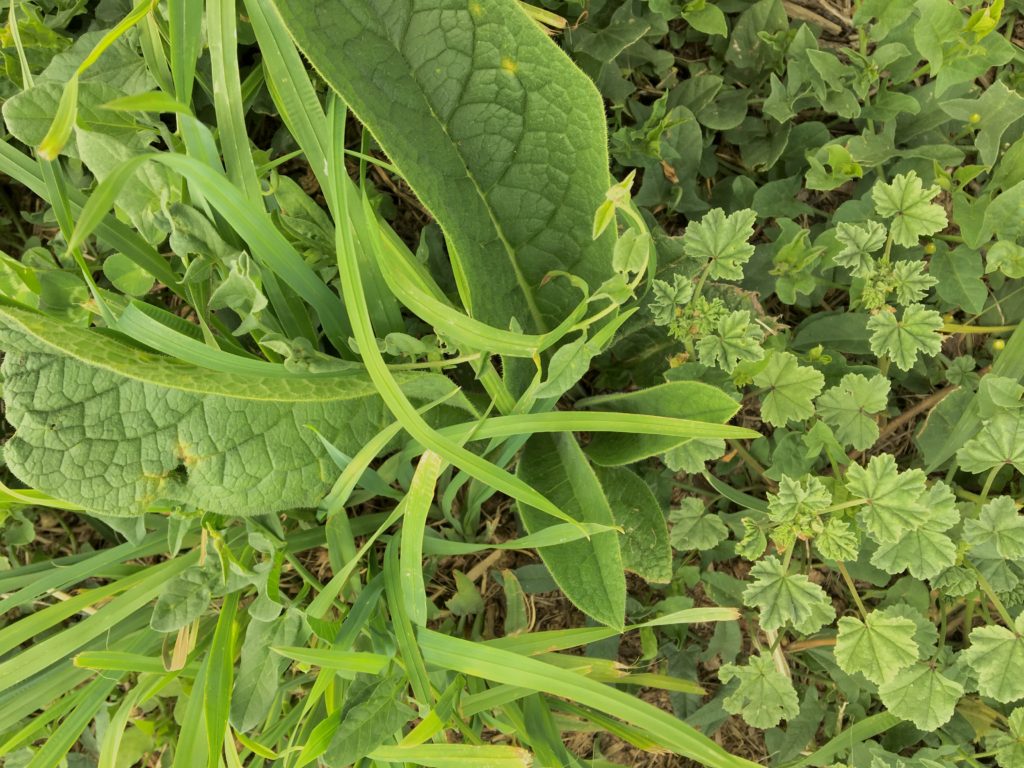
Comfrey, the deep tap root bring important minerals to the surface and when mowed deposit them where the trees and grasses can most benefit .
Yes, even the weeds. Weeds in the context of reclaiming pasture are not a bad thing. The earth naturally reclaims herself, and what we would call common weeds are some of the first plants that come into an area to help restore, rebuild and nourish. And we had a lot of weeds, big tall lambs quarter and hog weed, and we mowed them a few times and in doing that created a layer of natural mulch. Every year the grass, clovers and good perennial weeds got thicker and the starter weeds became less and less. We added animals in movable pens to eat down the grass and fertilize.
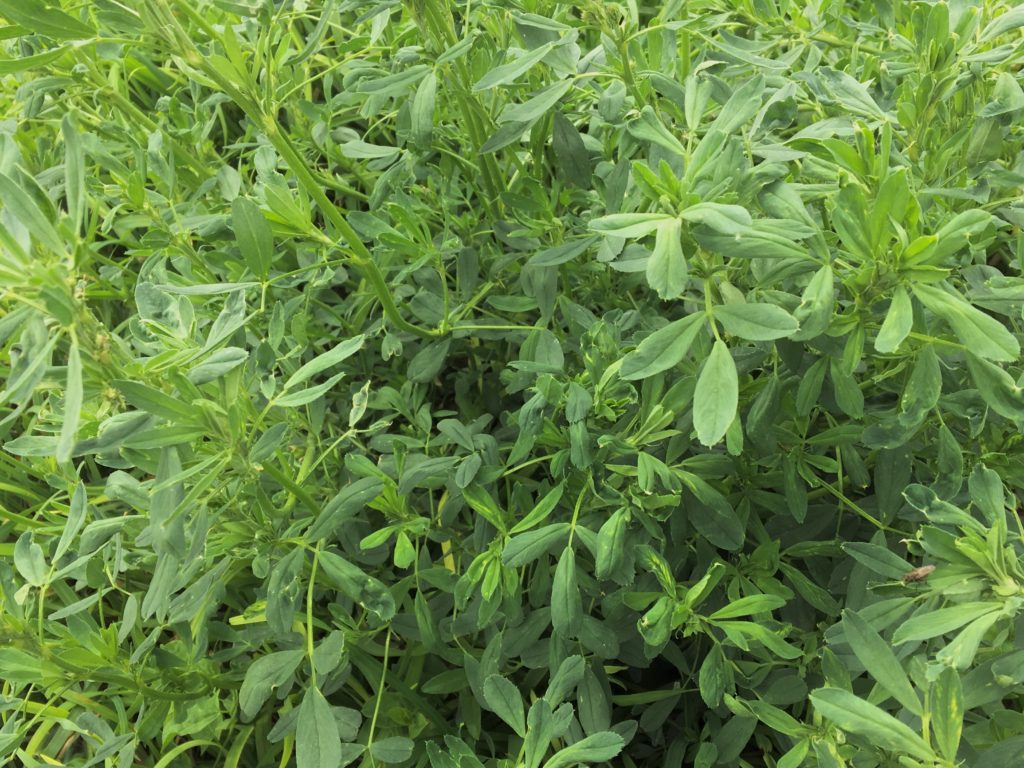
Alfalfa, creates a lot of biomass and fixes nitrogen from the air and makes it bioavailable in the soil around it.
This year our trees are bigger and the grass thicker and greener than it’s ever been. I still have to water at least once a week because the trees are still young (some only a year old, we lost a few to gophers) but soon the plan is to only water every few weeks as needed.
Plantain, not only great for the pasture, but very medicinal.
seriously, a dressing made with BBQ sauce and Ranch Dressing! How can that NOT be GOOD!
Here is our cast of characters:
Ranch Dressing
BBQ Sauce
Grilled Chicken
Romain Lettuce
Tomatoes, diced
Cilantro, chopped
1 can Black Beans, drained
1 can Corn, drained
(oops, forgot that for the picture)
Green Onions
Shredded Cheese
Tortilla Strips
Here is what Becky said:
“Now, there are different ways you can have this. In the past, we would mix all the fresh ingredients and then pour the ranch on top, then drizzled with BBQ sauce. My husband prefers to marinate the cooked chicken in the BBQ sauce all day and serve it that way. I also like to mix the ranch dressing and the BBQ sauce together for a Ranch/BBQ dressing. Whatever the way, it is SOOOO good! “
I chose to mix the Ranch dressing and BBQ sauce, then marinate the cooked chicken in the sauce. That alone was wonderful. If you were to shred the chicken and mix it with the sauce, you would have a wonderful filling for a chicken sandwich.
I also crushed the tortilla chips and mixed it with the salad just before I served it.
This recipe did not disappoint.
It was SO good!
Everyone loved this, it will defiantly become a regular at our dinner table.
I usually don’t bother with a fall garden. It’s mostly because of laziness. Not that I’m afraid of work, but that over the years I haven’t been very successful and I’ve been too lazy to figure it out. I feel like I’m either planting too late, or if I’m planting on time the garden is too hot and my germination rates are poor.
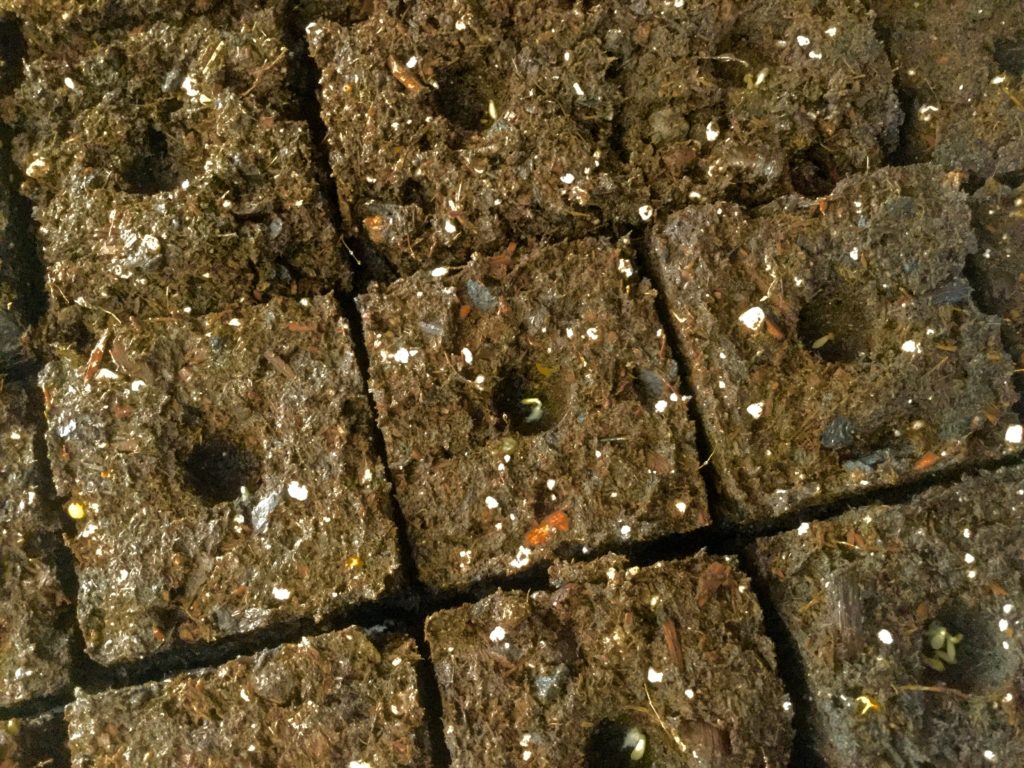
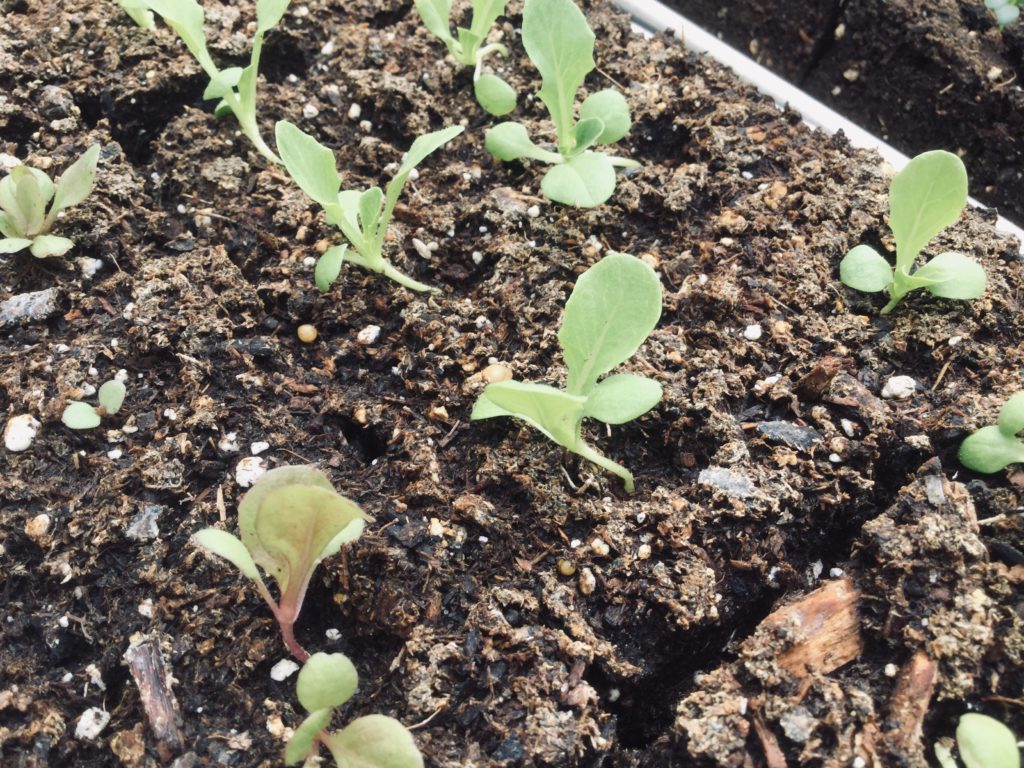
Lettuce seeds just starting to sprout in soil blocks.
When I started selling at the farmers market I decided I needed to start planting more lettuce as a cash crop and if done correctly I could get several harvests. However, two plantings later and a horrible germination rate, I was ready to give up. Maybe I’m not destined to have lettuce past June.
Then I read a book.
My opinion on starting seeds changed, like, completely. I’ve usually avoided starting seeds indoors. It was so much work, making sure they were warm enough and had enough light and water..for what? A week or two extra growing time? Well, when you are planting for sales a week or two or three is pretty huge. There is also the advantage of better germination rates than out in the field. I couldn’t get lettuce seeds to germinate well in the heat and dry of July, but I have an almost 100% germination rate in my 70 degree house where I can keep an eye on them easily. There is also the cost and bother of plastic or peat pots and flats, plastic wears out and peat can only be used once. I started reading about the soil blocking method, I ordered a soil block tool and made my first pan of soil blocks and sowed my lettuce seeds.
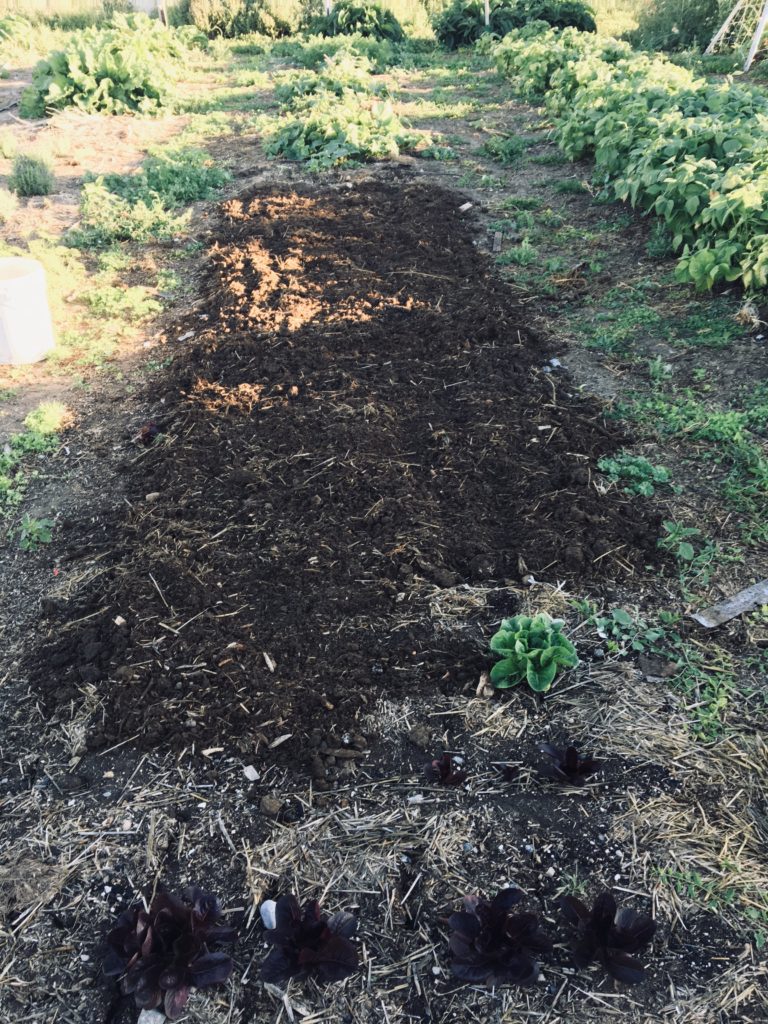
Newly prepared bed with fresh compost worked into the top couple inches of the soil.
As I said before I got an almost 100% germination rate. In the mean time I spent some time preparing my lettuce beds. For the past few years I had been using a no-till deep mulch method, and generally I like the philosophy and the lower manual labor (tilling, spading, weeding). However I was finding I still had problems with compact, clay soil and seed germination. After much research I’m transitioning to a low-till method, working only the top couple inches of soil, leaving the deep tilling to the worms. I worked this bed over with a spade, aerating the entire thing, then covered it all with my homemade compost and worked it in the top couple inches. All beautiful and ready for my lettuce starts to be transplanted this weekend.
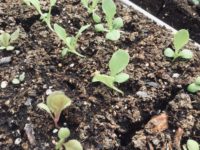
Two and a half week old lettuce seedlings being hardened off for transplanting in a few days.
I will be experimenting with starting more of my seeds indoors. Our biggest obstacles will be heat and light, so we will be working with artificial lighting and greenhouse methods this winter. It’s always a big experiment around here.
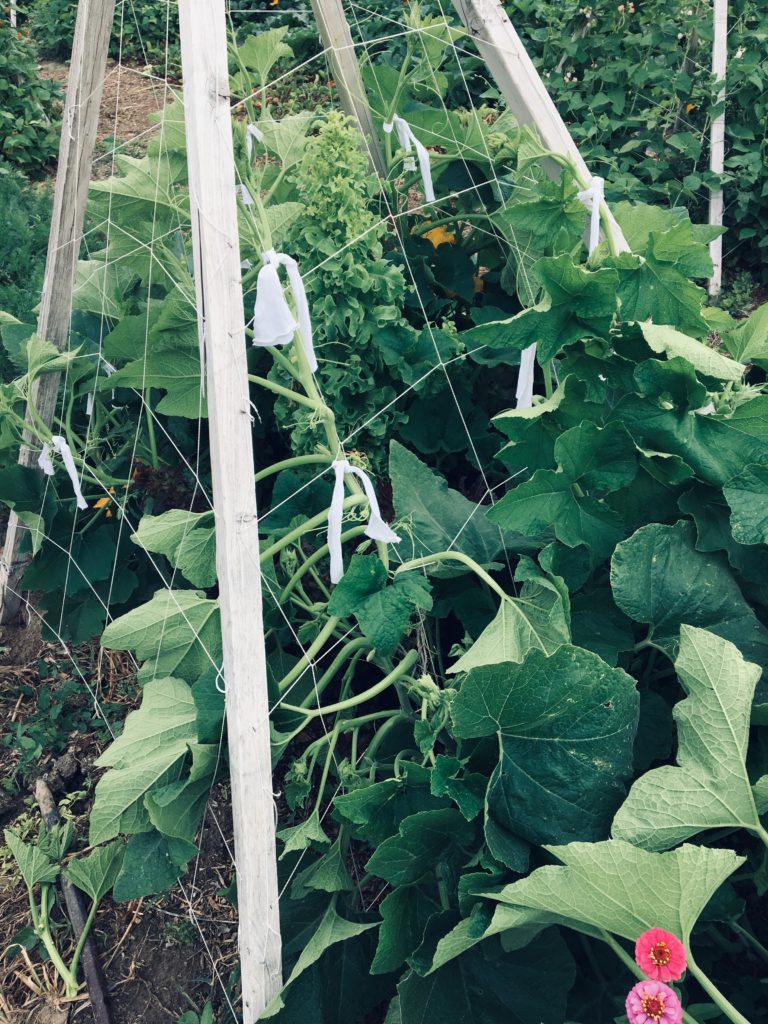
I love variety and beauty. Gardening has always been very satisfying for me because I can experiment a lot with both variety and beauty. I’m always trying new vegetables and flowers, usually mixing the two.
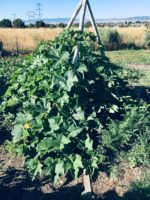
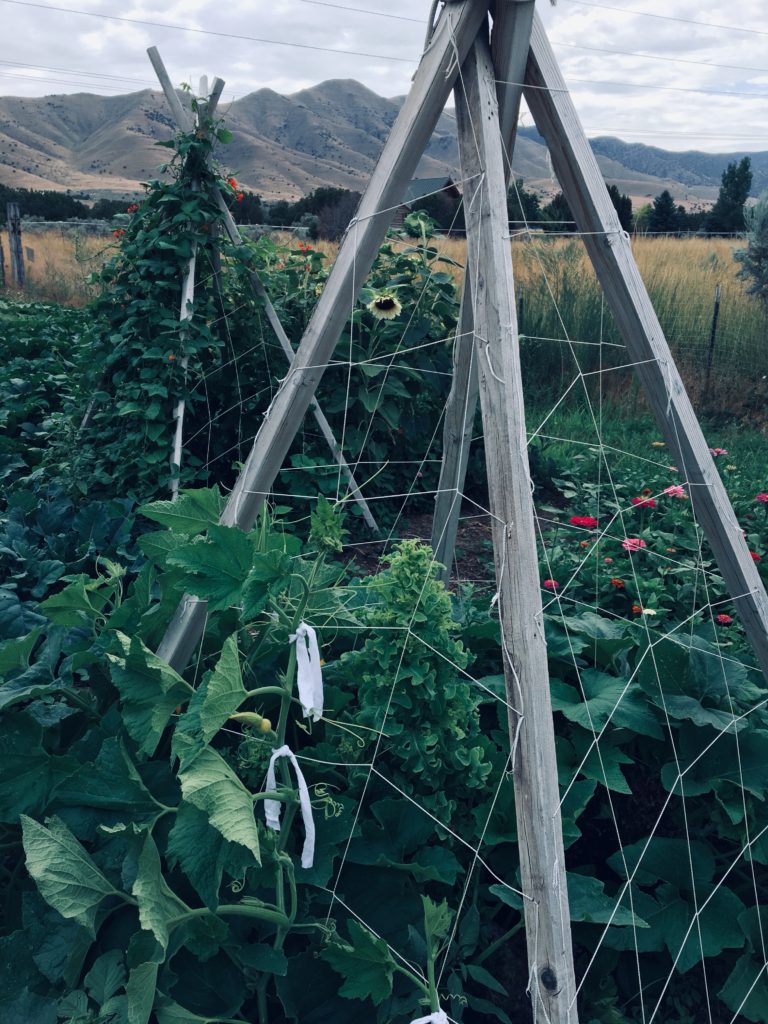
One way I like to bring variety and visual interest to the garden is by vertical plantings. A couple years ago Mike made several of these four sided trellises in some of the garden beds and I’ve has a lot of fun growing things right up them. I do a lot of runner beans (they have a prettiest flowers) and cucumbers, but one of my favorites would be mini pumpkins.
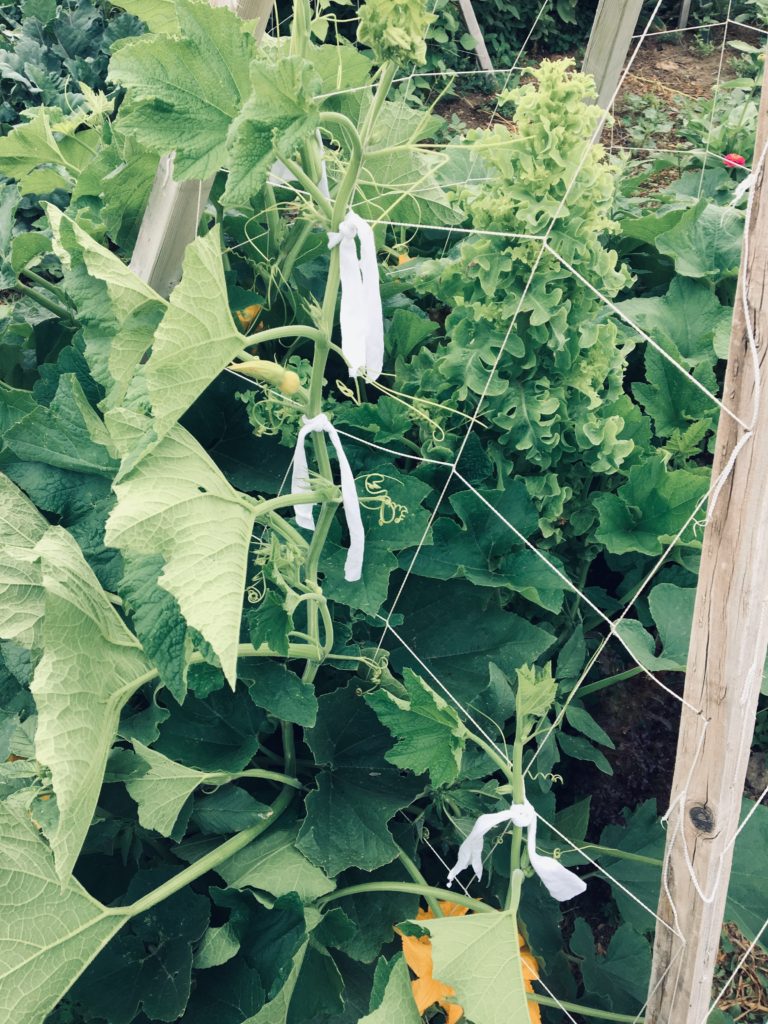
I’ve done a lot of mini pumpkins over the years, they are so cute and they kids just love them, they last through fall decorating and when they are done being pretty the chickens and goats enjoy them as an early winter treat. While pumpkins are a vine, they don’t naturally grow up, like pole beans or peas, and they need a bit of help. I like to use strips of cut up cotton shirts, they have a little bit of give in them, so when the wind blows it won’t snap the vine, they are very sturdy, but if one happens to be left in the garden they will break down nicely. They look a little ragged right after I lift the vines and tie them down, but bounce back pretty quickly. They are a fun addition to the garden and growing them vertically not only looks nice, but saves valuable garden space.
This is the mini pumpkin plant about a week after I tied it up, you can see how much bigger it has gotten and how nice and filled out it is.
***This is a post from my archives, I first published it ten years ago when I was doing a series on salads for my personal blog****
This Salad come from a good friend and neighbor of mine. She served it at a little gals night out get together at her house, and it had become a favorite of mine.
Here is our list of ingredients:
Spinach leaves, washed and trimmed (or a bag)
Strawberries, washed and sliced
Feta Cheese, crumbled
1/4 red onion, thinly sliced
Sugared Walnuts (I will show you how)
Brianna’s Blush Wine Vinaigrette
To sugar walnuts, melt equal parts brown sugar and butter in a small sauce pan (I did 2 Tbsp of each), when it is all melted add the walnuts and stir to coat.
Then lay them out and let them cool, and you have sugared walnuts.
I am not a walnut fan, but I love these.
Crumble the feta, I am not a real lover of feta, but there is something about the mix of strawberry and Vinaigrette that makes the feta so yummy.
Make sure to slice the onion really thin. Usually I don’t love raw onion, but like the feta, there is something about the mix of all the ingredients in this salad that makes it so yummy.
Add all your ingredients and toss with the Blush Wine Vinaigrette.
I served this with homemade french bread (thanks Casey) and home made pizza. I thought it made a yummy meal. I will have to be totally honest and say that my family doesn’t really share my love of this salad, Dadzoo mumbles something about hating feta, it has to do with being forced to eat it as a child. All my kids hate the dressing and the onions. So from a feeding the family/kids stand point this salad didn’t go over so well, but I love it, so it will just have to be saved for special occasions (like when I crave it really badly, there are some advantages to being the cook!)
For a long time I’ve dreamed of owning my own dairy animals and making all the yummy dairy foods. My first try at soft goat cheese was a success! My children may never get to drink our goat milk again, I’m saving it all for cheese.
I think this may just be the most perfect summer lunch ever.
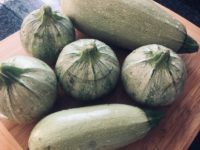
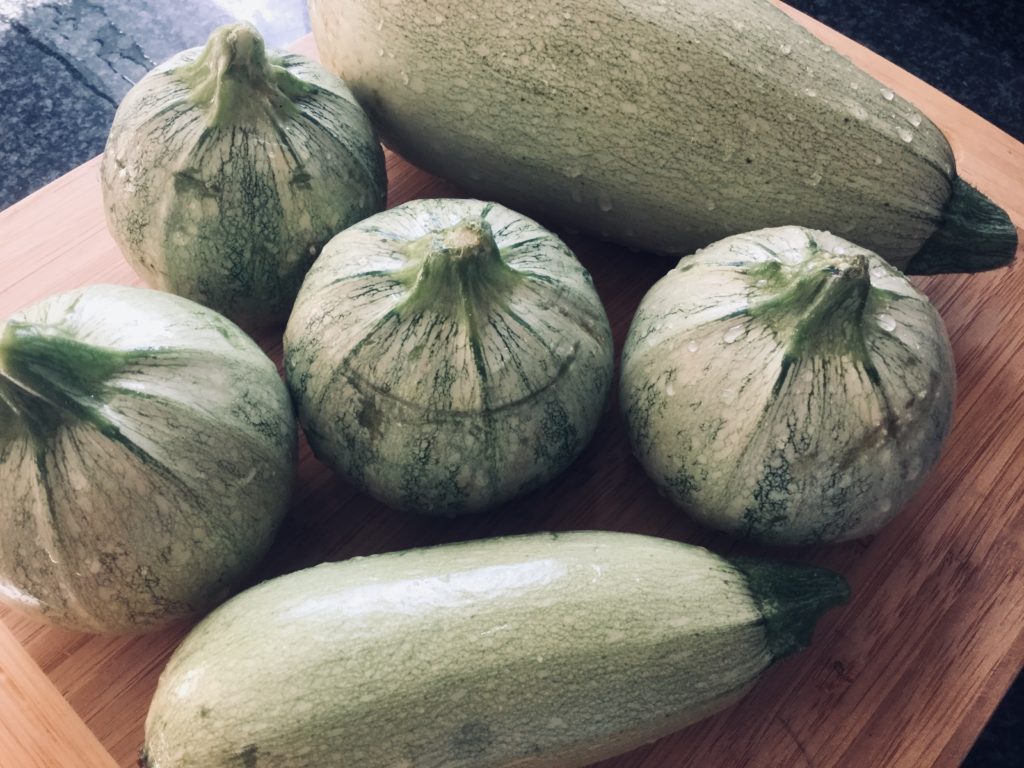
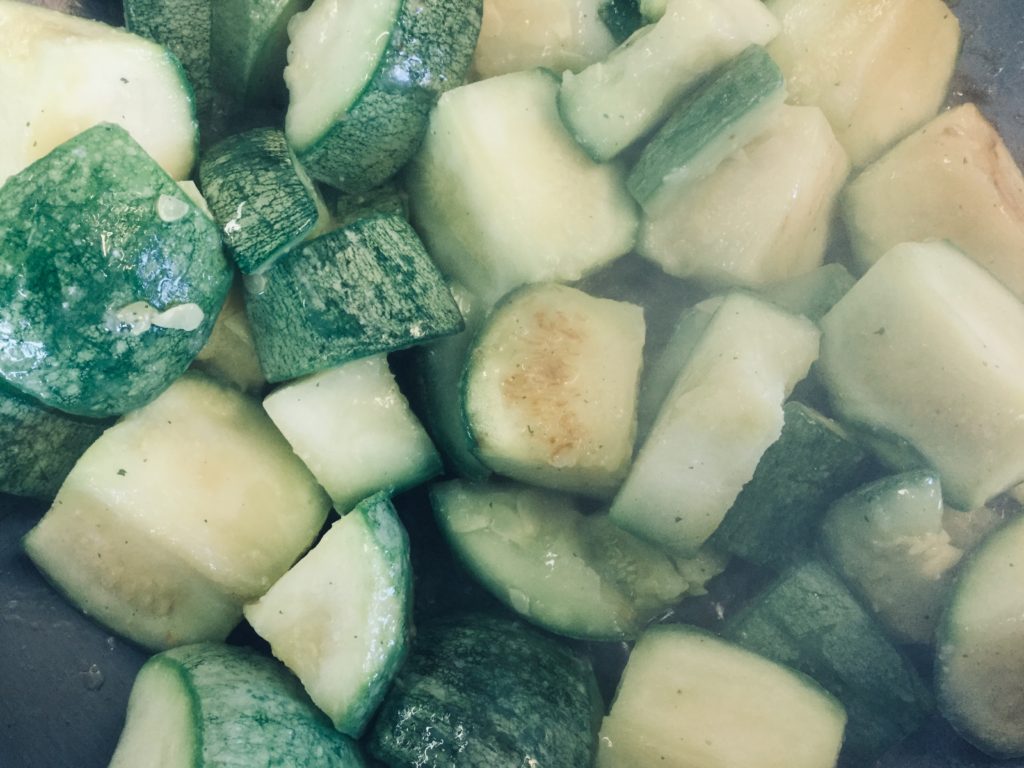
I know summer squash (a group that zucchini is a part of) is sort of a joke among gardeners and neighbors in the summertime. They are abundant and prolific and even the most beginning level gardener can be quite successful with them.
Growing up I swear I ate buckets of zucchini and crook neck squash and I really hated it. My mom (love you) would boil those babies and they were pretty tasteless, at least in my opinion. Then my younger sister got married and her new husband cooked up a zucchini on the grill with lemon pepper seasoning….And. I. Was. Hooked. Add to that I start getting these seed catalogues, from Bakers Creeks and Johnny’s Seeds that has all sorts of summer squash, different shapes and colors and sizes. Not only had my taste buds been satisfied, but my urge for fun and variety was being satisfied.
I’ve grown summer squash ever since. There are so many different ways to cook summer squash, Pinterest is full of great recipes, but I’d like to share my go-to way of cooking it. My kids even like it. This year when I served up the first of the squash my 12 year old boy gave a shout and a fist pump he was so excited!
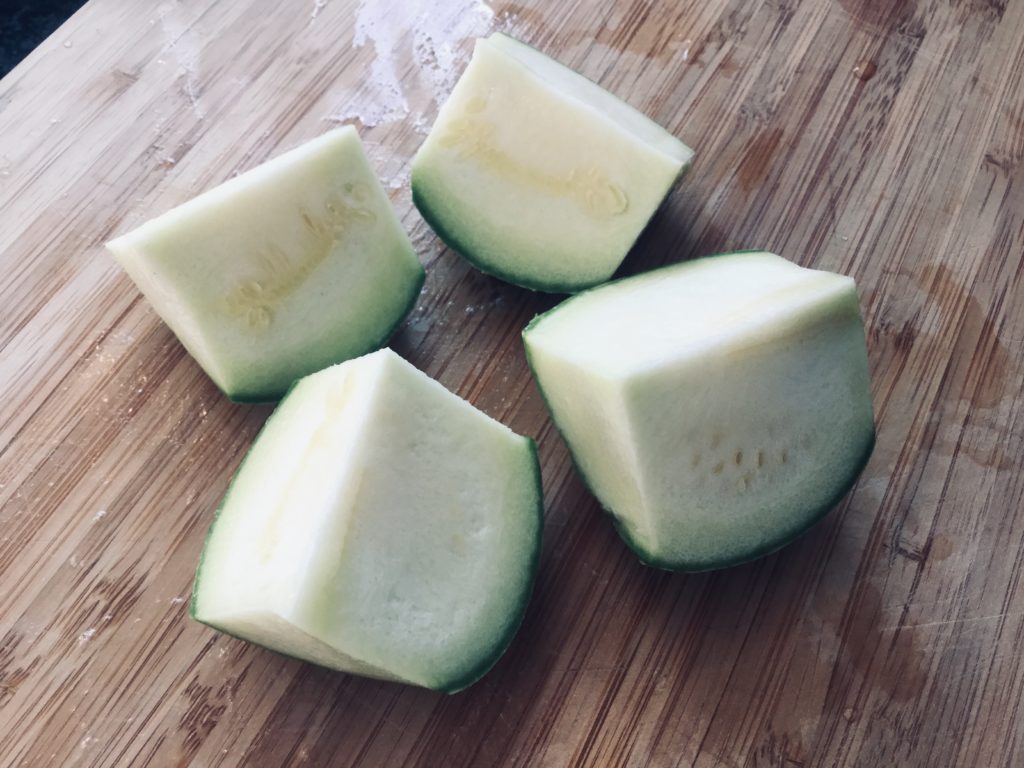
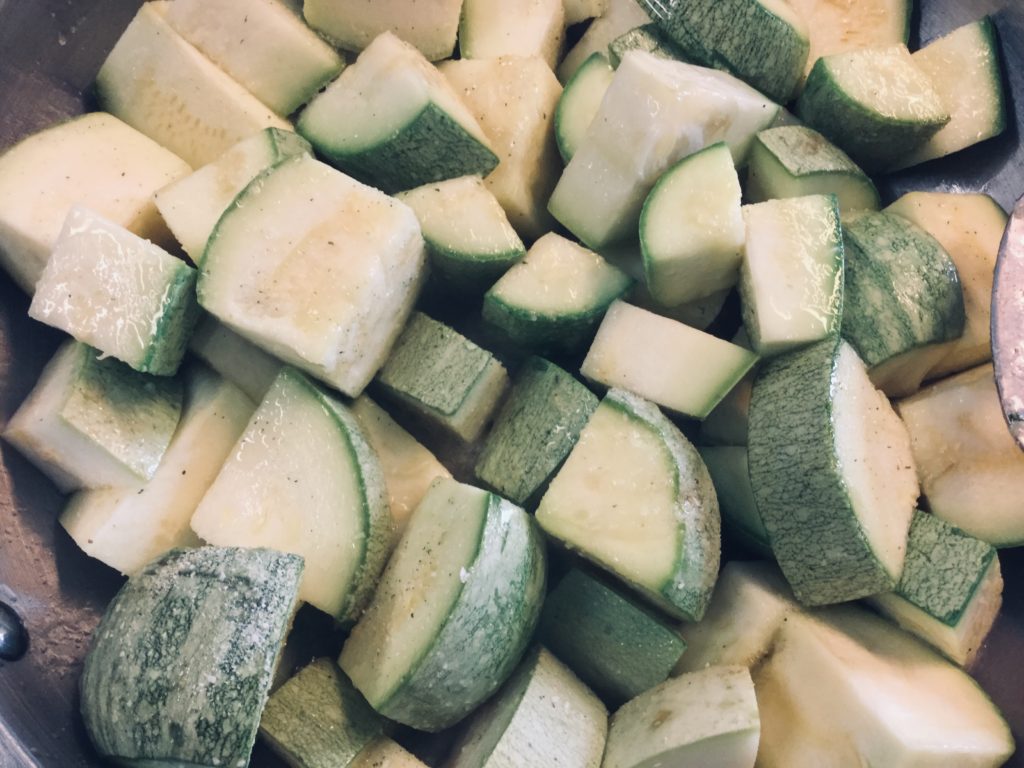
My method is quite simple:
wash
slice it up in whatever desired shape and size
heat up some type of fat (butter, bacon grease, olive oil, etc) until its nice and hot, add the squash
season as desired (we love garlic salt)
cook until soft, but not mushy, and the edges get a nice golden brown color
One of my main jobs here on the farm, my main focus, what everything comes down to is the health of the soil. It doesn’t matter what the freeze dates are, the rates of germination, how many pounds of beans harvested per row if my soil isn’t healthy and nurtured. I can’t have big harvests, beautiful plants or nutritious thriving vegetables if my soil is dead. I spend a lot of time looking at dirt, putting my hands in dirt, observing my garden beds, analyzing and planning, sometimes for years down the road. I want good, rich, dark soil, full of organic matter and life, worms, mushrooms, mold and microbes. The problem is that we are in a desert and our soil doesn’t come that way naturally, therefore is takes a lot of planning and focused effort to achieve that in an organic healthy way.
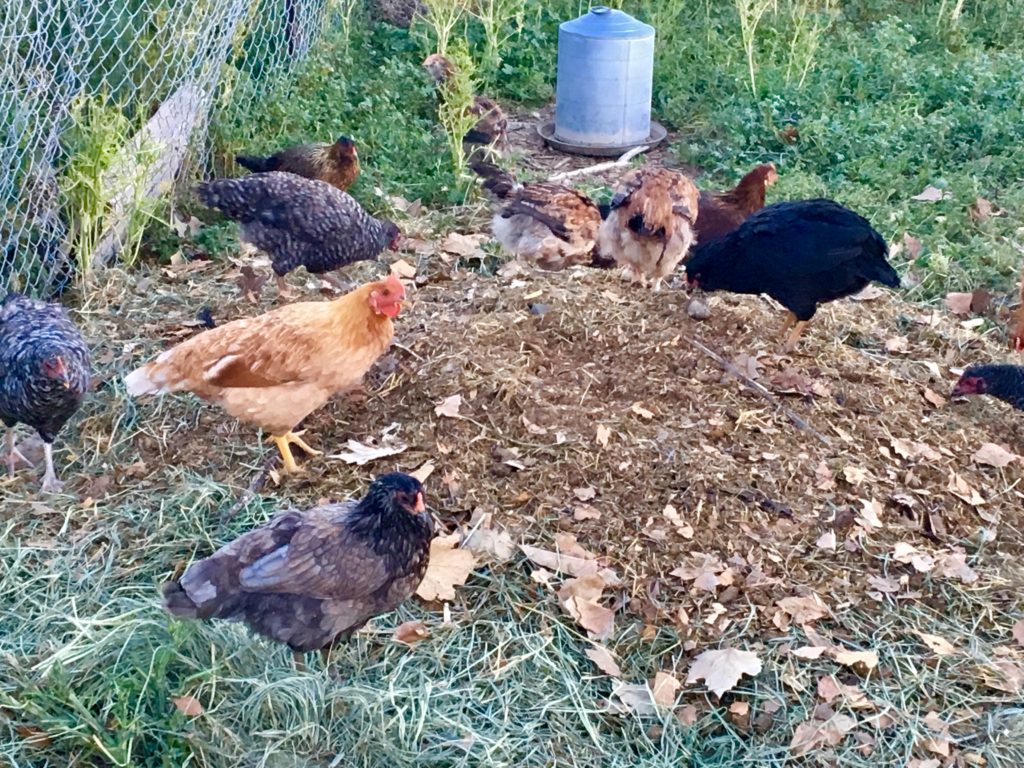
The ladies getting to work on a newly built compost pile.
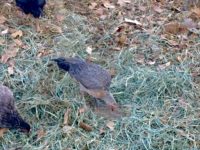
To do this we use many different permaculture methods. One method is the classic composting, nothing organic goes to waste here, from kitchen scraps to weeds, it’s all recycled in some way to help enrich the land. We use chickens extensively in our composting program. We also compost in place and do traditional compost piles, but the chicken composting is what I’d like to talk about today.
In the chicken yard we make a simple pile: horse manure, goat manure and bedding, old leaves, kitchen scraps, weeds and lawn clippings (be cautious using lawn clipping in compost, if there is any weed killer on it, it can cause problems in the garden, I know I’ve experienced it first hand). We do this for a couple weeks, adding food scraps and weeds, especially those that have seeds. The chicken then scratch through the pile, mixing it, eating weed seeds and leaving their droppings to further enrich the compost. Every morning when my son goes out to do his chicken chores he rakes the pile up high and the chickens get to work mixing it all up again.
A pullet working on a new compost pile, she will help breakdown all those leaves and hay.
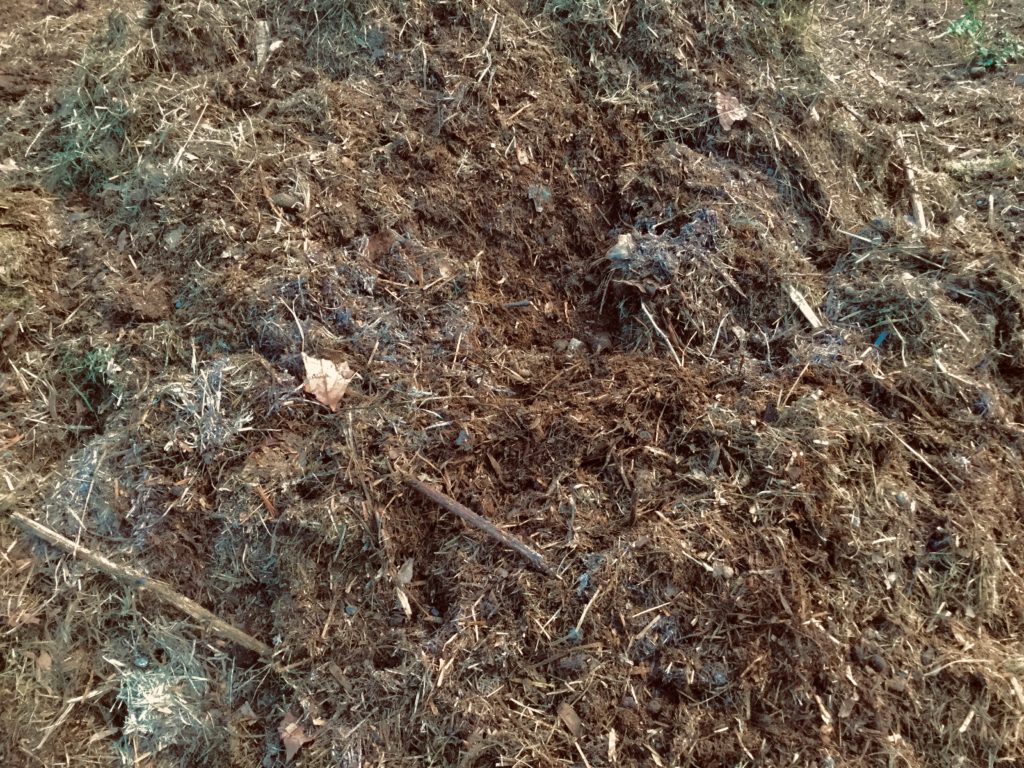
In about a week the pile looks like this picture below, and in two weeks it will be finished and ready to apply to the garden beds. About 10 days to 2 weeks after a pile is started I make a new one and so it goes through the season. Black gold made by my feathered friends and farm hands.
When done right the compost is hot to the touch and steams when the core is opened, this will help kill weed seeds and speeds up the compost process.

 Today as I was out checking the garden I noticed that there were peas on the vines! The end of June our spring peas decided it was too hot and in a pout stopped flowering. They ended up in the compost pile and a new set of pea seeds were planted. I had been noticing a flower or two the last week, what I hadn’t noticed that under the leaves there were many more flowers than I had known. Today I saw them, beautiful snow peas, they should be productive well into October and I am so excited!


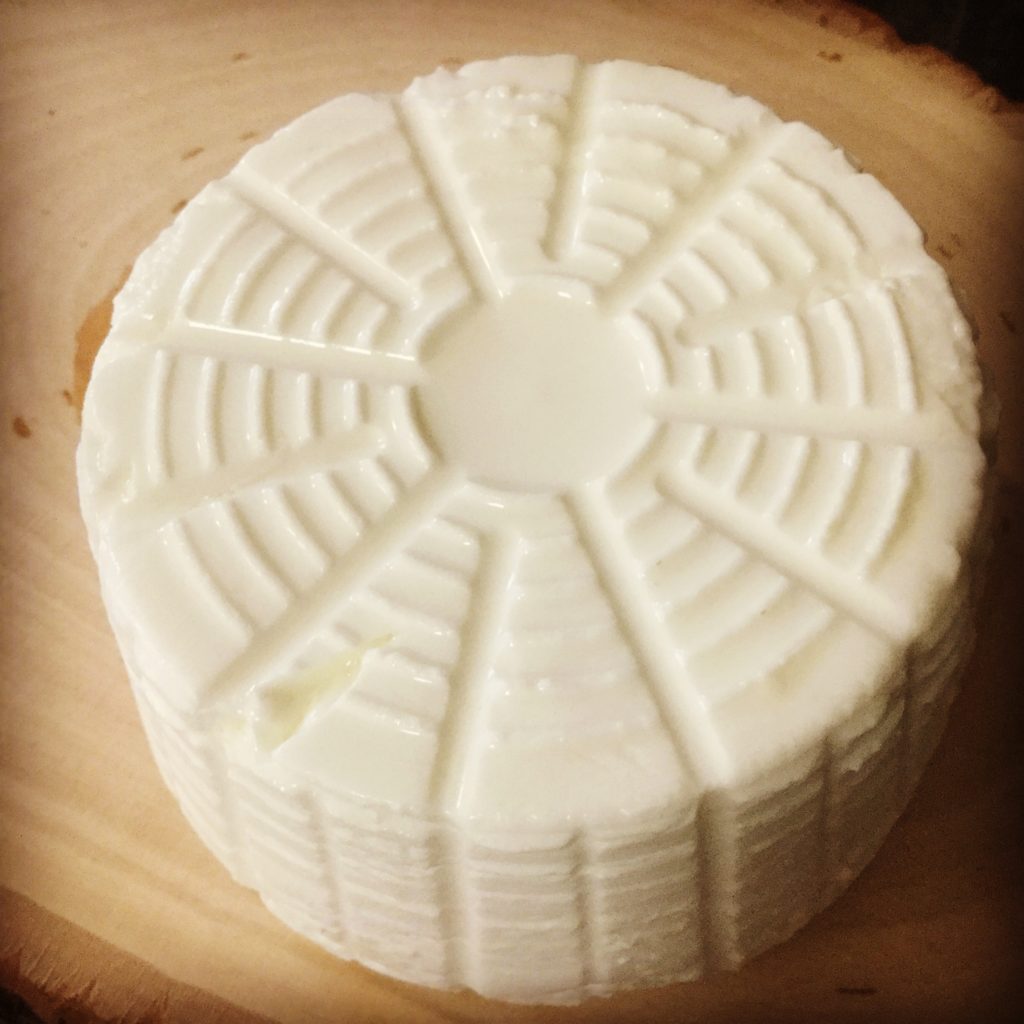 For a long time I’ve dreamed of owning my own dairy animals and making all the yummy dairy foods. My first try at soft goat cheese was a success! My children may never get to drink our goat milk again, I’m saving it all for cheese.
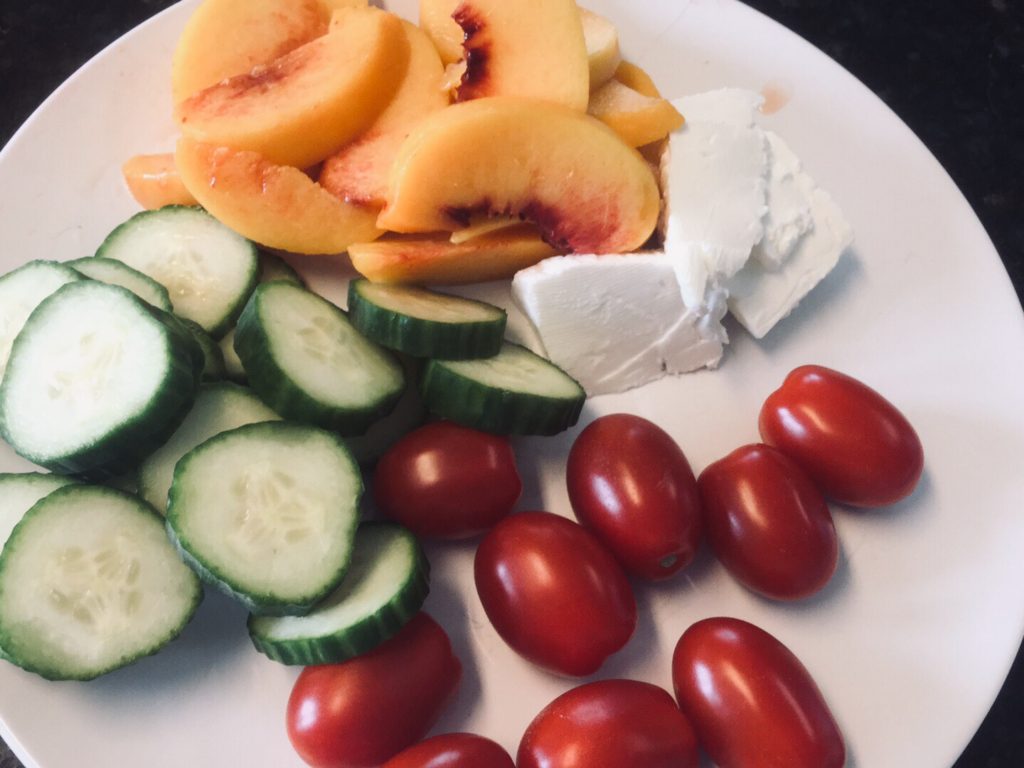 I think this may just be the most perfect summer lunch ever.