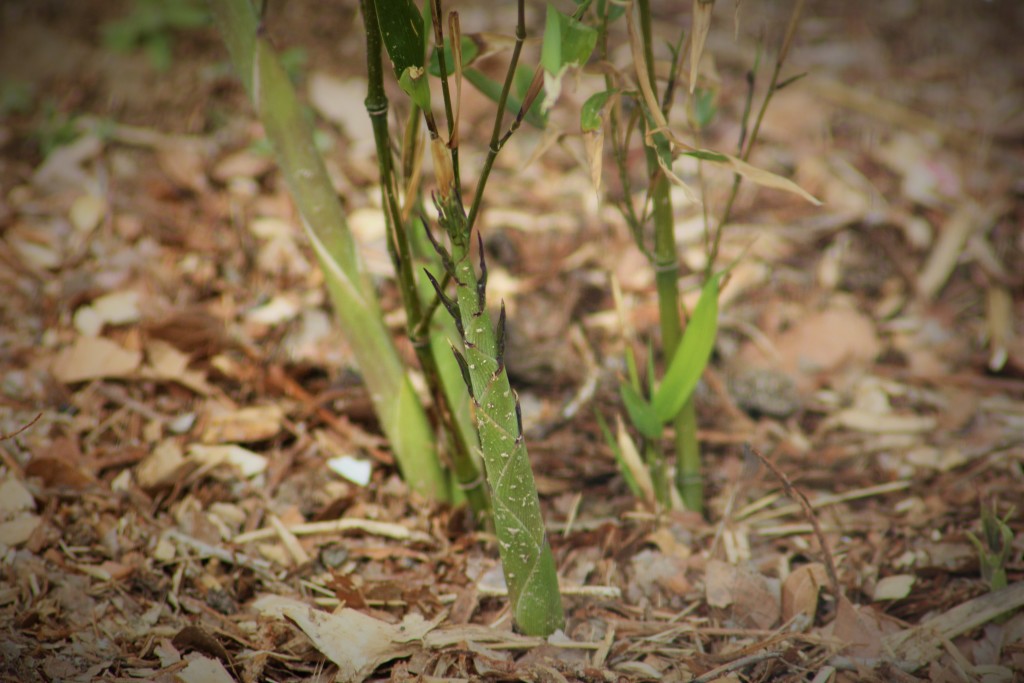
Earlier this spring we spend a Saturday preping an area along the south side of our house for bamboo(read about it here). We like that bamboo will grow quickly, prolifically and tall, covering and shading the south, hot side of our house. We are also anticipating many other benifits, bamboo creates a lot of biomass to use in the gardens, poles for garden structures and food.
We ordered our bamboo from a company on Amazon, Maya Gardens Inc. When the bamboo arrived it was beautiful and green with strong roots, it also came with a few pages full of instructions. We decided to pot the bamboo up, instead of putting it directly in the ground, it was early spring and still quite cold, in a pot I could easily bring it inside at nights and give it extra loving care. In April we finally got around to planting it in its spot, and one plant promptly went brown and appeared dead, the other plant lost a few leaves, but seemed to be limping along.
I honestly thought we had lost one of them, the instructions said it may happen and it would still live, but still…..
The bamboo that had “died”
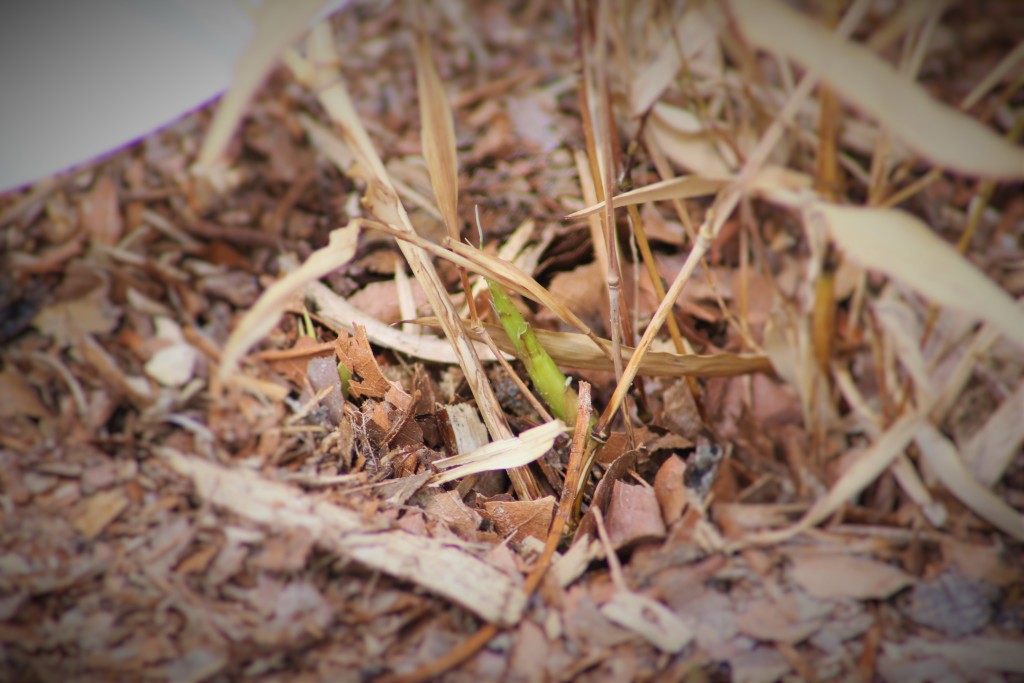
Then just this last week i was walking past the bamboo beds and something caught my eye.
Something small, and green was poking up among the brown stems of the struggling bamboo plant, then I looked over at the other bamboo and there were several healthy shoots, happily growning, happily green and happily expanding!
The grand experiment continues, I am excited and optimistic that this might actually work. One hurdle over come, a few more to go and we have an established bamboo bed.
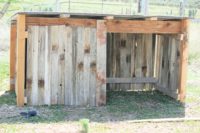
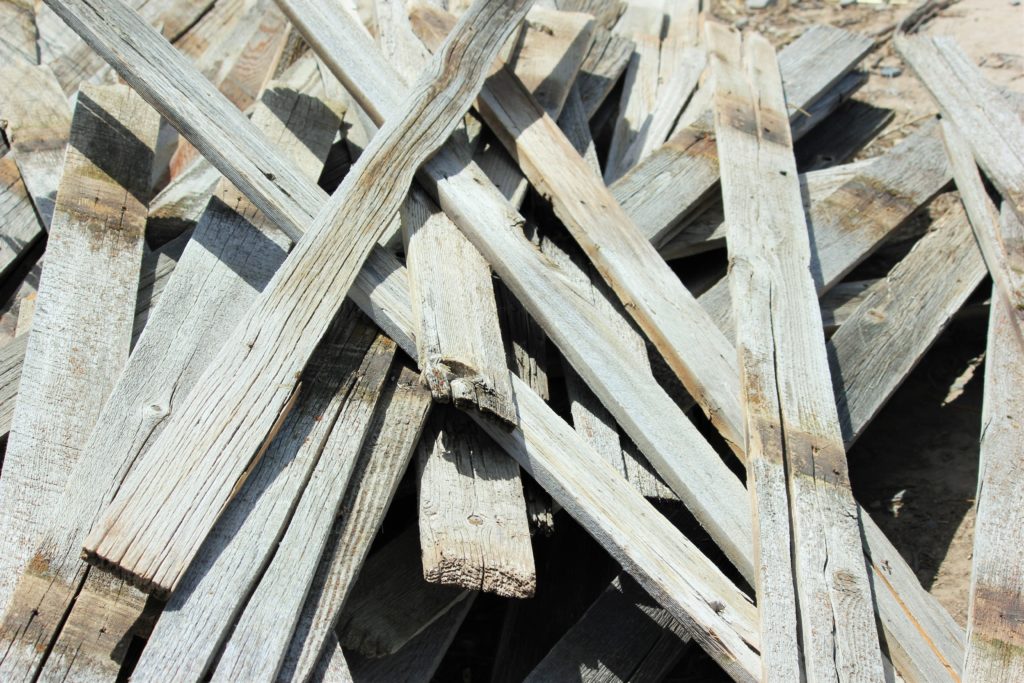
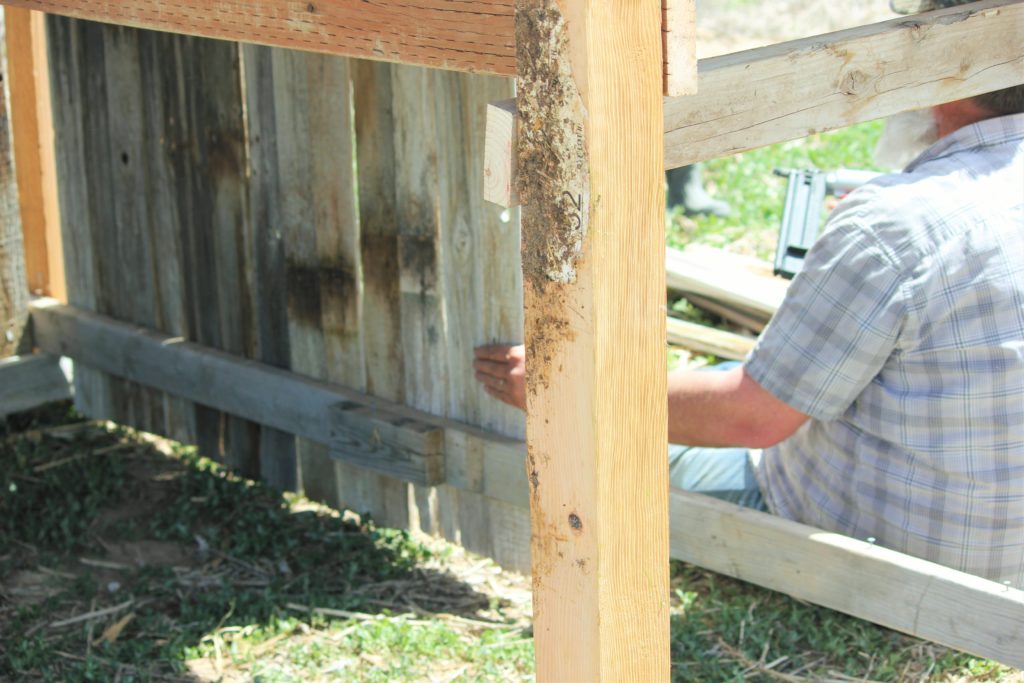
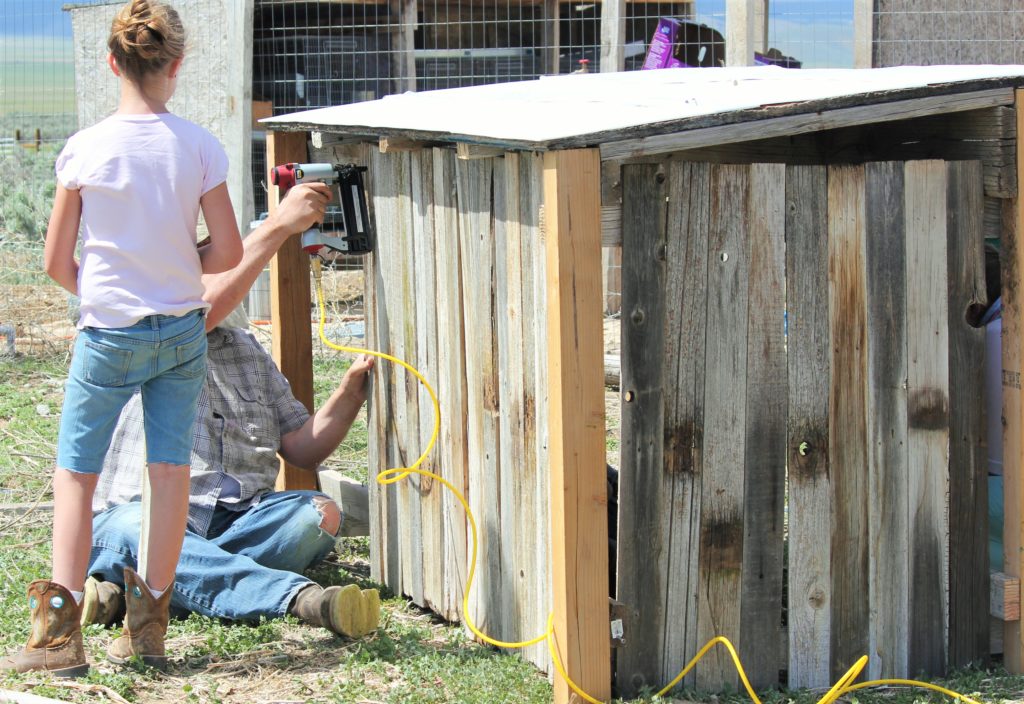
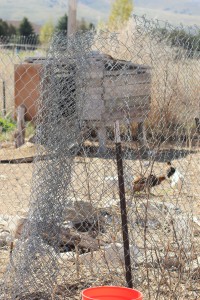
One of the things we try to do on the farm is reuse as much materials as we can. We re-purpose wood, and other building materials. Not only does it reduce the cost of the project, but it also reduces the amount of stuff that eventually ends up in the land fills.
Enter our Goat Enclosure. The goal is to create an enclosure that is big enough for the goats we will be getting in the next Month or so, and reduce any cost that may be associated with it. The cost for this enclosure was a total of $18.00. I did use two new 4×4 posts for the corners of the enclosure. The sides are made from repurposed 2x4s that are then covered with some old cedar fencing that we salvaged from a 30 year old wood fence.
Cedar boards reclaimed from an old wood fence.Chadd removing nails from the piece of plywood we used for the roof.
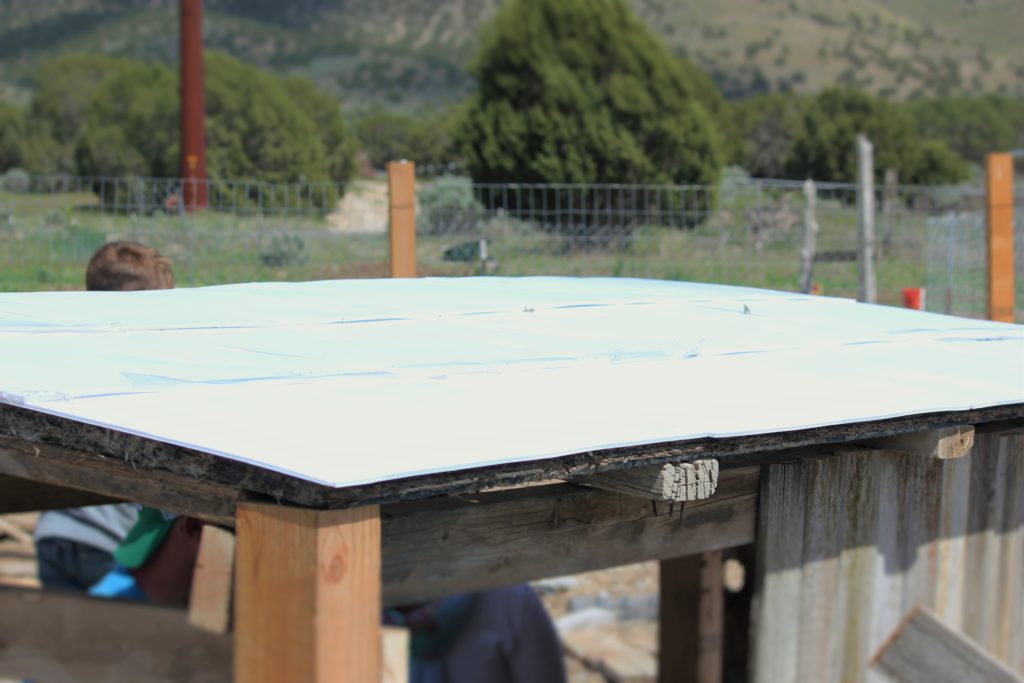
We also did not want to purchase roofing for it, so we re-purposed old campaign signs from the recent city council election. (Thanks Ben Reeves for giving us your old signs). I did have to modify the structure of the roof so that it was the correct width to use the campaign signs.
Shed roof made with old Eagle Mountain City Council campaign signs.
I used wood screws to attach the 2x4s to the 4x4s as cross members, and then used an air staple gun to attach the cedar boards to the 2x4s and to also secure the campaign signs to the top of the enclosure.
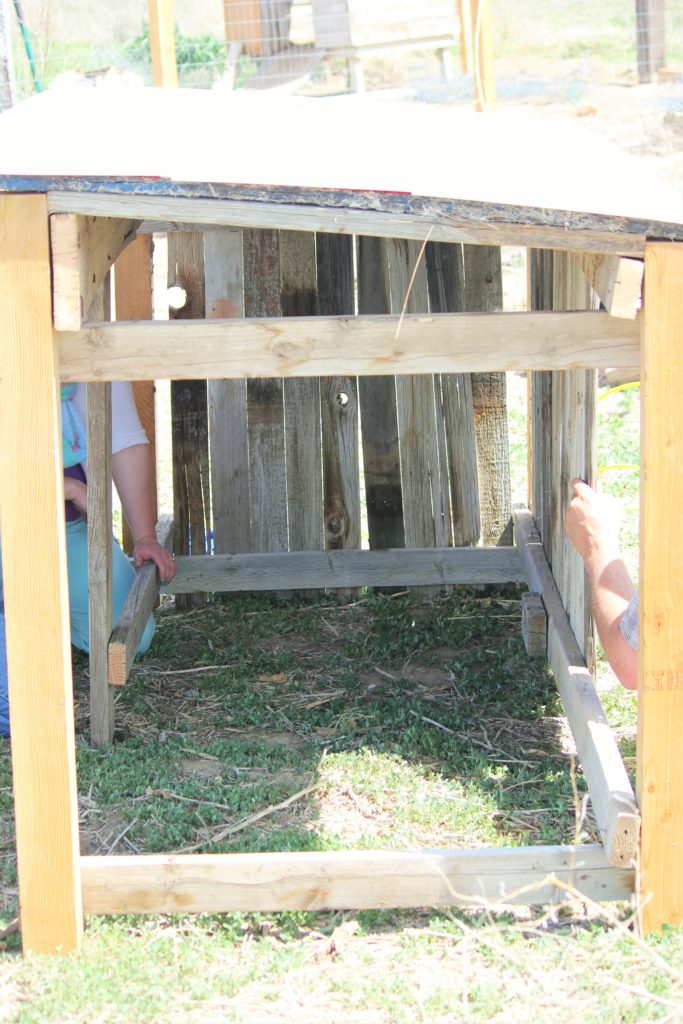
The enclosure is four feet tall, four feed deep and eight feet wide. The front is partially enclosed, and we will probably be adding a gate in the near future.
This is the front of the finished project
Front of goat enclosure.
It will be interesting to see how the campaign signs weather in the sun and the elements over the years. I think it will work nicely for the goats when the arrive on the farm.
Now all we need is some hay and the goats. I am also going to use the chipper/shredder to turn the end of the fence board we cut into mulch. If I can’t do that then, we will burn them in our wood stove this winter.
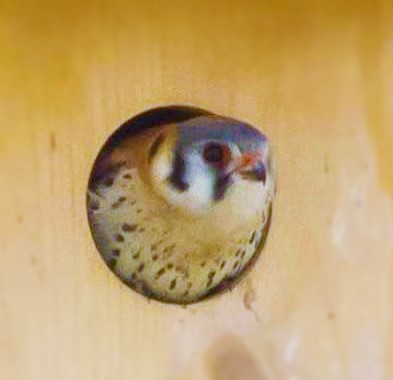
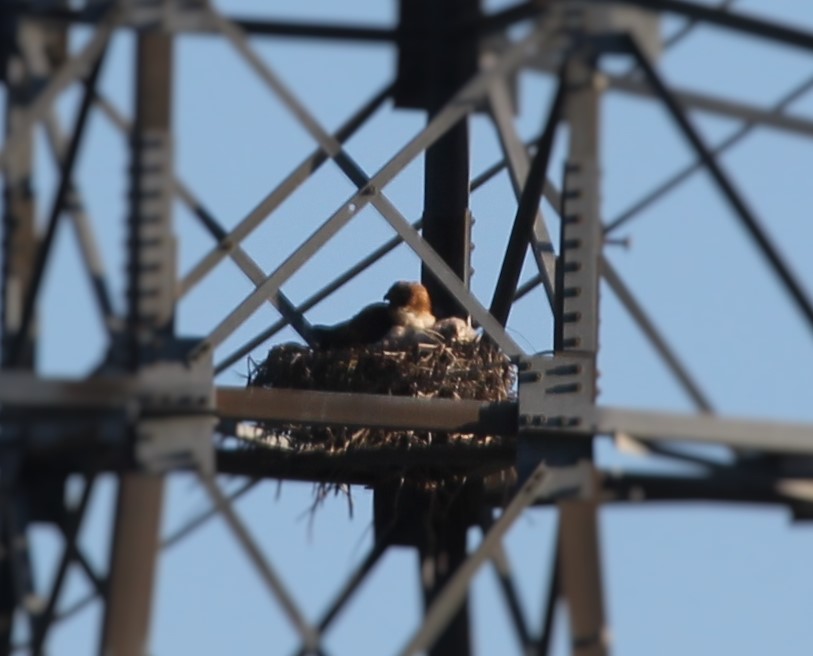
GREAT NEWS! We have teamed up with the Eagle Mountain Kestrel Project, Legend Engineering, and a couple of other residents to bring you the Eagle Mountain Kestrel Cam. We have picked one of the nesting pair of kestrels and have installed a webcam into their nesting box. Shon Reed, an Eagle Mountain resident, has worked hard to get all of the elements needed to make it happen. It should also be noted the Shon is a very excellent photographer, and you can see his work by going to his Instagram page: https://www.instagram.com/shon_reed/
The Eagle Mountain Kestrel project is designed to help increase, and preserve the American Kestrel population in and around Eagle Mountain. There have been a number of kestrel boxes placed around the city on public and private land. Eagle Mountain city keeps an updated list of the location of these boxes: http://www.eaglemountaincity.org/community/kestrel-boxes. Quail Run Farm currently has one of those boxes and is now helping the project spread the word with a 24/7 live webcam. We are hoping to see this mating pair of Kestrels lay a clutch soon.
The purpose of this post is to give you a little insight into how the cam is setup, and the effort that was taken to bring it to you. One of the unique things about this box is that we also have a 24/7 weather station about 200 feet away, this station is collecting the weather data to go along with the video feed. You can view this weather data, by going to our Weather Underground feed (Station ID: KUTEAGLE19).
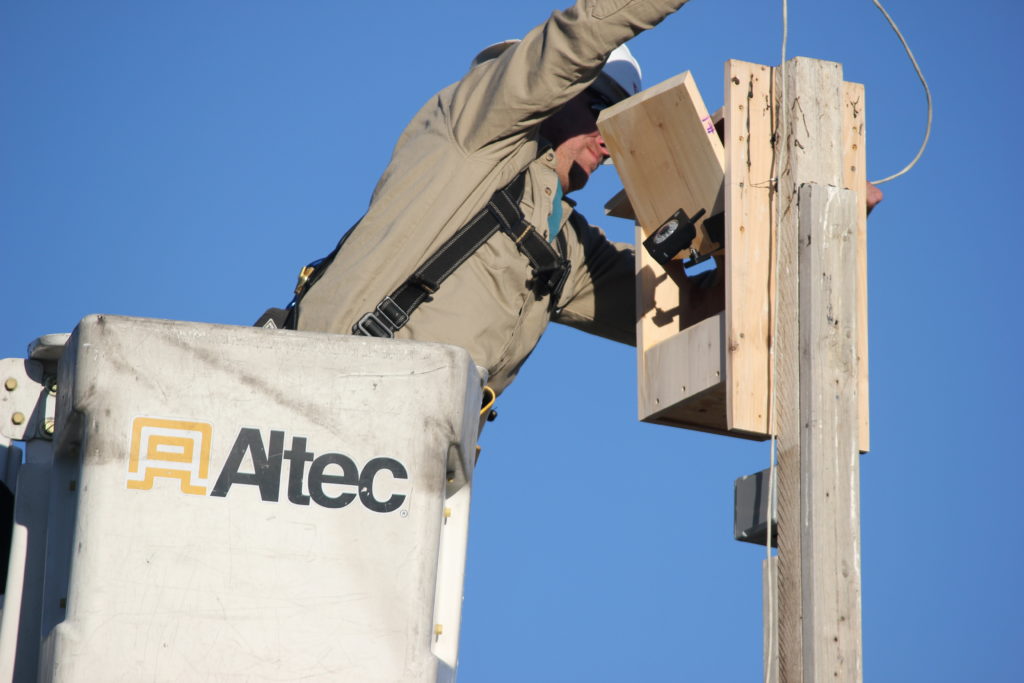
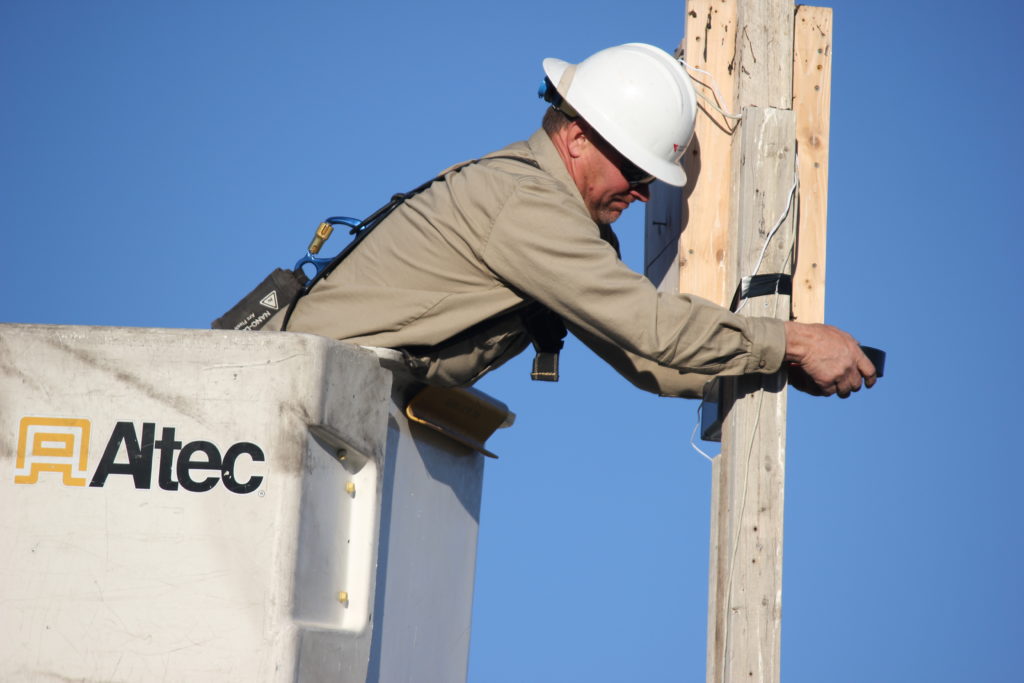
The nesting box is on top a 30 foot pole, that was made from repurposed 4X4s wedged between 2X4s on either side.
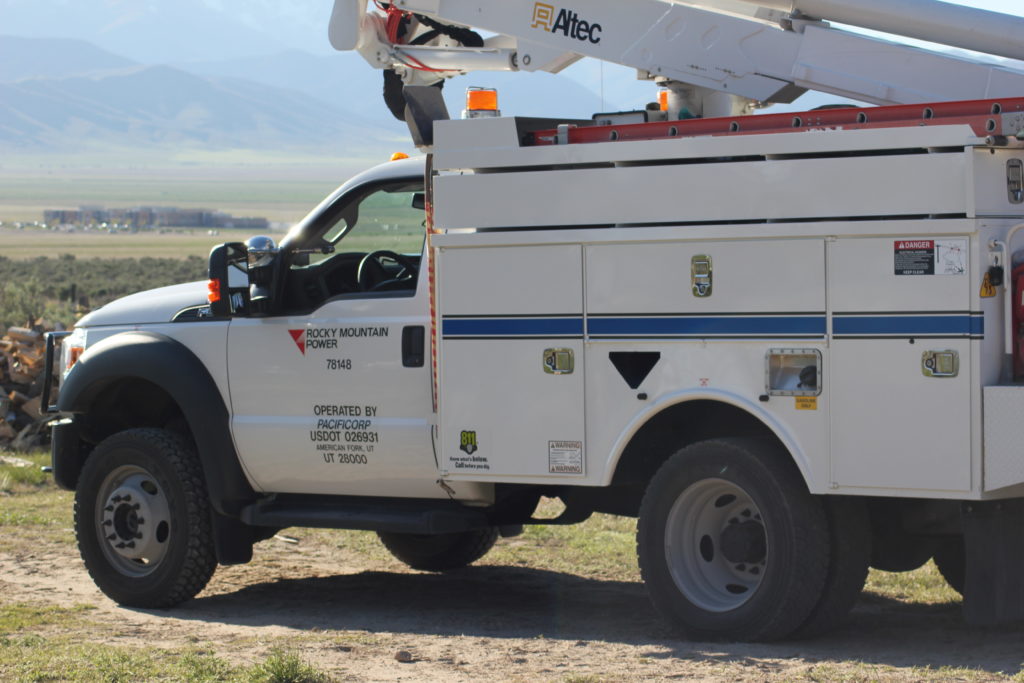
The height of the box, and the poles materials has made it difficult to check the box, and putting a webcam in the box would be impossible without the donated time of Brian and Jordan, and the use of equipment from Rocky Mountain Power.
Brian and Jordan donated their time, and Rocky Mountain Power allowed them to use a bucket truck to help install the camera after hours. I want to thank Brian and Jordan for donating their time after work, and Rocky Mountain power for allowing them to use their truck when they were installing the camera.
Rocky Mountain Truck
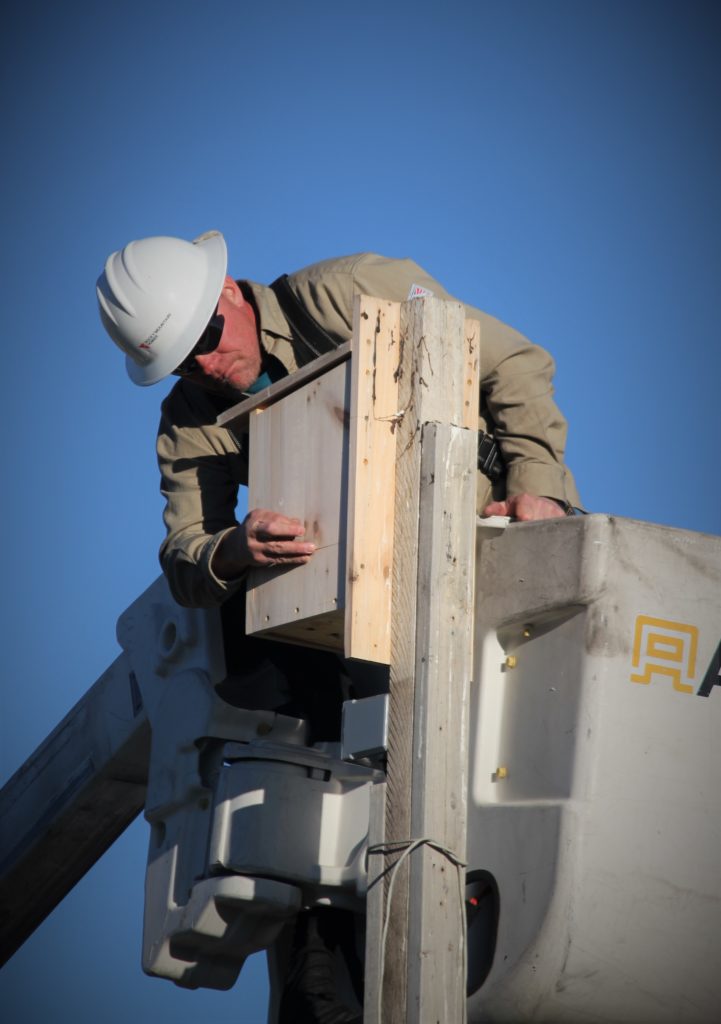
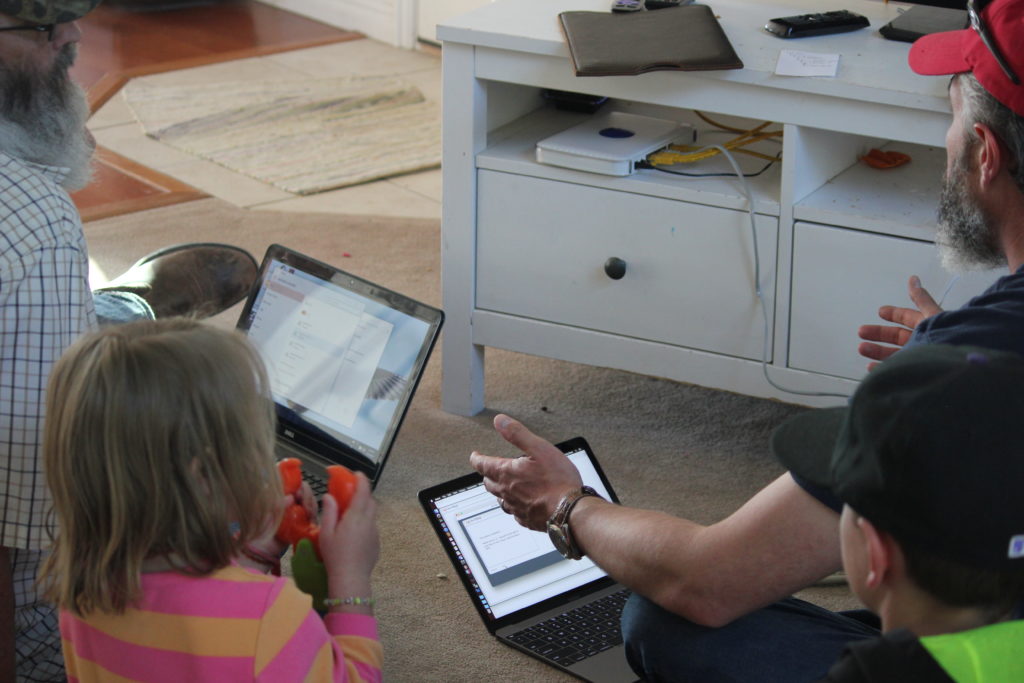
After we ran power to the pole, and extend our Wi-Fi coverage, we were able to install the web cam. The webcam was purchased for the project by Lonny Reed the owner of Legend Engineering in Heber City, a Civil Engineering, Survey and Land Planning company.
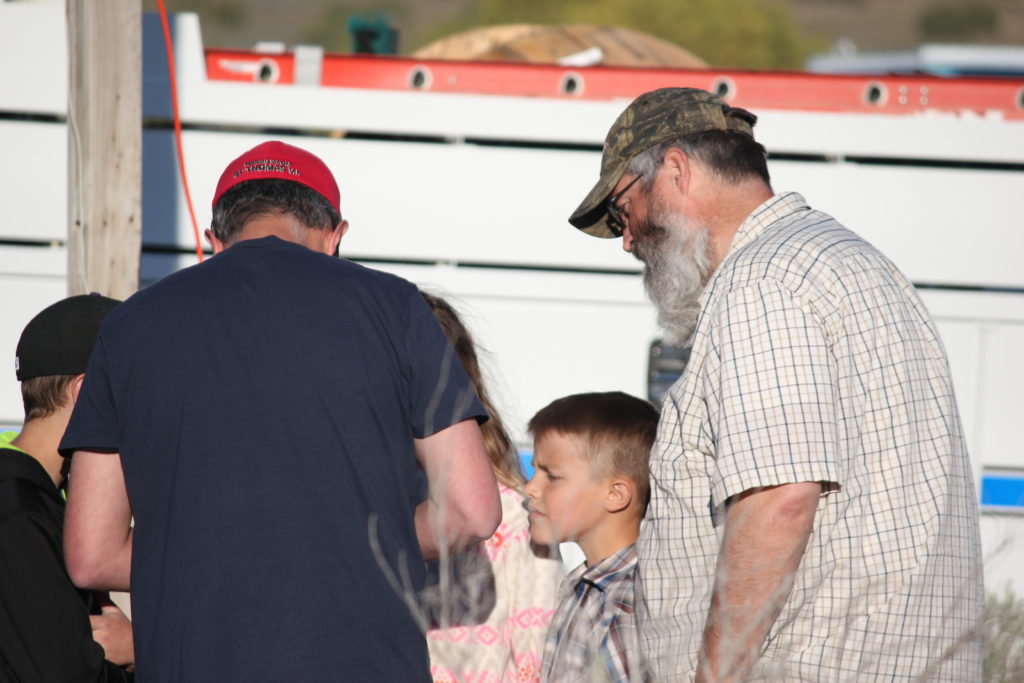
Brian and Lonny Read looking at the camera and working on the strategy to install it with little impact on the falcons.
Once the camera was prepped for install, Brian went up in the bucket truck to install the camera. Lonny and the rest of us were on the ground looking at the camera to help Brian find the best angle after it was installed in the nest. Shon was out of town during the install, but was being constantly updated on the progress and sent the live feed so he also could give input on the install.
Looking at the feed while Brian is installing the camera.Brian installing the camera.Taping the cables in place.
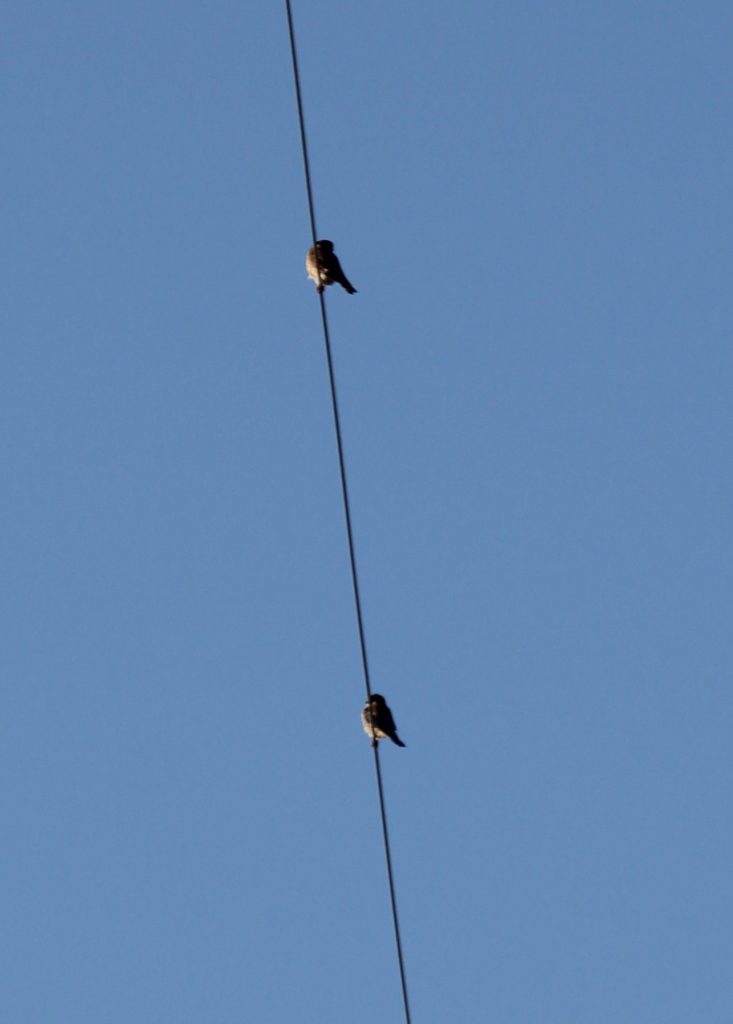
Kestrel pair watching as the camera is installed from a close by power line.
Eagle Mountain can now enjoy the views from the webcam. We have the feed available to everyone on the Quail Run Website. You can view the camera by going to this link:
The page includes a place where you can leave your comments, and start a discussion on what is being seen. You can even share your favorite photo from the webcam in the comments section.
Let us know what we can do to improve the project, as well as learn more about these beautiful and powerful birds.
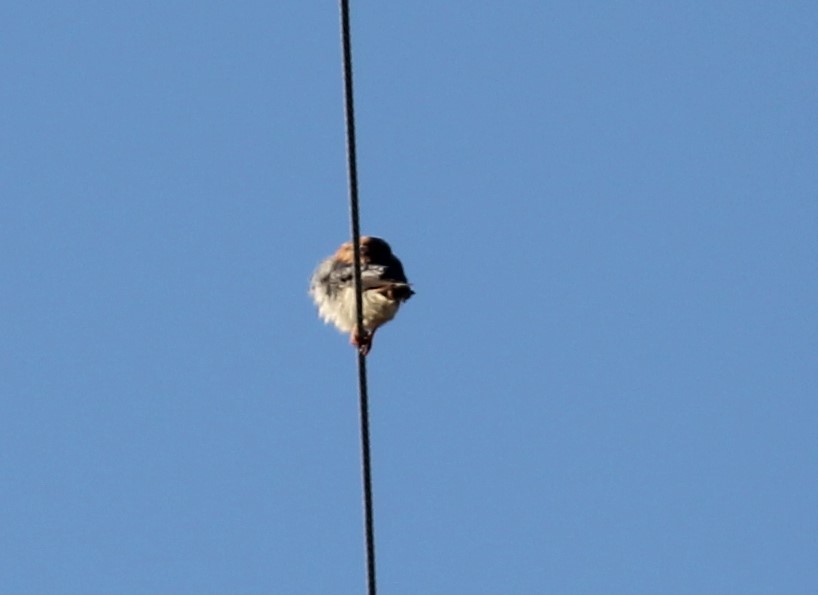
It should also be noted that we had some other birds watching us while we were installing the camera.
Red Tailed Hawks looking on from a near by power pole.
Once we were done with the actual camera install, we needed to complete the configuration, get the website setup, and make sure that it could be accessed via the internet.
Working on the wireless and port forwarding for the website and live feed.
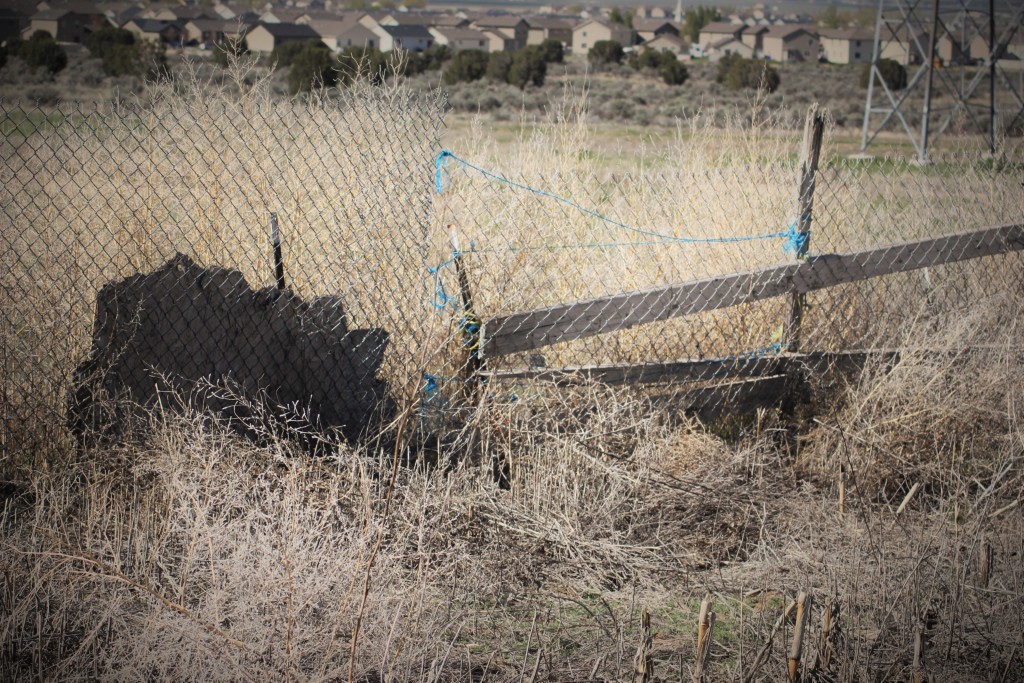
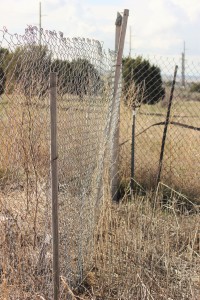
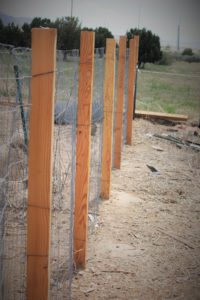
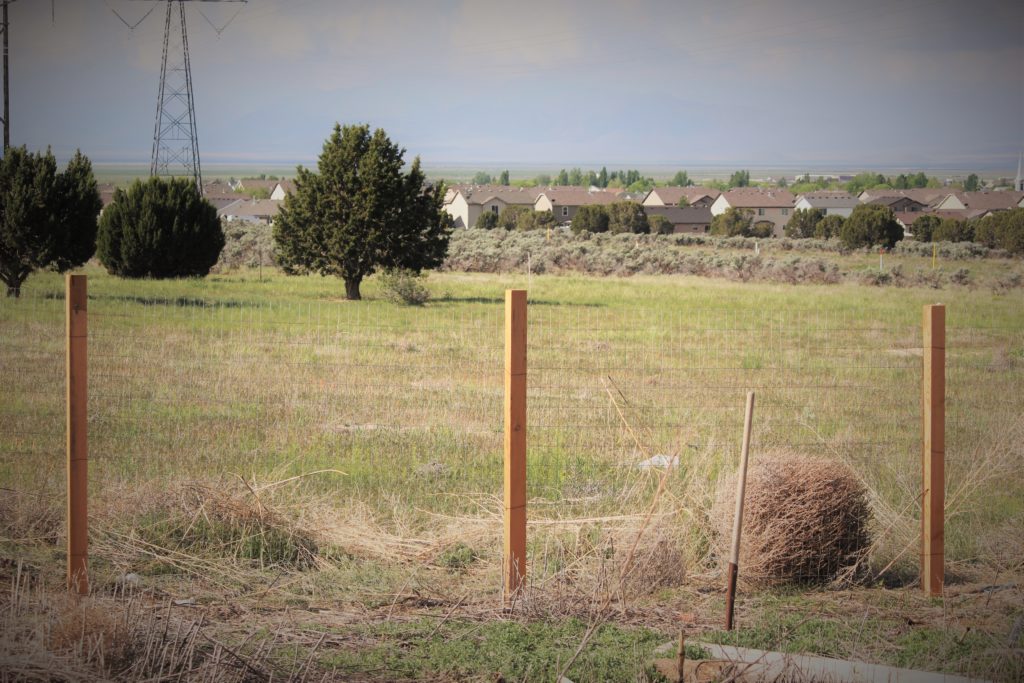
Before we bought this property, three years ago, it had been sorely neglected and abused. There were piles and piles of old construction waste piled all around the house and down in the pastures, old dilapidated sheds and the fencing was an array of hodge-podge materials and poor patching. Over the last three summers we have been steadily cleaning things up, making a dent in the garbage, hauling it off or organizing it to be re-purposed. Its a daunting job and we still have years of work ahead of us and about a zillion trips to the dump. In preparation for adding a small herd of goats to the farm this spring we had to replace some of the worse fencing along the property line. It is something we had been planning for the last three years, but fencing is a lot of work and can be rather expensive, however keeping goats where they need to be required that we finally get to that fence.
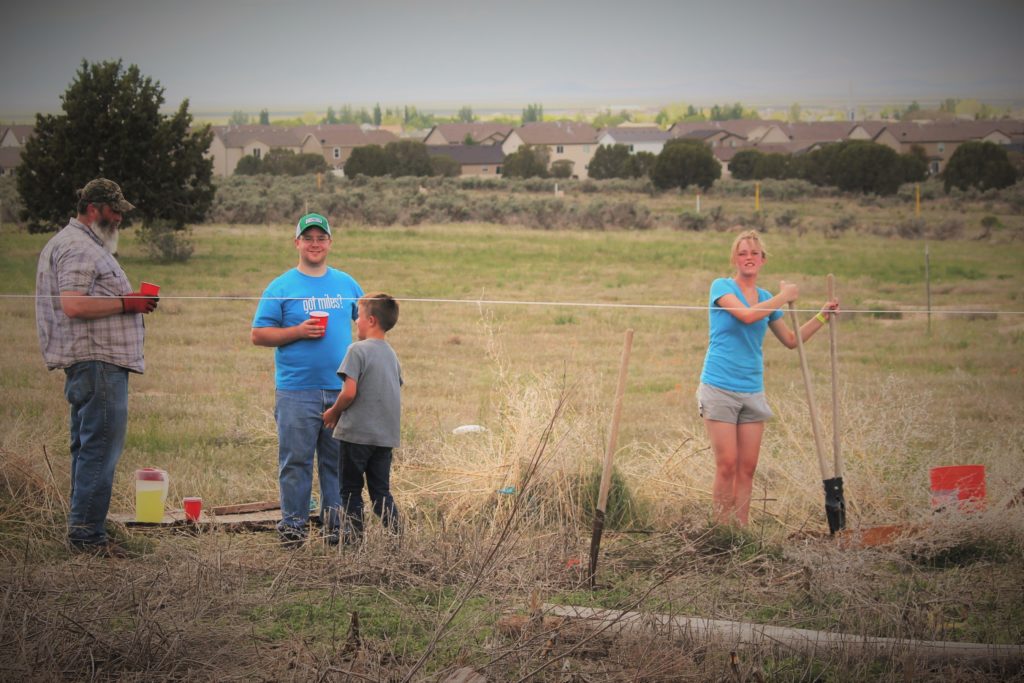
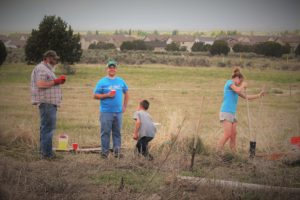
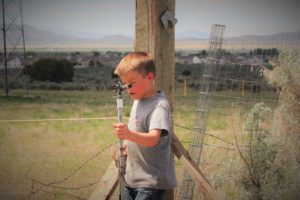
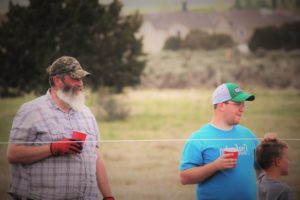
This Saturday was fencing day, my brother came to lend us a hand. As you can see he was a lot of help…. The men watched on as our fourteen year old daughter dug all the fence posts. We are teaching them to work, right?
After my little sassy pants daughter got all the holes dug and the fence posts in (yes she actually did all that, with supervision from her father, and they were actually building a shed for the goats so they weren’t slacking as much as it looks in the pictures) the men ran wire and stretched it tight, wiring it in place. The goat pen is ready for those little babies in a few weeks.
The difference is amazing, it makes me excited for when we get all the fencing cleaned up and replaced.
“For all Hobbits share a love of things that grow.” is a quote from one of my favorite movies. I agree with Bilbo, there is something about things that grow. But in order to grow, you need soil fertility and top soil.
Quail Run farm is in the middle of the Utah High Desert. Yes, we have access to water, and can change our environment some to help encourage plant growth, but our biggest hurdle is soil fertility. Soil fertility is the part of the soil that allows for plant growth. In the desert you have a hard time growing things because of the lack of soil fertility. For plants to thrive, they need to have nutrients, minerals, organic matter, and moisture.
Because of the lack of vegetation in the high desert, it is hard to build the top layer of Organic material that plants need to thrive. We have started to use a few techniques on the farm, from hugelkultur, permaculture, and Back to Eden Gardening. In short, Back to Eden Gardening, is the process of allowing the land to take care of itself, by mimicking the way that nature preps the soil for plants. Basically God set the Earth up so that it could take care of itself, and we are just trying to mimic the way God has setup fertile areas in a not so fertile area. And to do that, we need a lot of mulch. It is suggested to have a deep mulch, and by deep mulch we are talking about 6-8 inches of mulch.
Mulch has several different purposes. Mulch is used to conserve moisture, improve soil fertility and health, reduce weed growth, and increase the visual appeal of the area. If you go into the forest, and look at the soil horizon, you will notice that the forest has a nice layer of mulch on top of the soil. This layer is what we are trying to reproduce. The mulch layer can be made from a lot of different materials. You can create mulch from leaves, grass, peat, woodchips, bark, straw, pine needles, or most paper products. One of the most common forms of mulch used in the urban setting is that of not bagging your lawn clippings. A lot of people use a mulching mower and don’t even know the benefits it is giving their lawn. On a larger scale, you may even see what is called Forestry mulching. A lot of farmers do this by cutting and chipping trees, and brush and the leaving it where they chipped it. You may have even seen them do this along roadsides to clear brush as well.
The problem we have, on Quail Run Farm, is that there is not a lot of tree litter. Because there is not a forest on the property, we don’t have an abundant source of mulch to use for our gardening. So we have decided to create our own.
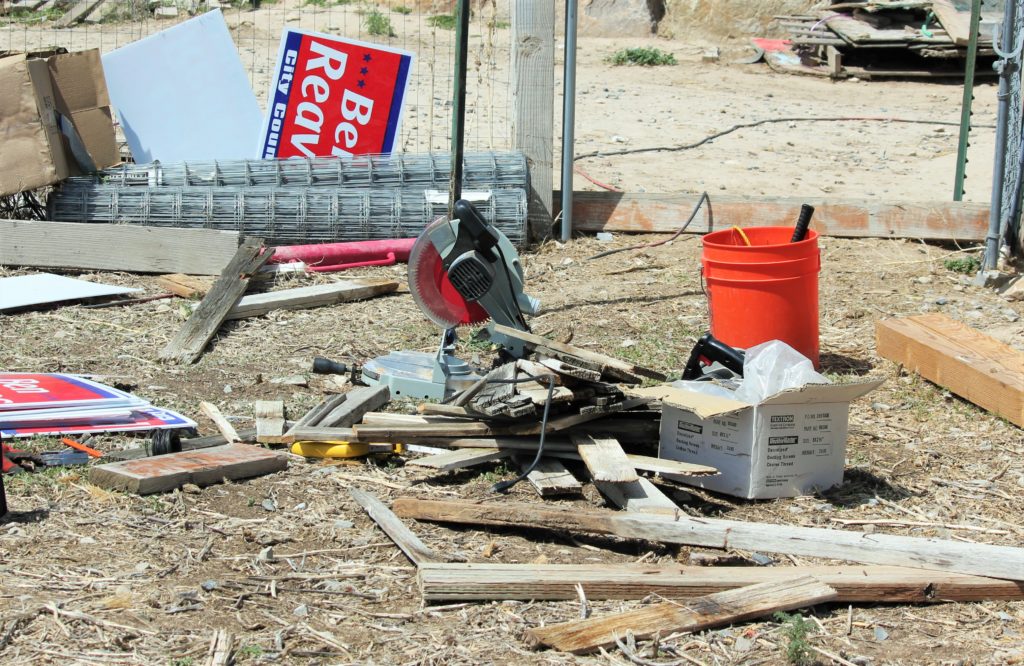
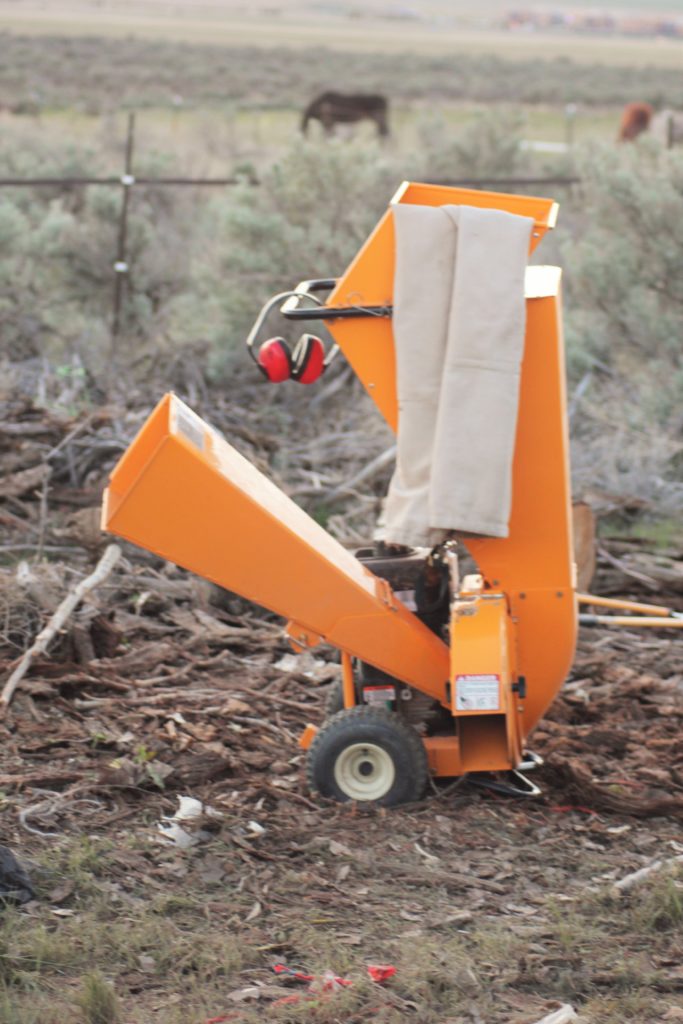
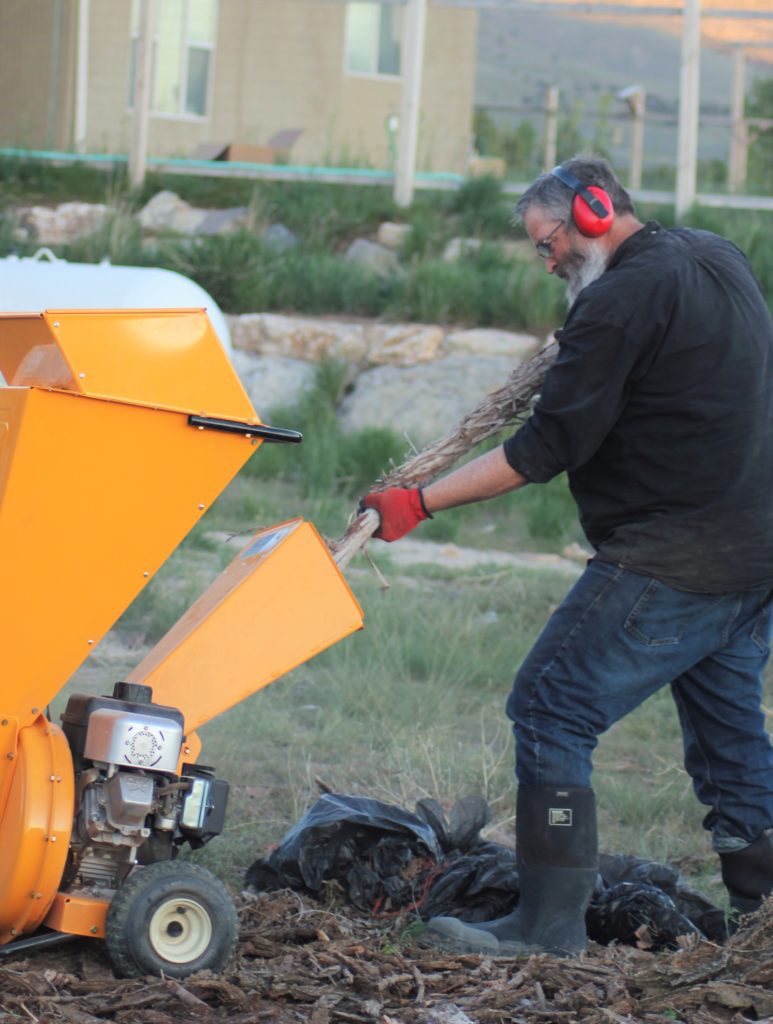
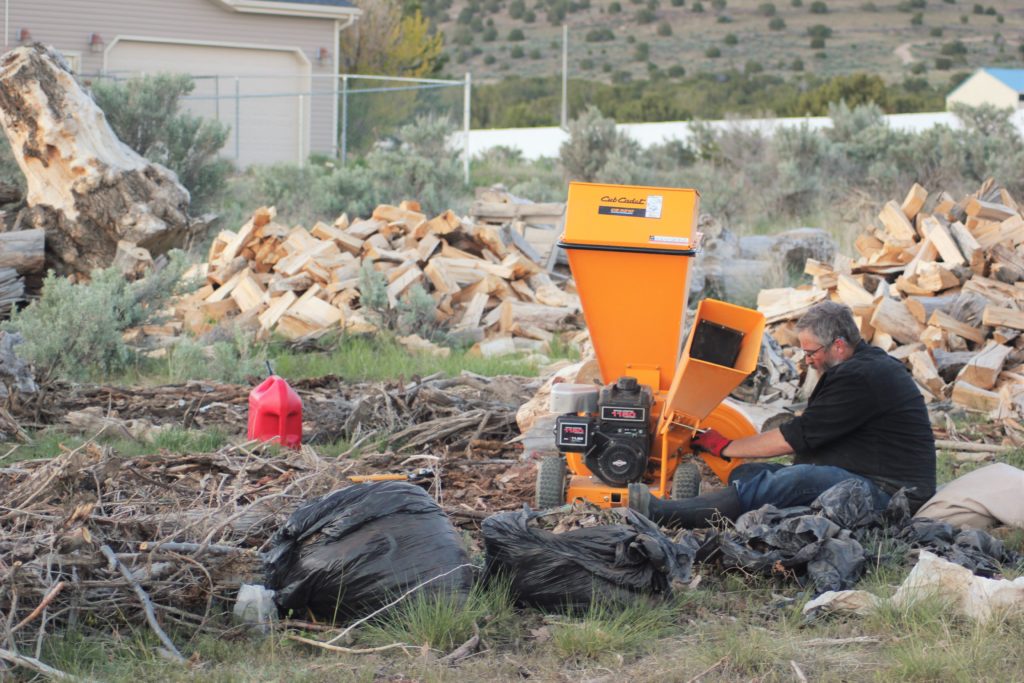
First, we have to spend some money and buy some equipment. We use Big Blue (our 1973 Ford Tractor, that has a bucket) to haul the mulch around and do any heavy lifting that may be needed. We purchased a 5 X 10 foot utility trailer so we could collect the material that we are going to convert to mulch. And we purchased a chipper/shredder to be able to convert the material we gather into mulch. (We looked into renting or borrowing the chipper and trailer, but after crunching the math, we came to the conclusion that it would be cheaper in the long run to just purchase the equipment.)
The chipper/shredder.
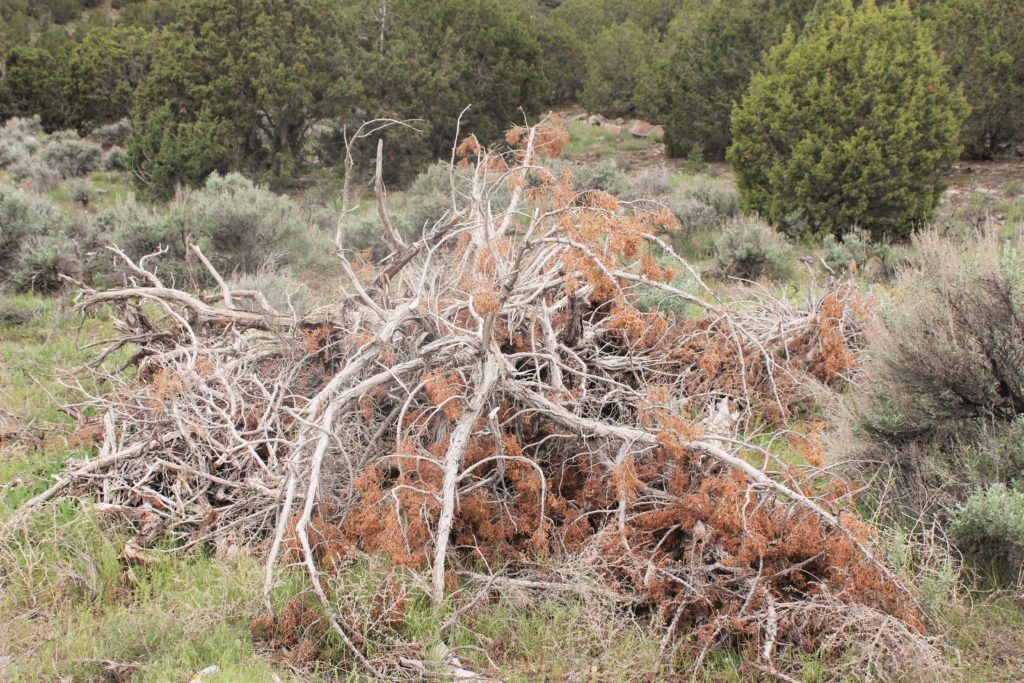
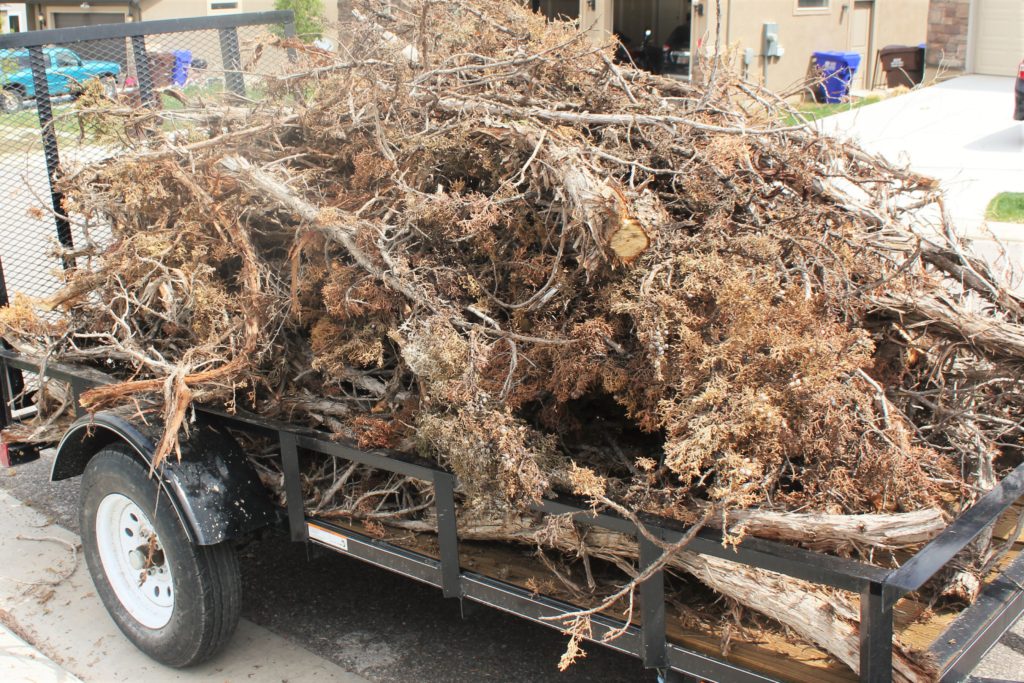
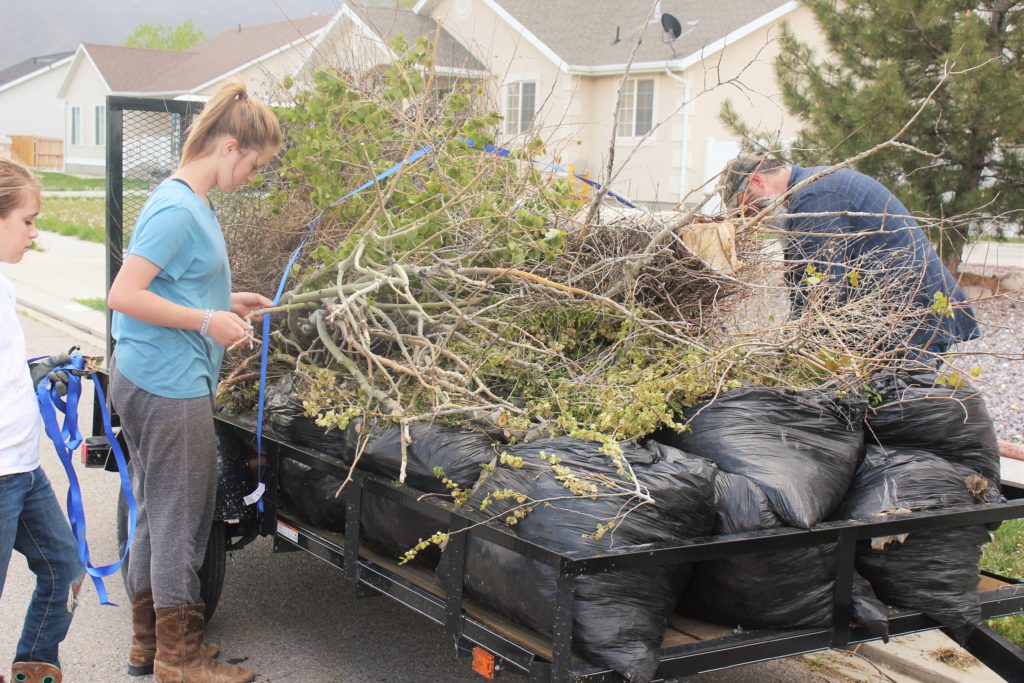
Second, we needed to collect the material that we wanted to turn into mulch. So I put the word out on a local community on Facebook. I basically asked for anyone who was going to throw away leaves, trees, bushes, and like to give us a chance to come collect them before they threw them away. We had a lot of people respond. (And we still have more to go collect and to get back with.)
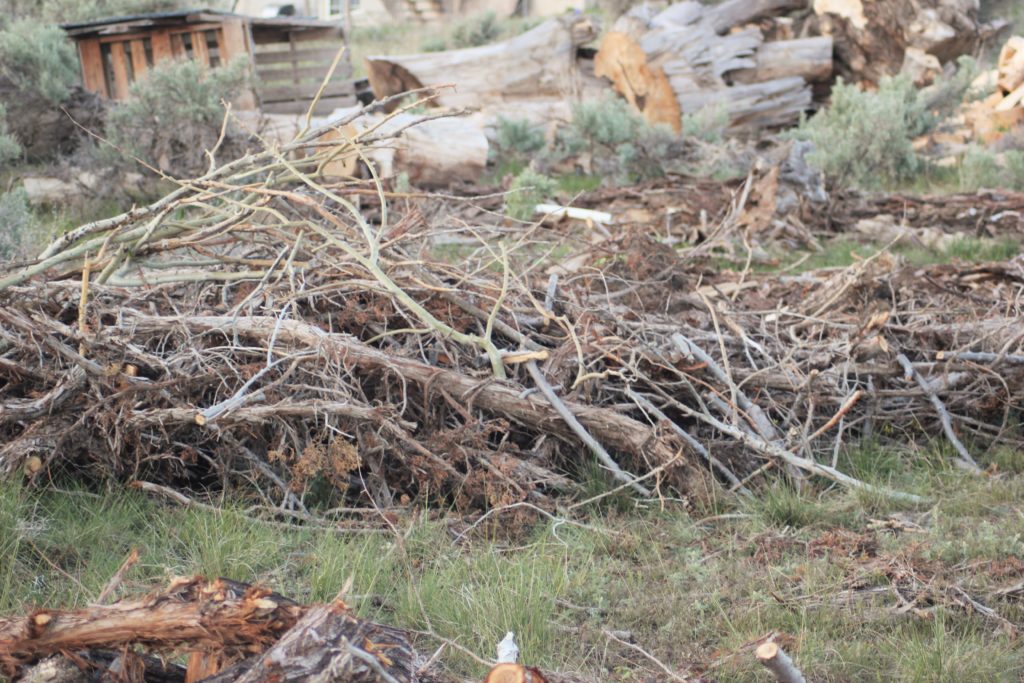
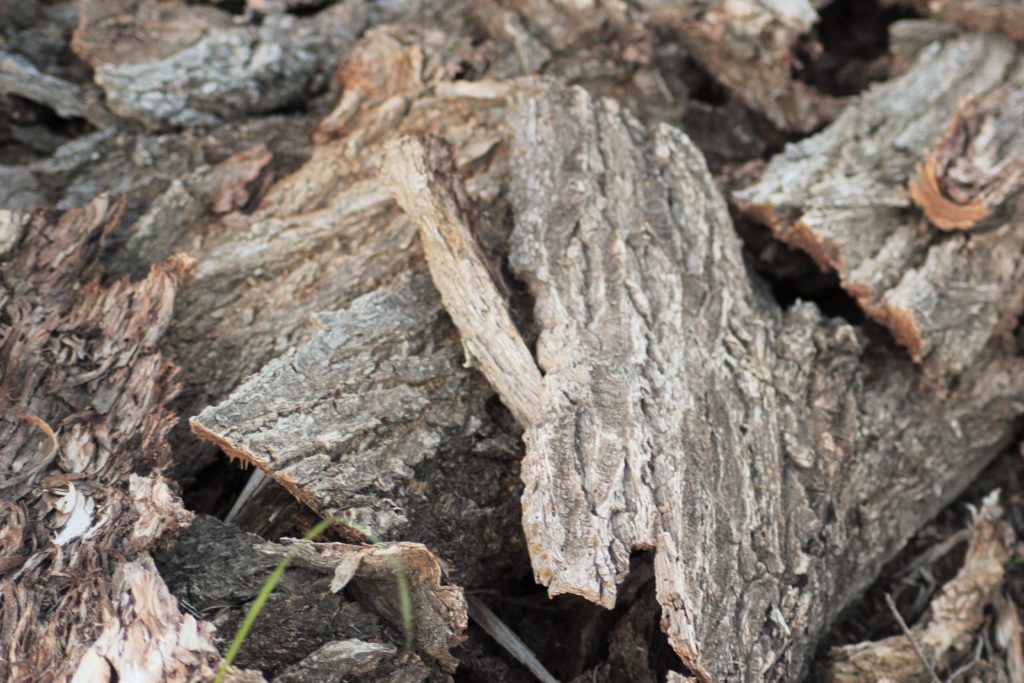
A bunch of juniper trees a developer removed. The resident said we could haul them off.Loaded trailer with the juniper trees.Kids helping secure another load from several different houses in Eagle Mountain.Pile of trees, and branches ready to mulch.More stuff waiting to be converted to mulch.This bark was left over from some trees we had cut into firewood. We will also be converting it to mulch.
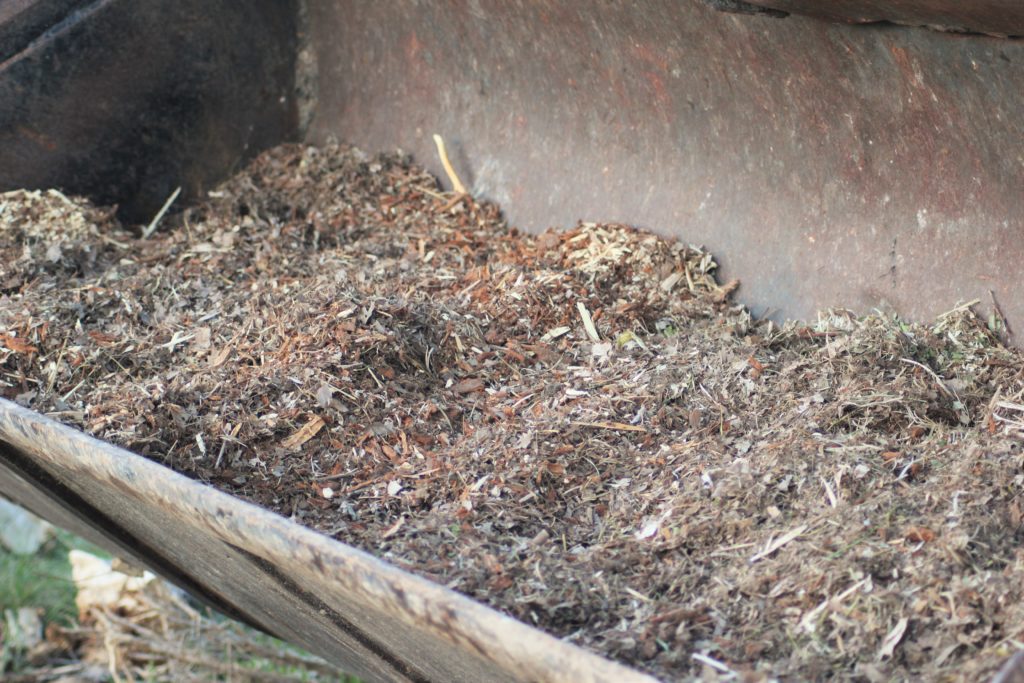
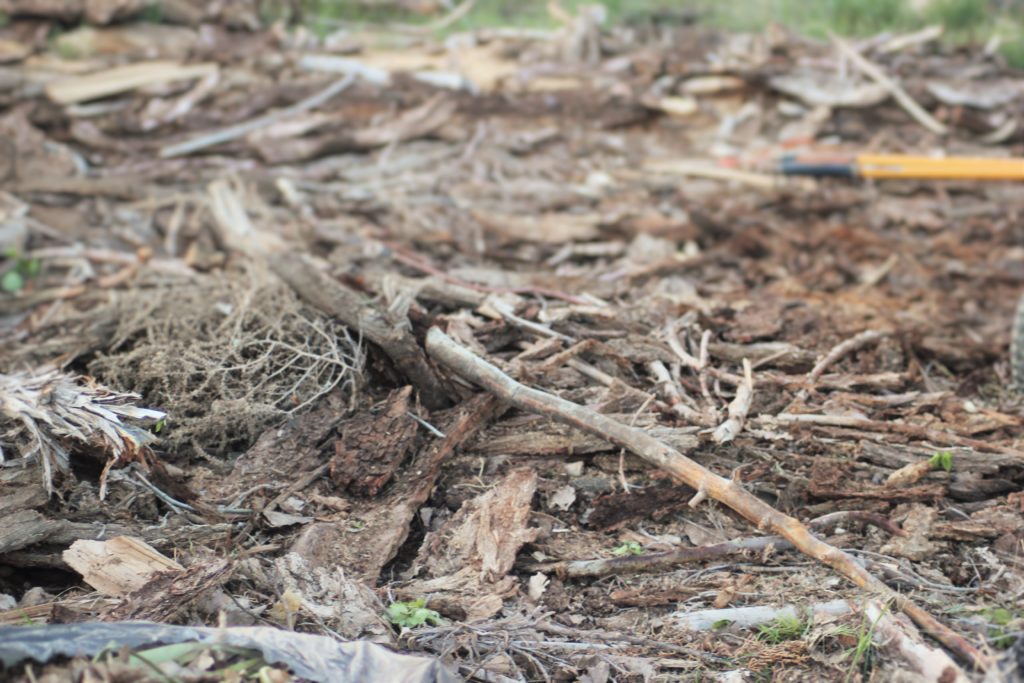
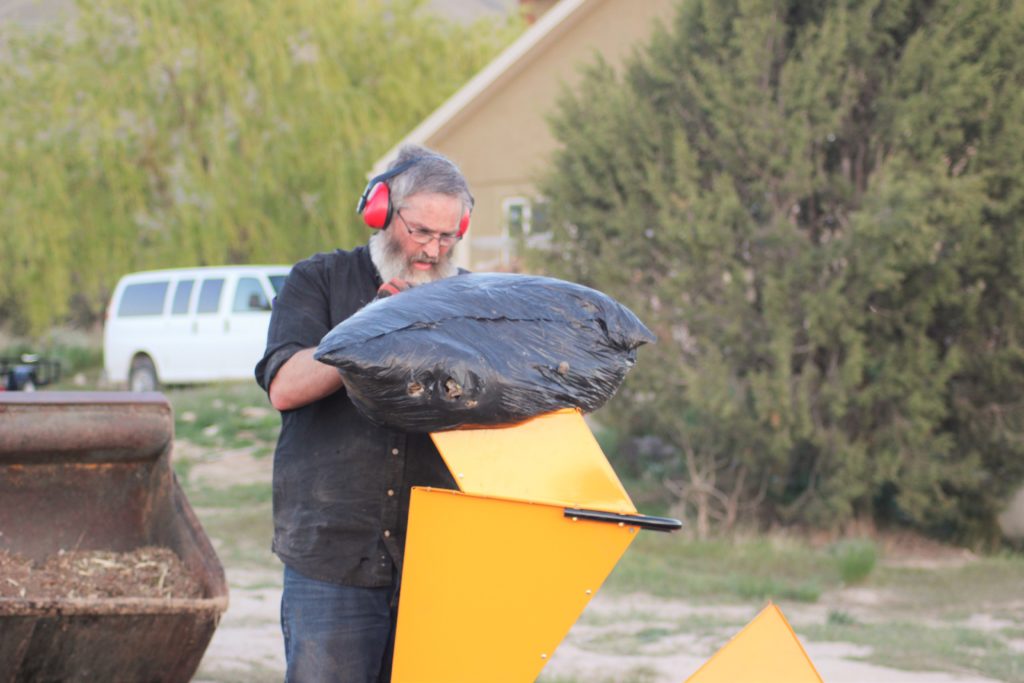
Third, we need to convert the material that was collected into mulch. To do this we used the chipper/shredder we purchased. It works really well. I would usually do a bag of leaves and then either the bark or the branches we collected. Once the shredders bag was full I would then dump it into the bucket of Big Blue and then transport it to the garden area.
Chipping some of the big stuff.Shredding a bag of leaves.Emptying the bag into Big Blue.
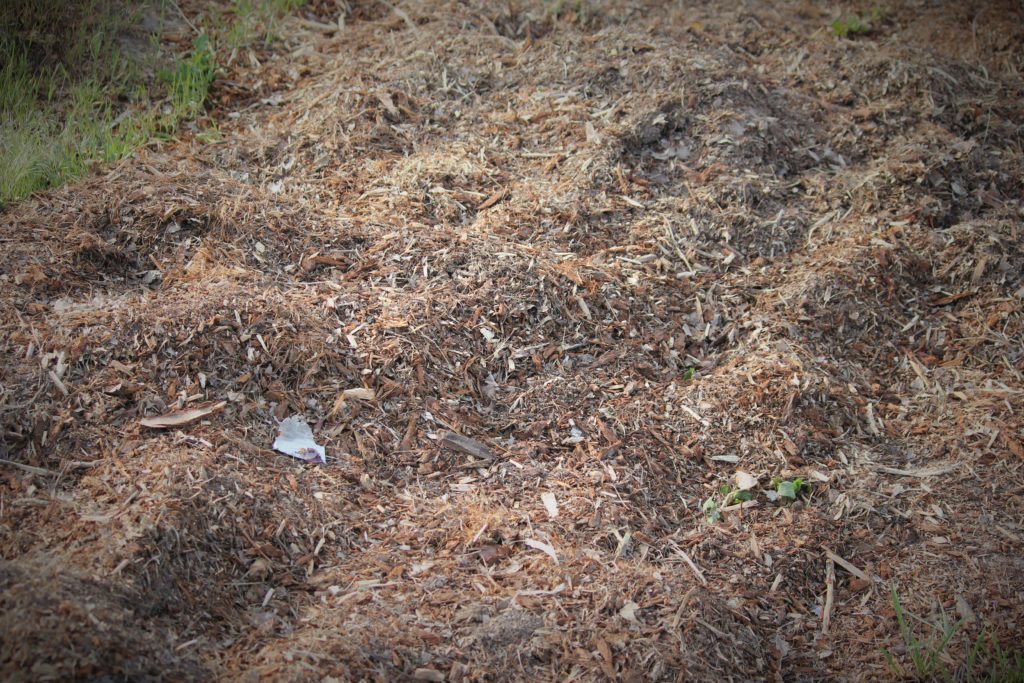
Forth, we need to use the mulch. Once we have the mulch created, we then would put it on the garden beds, and in between the rows of already planted spring crops.
Mulch over garden bed, getting ready to plan.Mulch between rows of plants.Mulch between rows of plants.
As a note… Sometime things don’t go as you plan. For instance, don’t let the chipper/shredder run out of gas in the middle of chipping a large tree branch. Parts of it will get stuck in the chipper, and it will require you to remove the blockage before you can use the chipper again.
Cleaning the chipper after it ran out of gas in the middle of a large branch.
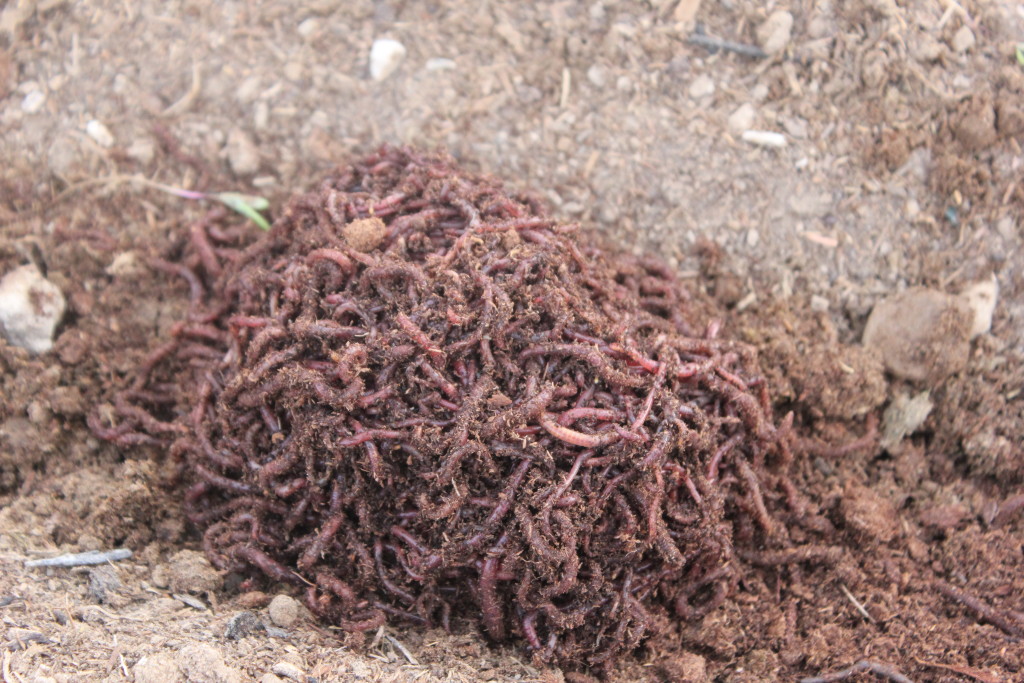
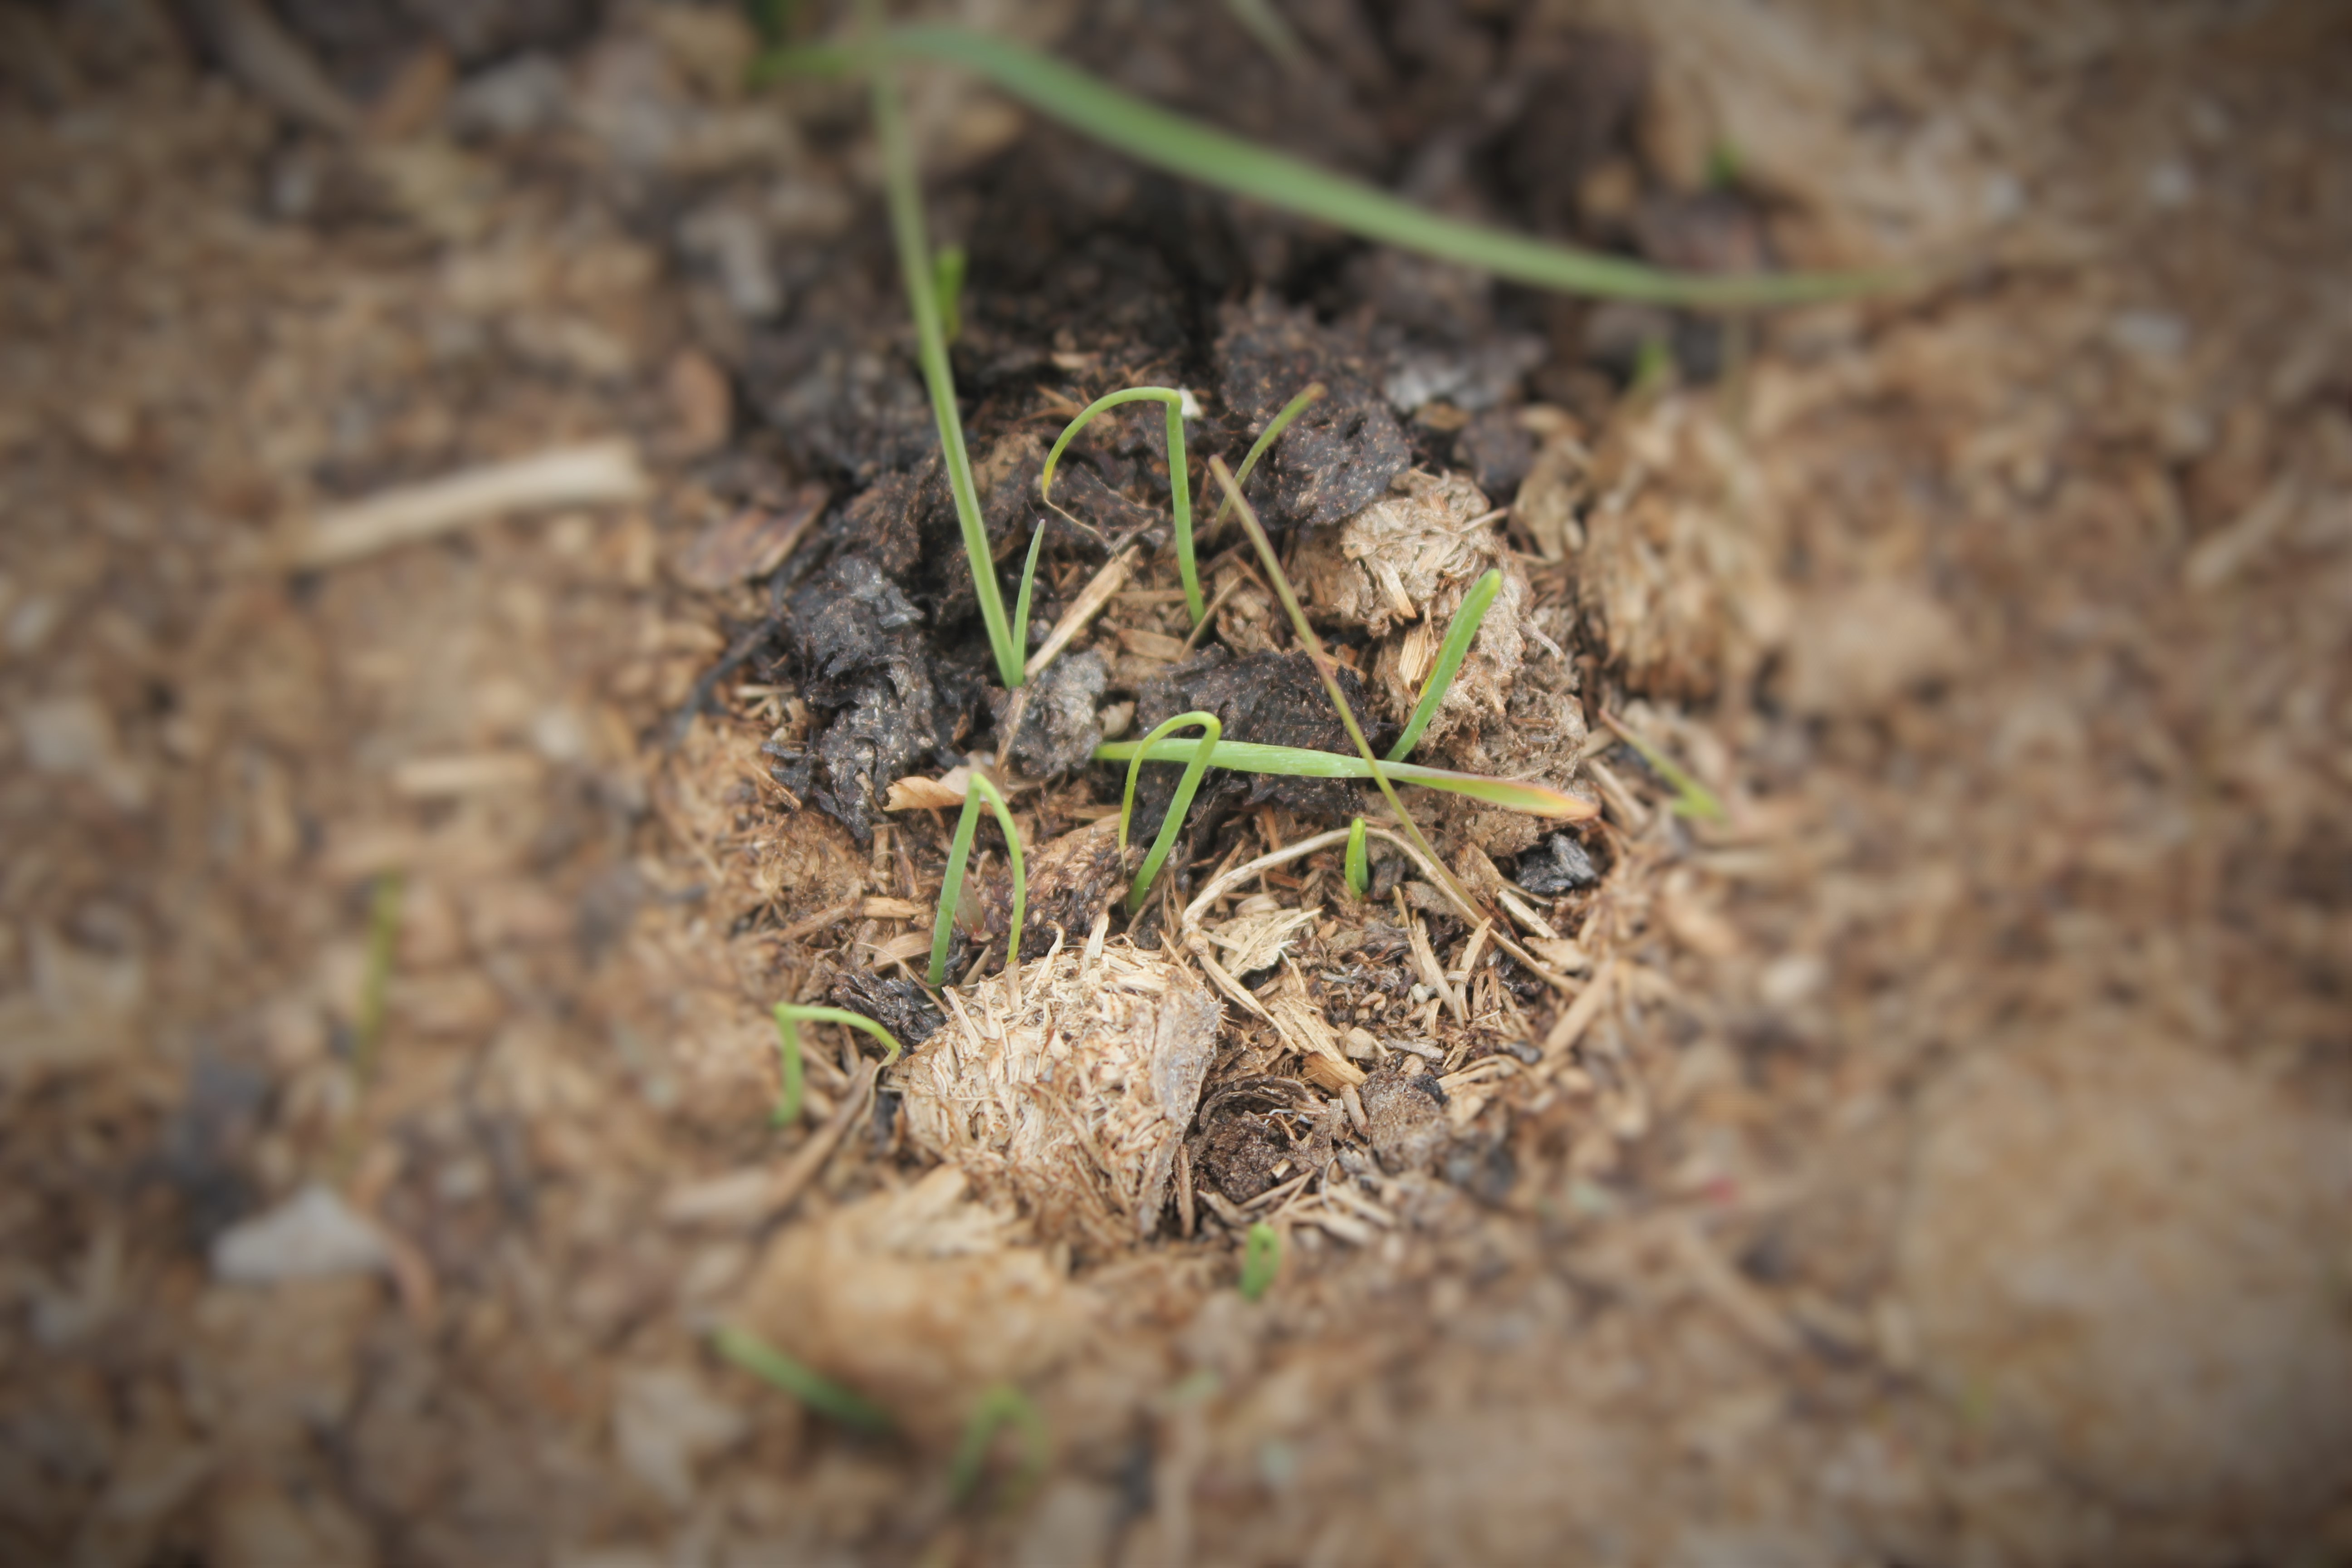
Back in March I stared a garden bed in which I was going to experiment with composting in place. You can read more about it: here. So far things are going well. From my investigating and poking around it seems like everything is breaking down nicely, although a bit slowly. I decided to give it a little help in the form of red wiggler worms.
Yes worms, did you know that you can buy worms by the pound? Yes you can, and I have, many times before and I have been so happy with the results of adding worms to my compost, thereby adding fertility to my soil.
Part of having fertile soil is protecting, maintaining and facilitating a whole ecosystem under the surface. All those little microorganisms, bugs, grubs and worms work together breaking down organic matter and turning it into nutrients that plants can use. Soil devoid of this secret ecosystem cannot optimally support life.
Worms are an irreplaceable piece in this puzzle.
Red worms in a natural ecosystem feed in the leaf litter — the surface of the soil that contains dead plants, leaves and animal remains. As red worms gorge on decomposing matter, they leave behind castings — excrement or fecal matter — that is highly concentrated in nitrogen, phosphorus and potassium. All of these are important nutrients that fertilize living plants. During the feeding and decomposing process, red worms help aerate the soil, creating pockets of air that allow for water and nutrients to flow more easily among plant roots.
Adding worms to the garden or compost is quite easy, you just dig a little hole or create a small trench, add the worms and cover, then water in well. The worms will soak up the water and become active, eating everything and pooping a lot, helping the garden to grow.
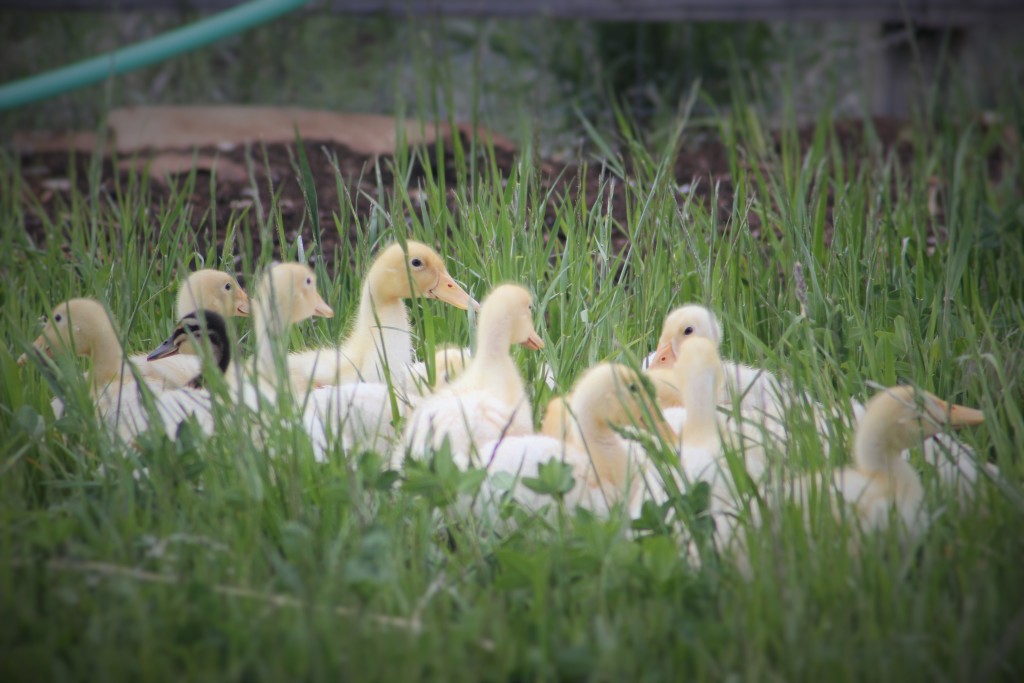
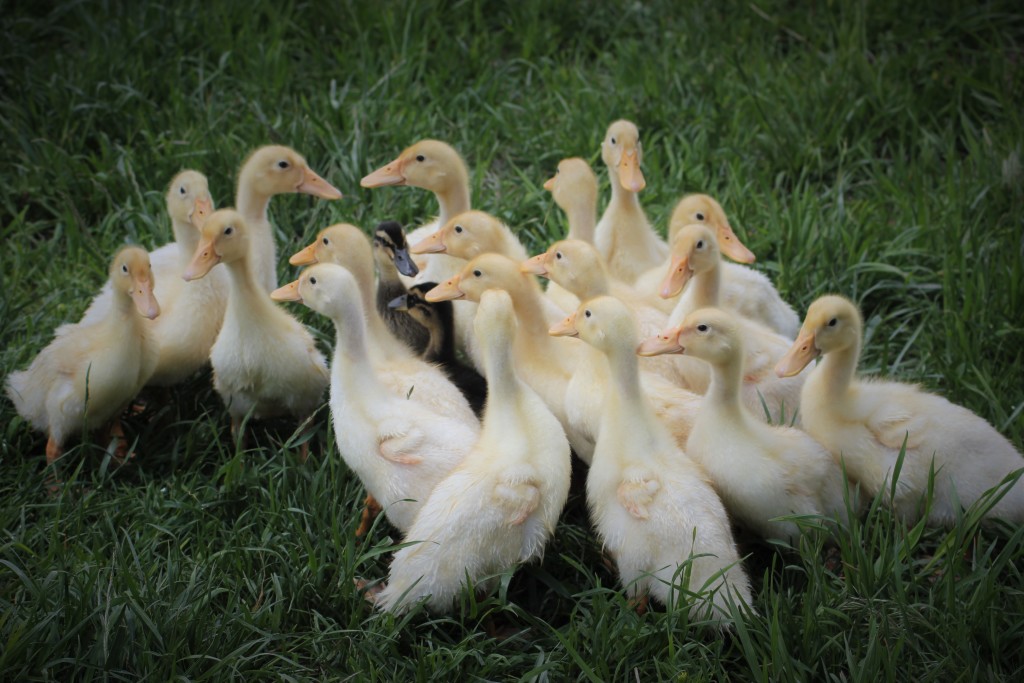
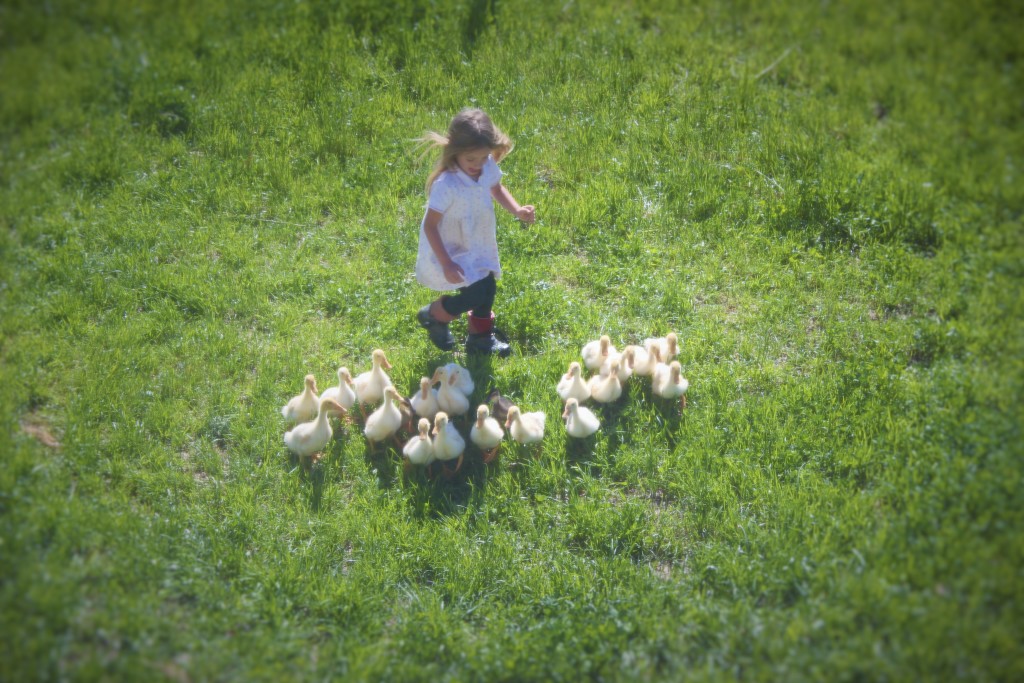
We have had three ducks for a while now, and they have been very enjoyable. There are some great benefits to have ducks, they love to eat bugs, lots and lots of bugs. They will graze on grasses, herbs and weeds without being as destructive as chickens are. They also lay wonderful eggs, my family doesn’t love eating the eggs, but using duck eggs in baking produces a superior product and we hord the duck eggs for all our baking. This spring I have been talking and talking and talking about getting some more ducklings. We never actually purchased them, usually there was something more pressing that needed funds or I felt like I wasn’t set up for ducklings just yet, there were many excuses and reasons I kept putting off getting those ducklings.
One evening I was speaking to my Dad and he mentioned that the feed store close to him had ducks for sale at a steeply discounted price. He said we was willing to run over first thing in the morning to see if any were left and bring them to me the next day. I readly agreed, hoping that there would be two or three left, the price was so good on those birds that I couldn’t imagine they would still be there.
The next morning when he and my brother arrived at my house he asked me how I felt about twenty two ducks. Seriously? Twenty two ducks! When he got the the store, right as it opened, there were twenty two ducks left and he asked the sales lady if he could take them all. She told him if he would take them all that he could have them at no cost, they were that eager to have them gone. They boxed them up and brought them to me.
Now Quail Run Farm is home to twenty five ducks, we are so excited, we love having ducks around. For the next little while the ducklings will live in the backyard where they have acess to a warm heat lamp, supplimental feed, grass, bugs and a kiddie pool. Happy ducks are healthy ducks!
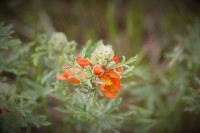
Globemallow
Desert Mallow
Apricot Mallow
Desert Hollyhock
Mal de Ojo
Sore-eye Poppy
My favorite wildflower, it grows in clumps among the sage brush and juniper, its especially prolific when we have a wet fall and spring. I watch carefully through out the early spring months, looking for the grey green foliage to come up and then I wait eagerly for the deep orange flowers to bloom. They start blooming in May and can go into the end of June carpeting the desert floor with its color.
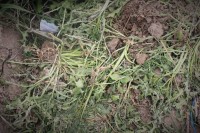
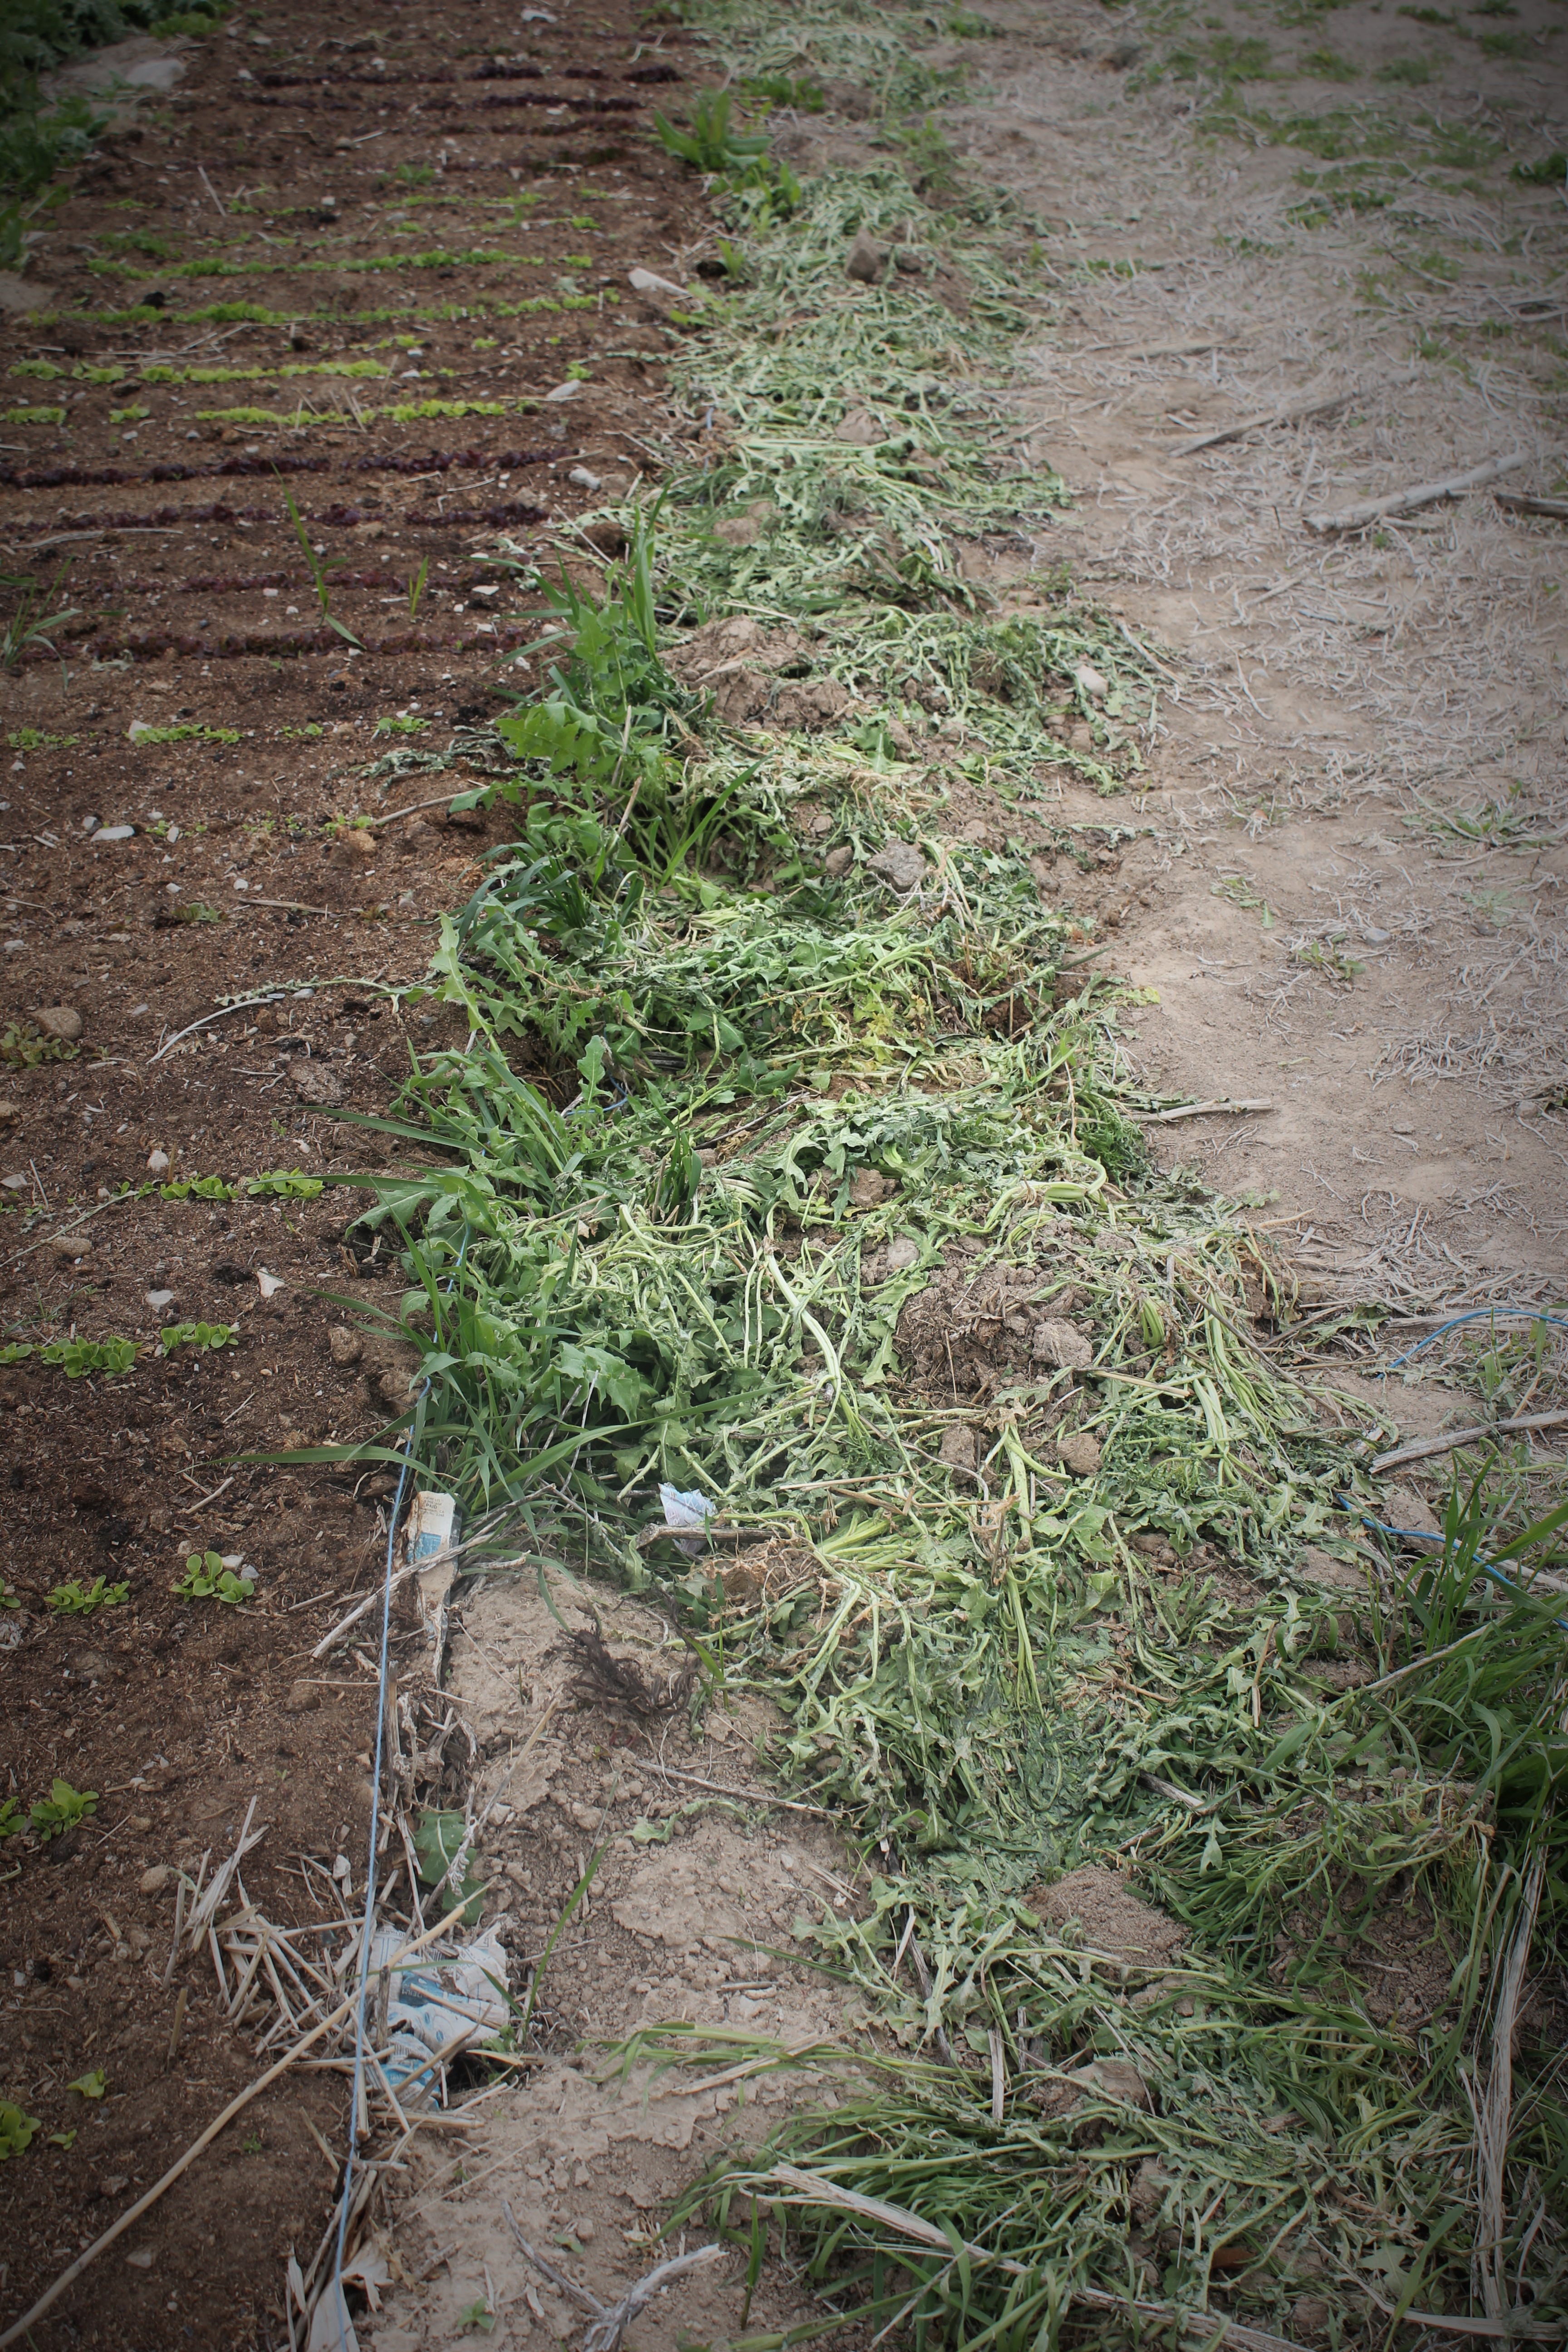
Along with all the pretty little vegetable, herbs and flowers the weeds are coming up in abundance. We are a no/low spray farm, and with a few exceptions we never spray chemicals on our land. The one exception is for Field Bind Weed, it is taking over, and there really isn’t a good way to get rid of it other than spraying. Our weed management consists of two main approaches: pulling and covering. We pull and pull and pull weeds all summer long. We also cover our weeds in a few different ways. Sometimes we will put down a weed barrier and mulch on top of that, that is my least favorite way of using cover, its limiting to me, plants can’t naturally spread and its difficult to add new plantings. We also use deep mulching, laying down 4-6 inches of chipped wood and leaves, this not only has the advantage of choking out weed seeds and seedling, it also helps retain water and adds fertility and the weeds that do come up are easy to pull. The last covering method we use is black plastic, we lay black plastic over large areas that need to have invasive grass and weeds cleaned out and let it sit for a couple weeks, the sun heats up the plastic and basically cooks the weeds and their seeds, this is quick and effective.
When ever we pull weeds we keep them in place, its a method of deep mulching. The weed is pulled and laid down right in place. It is important to pull these weeds before they go to seed. it acts like the wood chips or leaves, choking out weed seeds and seedlings, but it also keeps the nutrients from the weeds in place. Weeds in and of themselves are not bad, they are only bad because they keep the plants we want from thriving. Weeds are place holders, the are land restorers, land cleaners. Weeds come into disturbed land, pulling nutrients from the ground and the sun, depositing them on the surface, allowing for long term native plants to eventually come in and repopulate the land. Understanding this, I have a hard time pulling weeds and hauling them off, they have a purpose too, and I like to honor that by pulling and using them to nourish the plants that I want to thrive there.
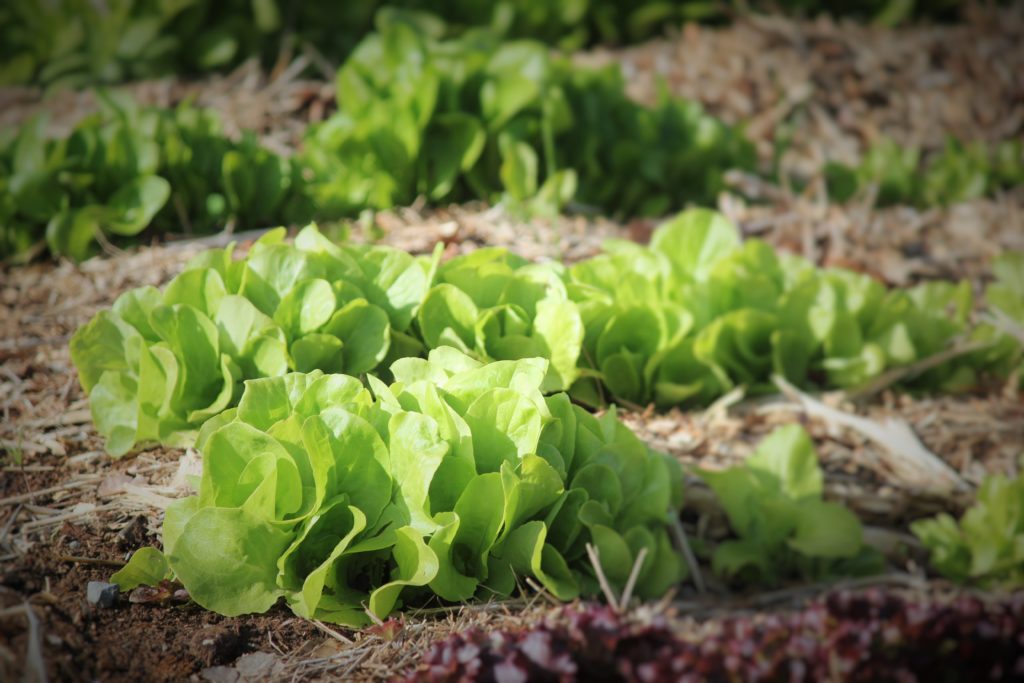
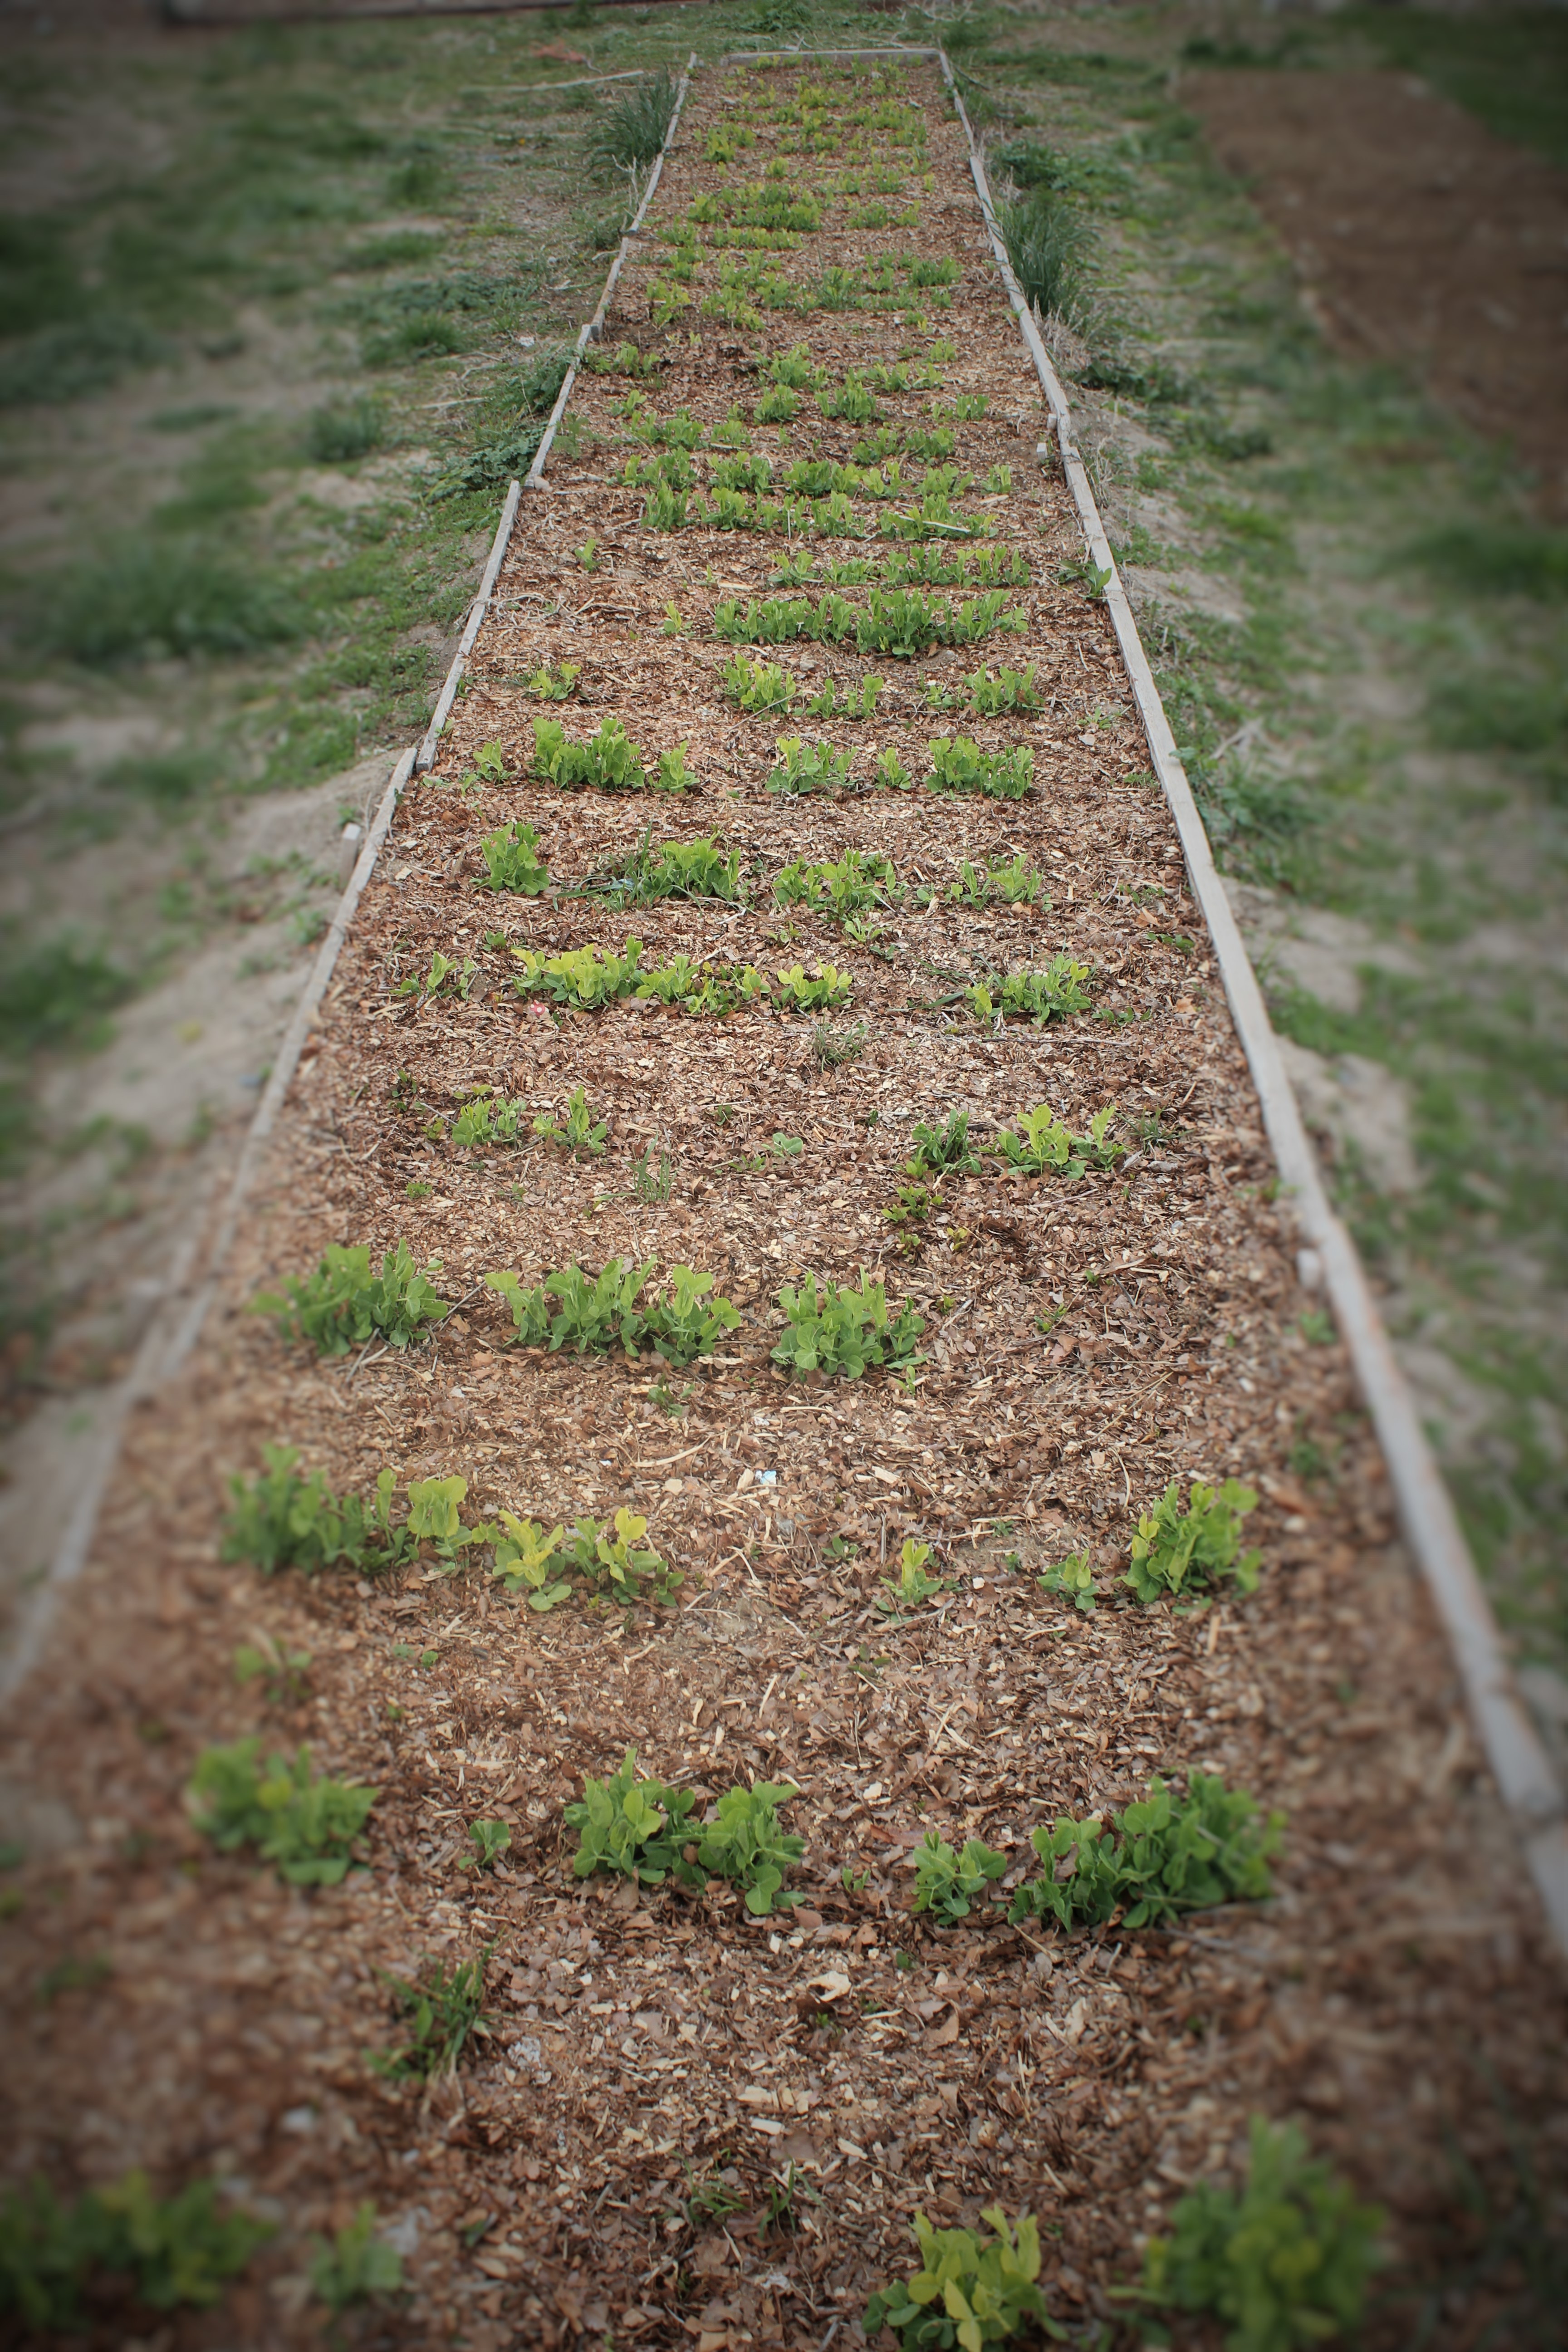
Spring is in full swing here on the farm and new plants and popping up all over the place, from the diversity and organized chaos of the orchard meadow to the neat rows in the vegetable garden, there is green everywhere.
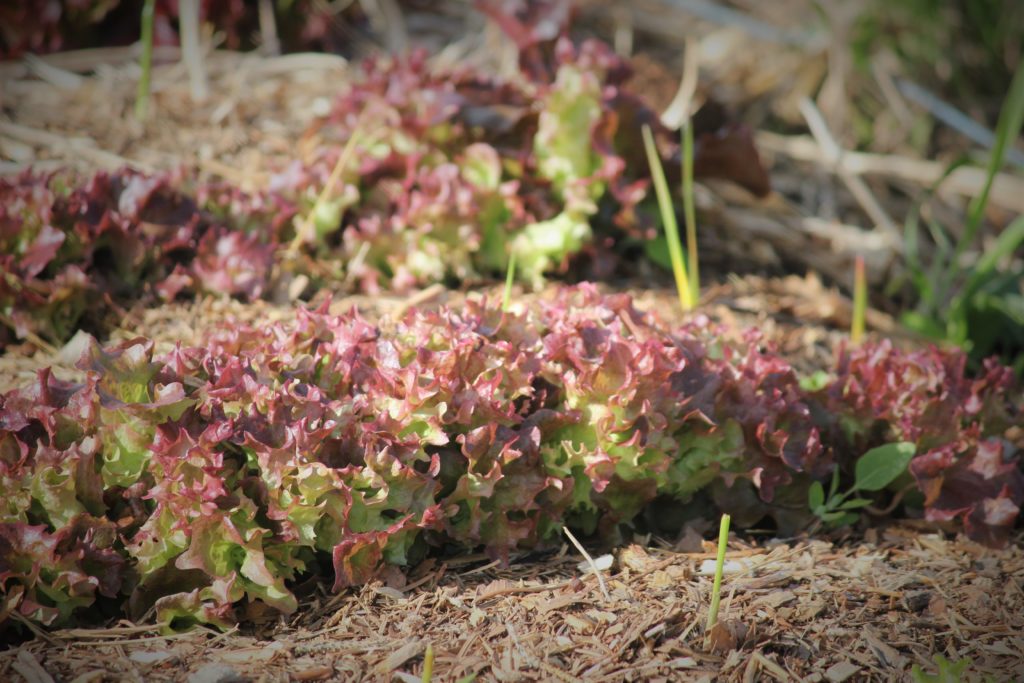
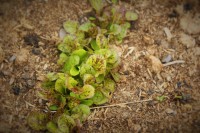
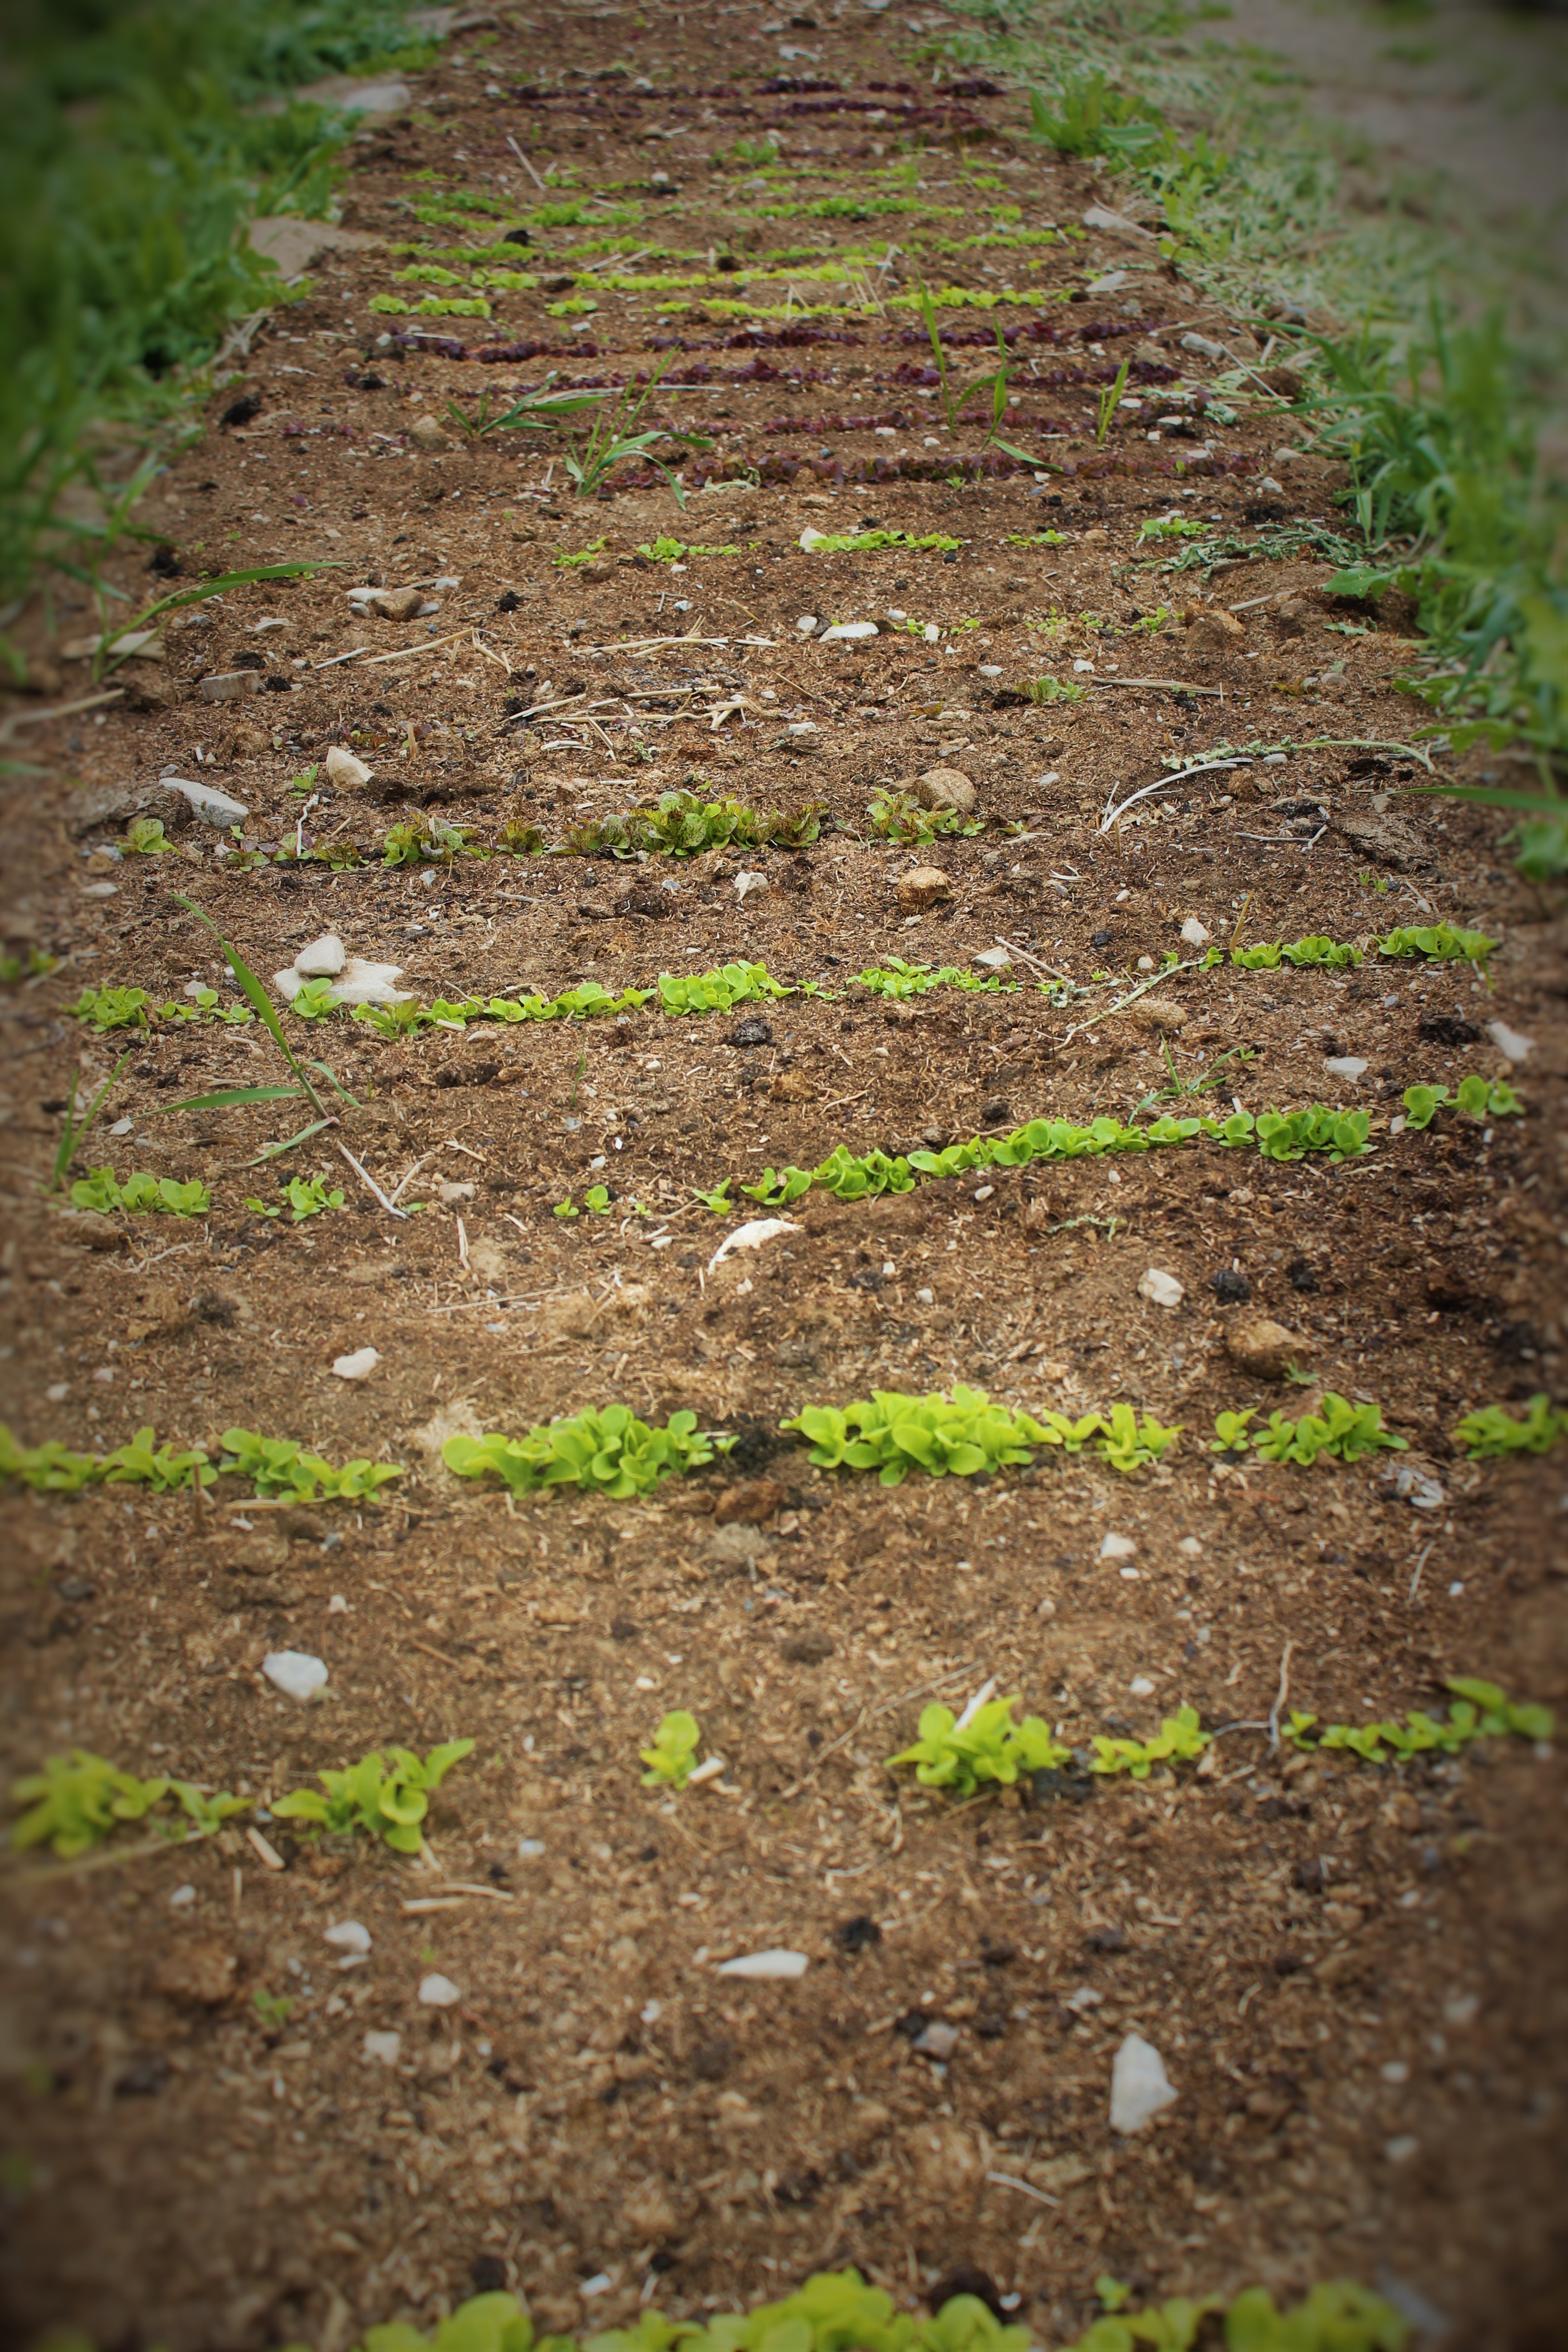
This is the lettuce bed, we have several varieties of leaf lettuce growing here as you can see by the different colors and hues. Lettuce loves the cool spring temperatures and will soon be big enough to start harvesting tender baby greens. In the heat of the summer we will have to cover with shade cloth to keep thing cool enough so they don’t go bitter.
Little bitty onions making their first appearance, I think it is amusing how those long spears come up bent over, soon they will be popping up straight and tall. From the looks of it we are going to have a bumper crop of onions this year.
The pea beds are coming along, I am expecting to have blossoms showing up in the next week or so. Some of the peas are looking a little yellow, I will be making compost tea this weekend and feeding my babies. This is close up of one of my leaf lettuces, I am excited about this variety, its named “Flashy Butter Oak” and I think it looks like a lot of fun, definitely a splash of color to add to a salad!
I am optimistic that we will soon have fresh, local produce to offer our community.


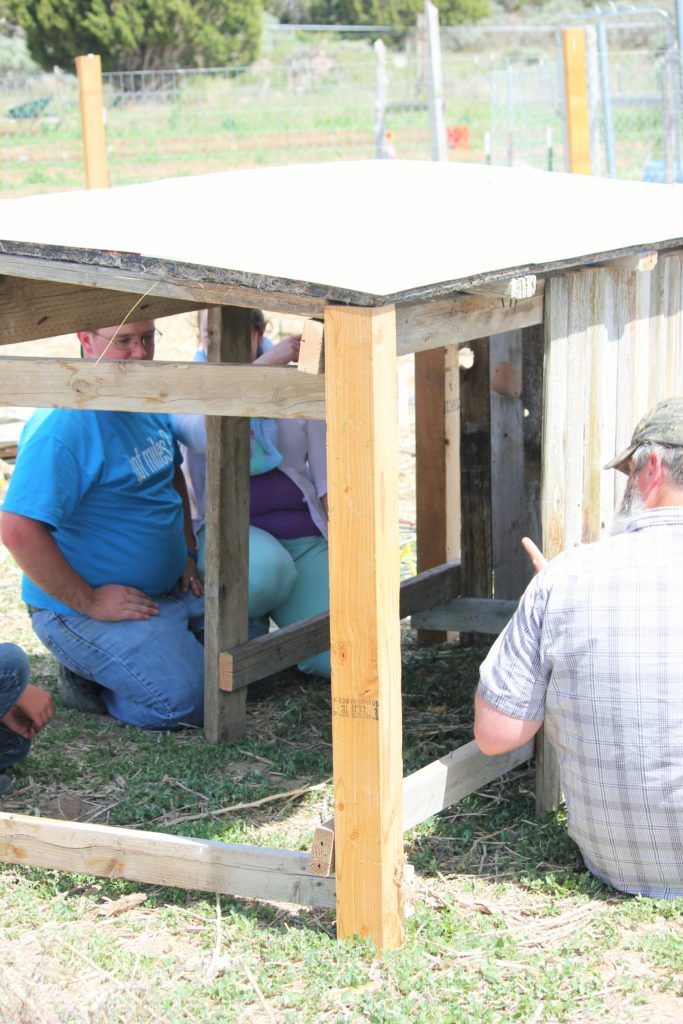
 This is the front of the finished project
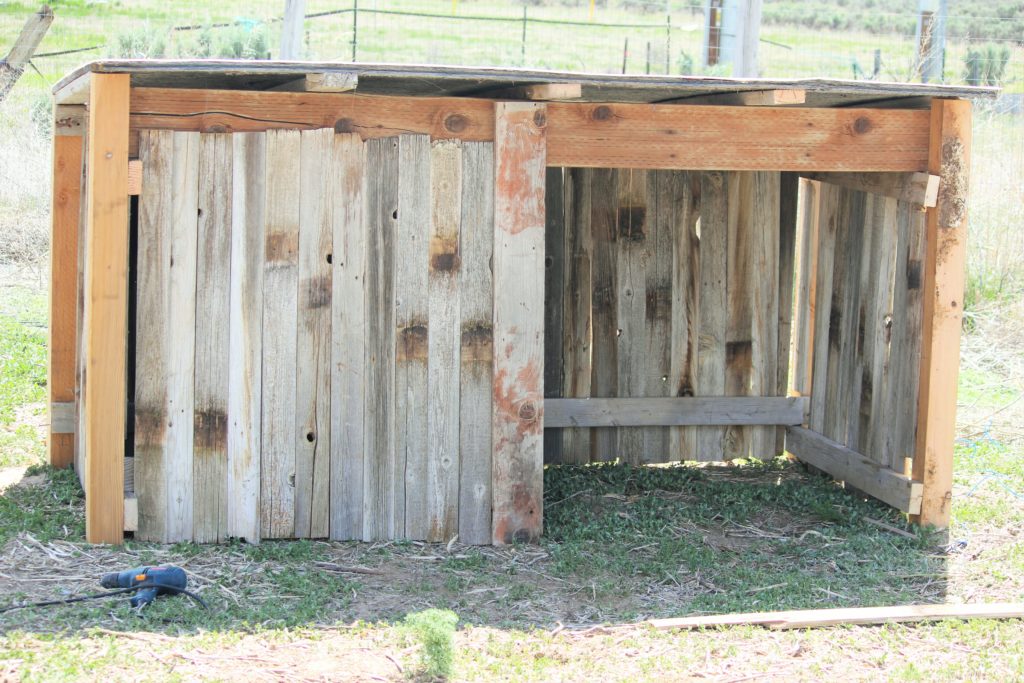


 In preparation for adding a small herd of goats to the farm this spring we had to replace some of the worse fencing along the property line. It is something we had been planning for the last three years, but fencing is a lot of work and can be rather expensive, however keeping goats where they need to be required that we finally get to that fence.
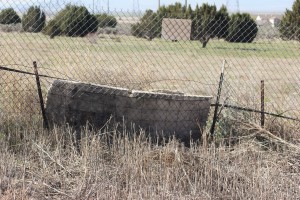


 This spring I have been talking and talking and talking about getting some more ducklings. We never actually purchased them, usually there was something more pressing that needed funds or I felt like I wasn’t set up for ducklings just yet, there were many excuses and reasons I kept putting off getting those ducklings.
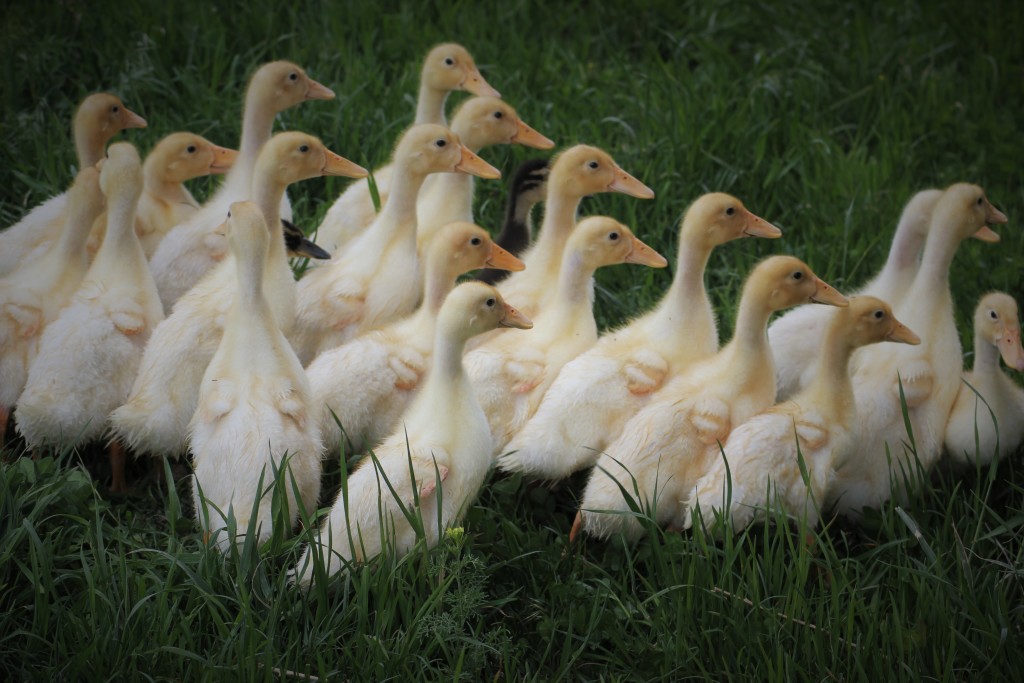
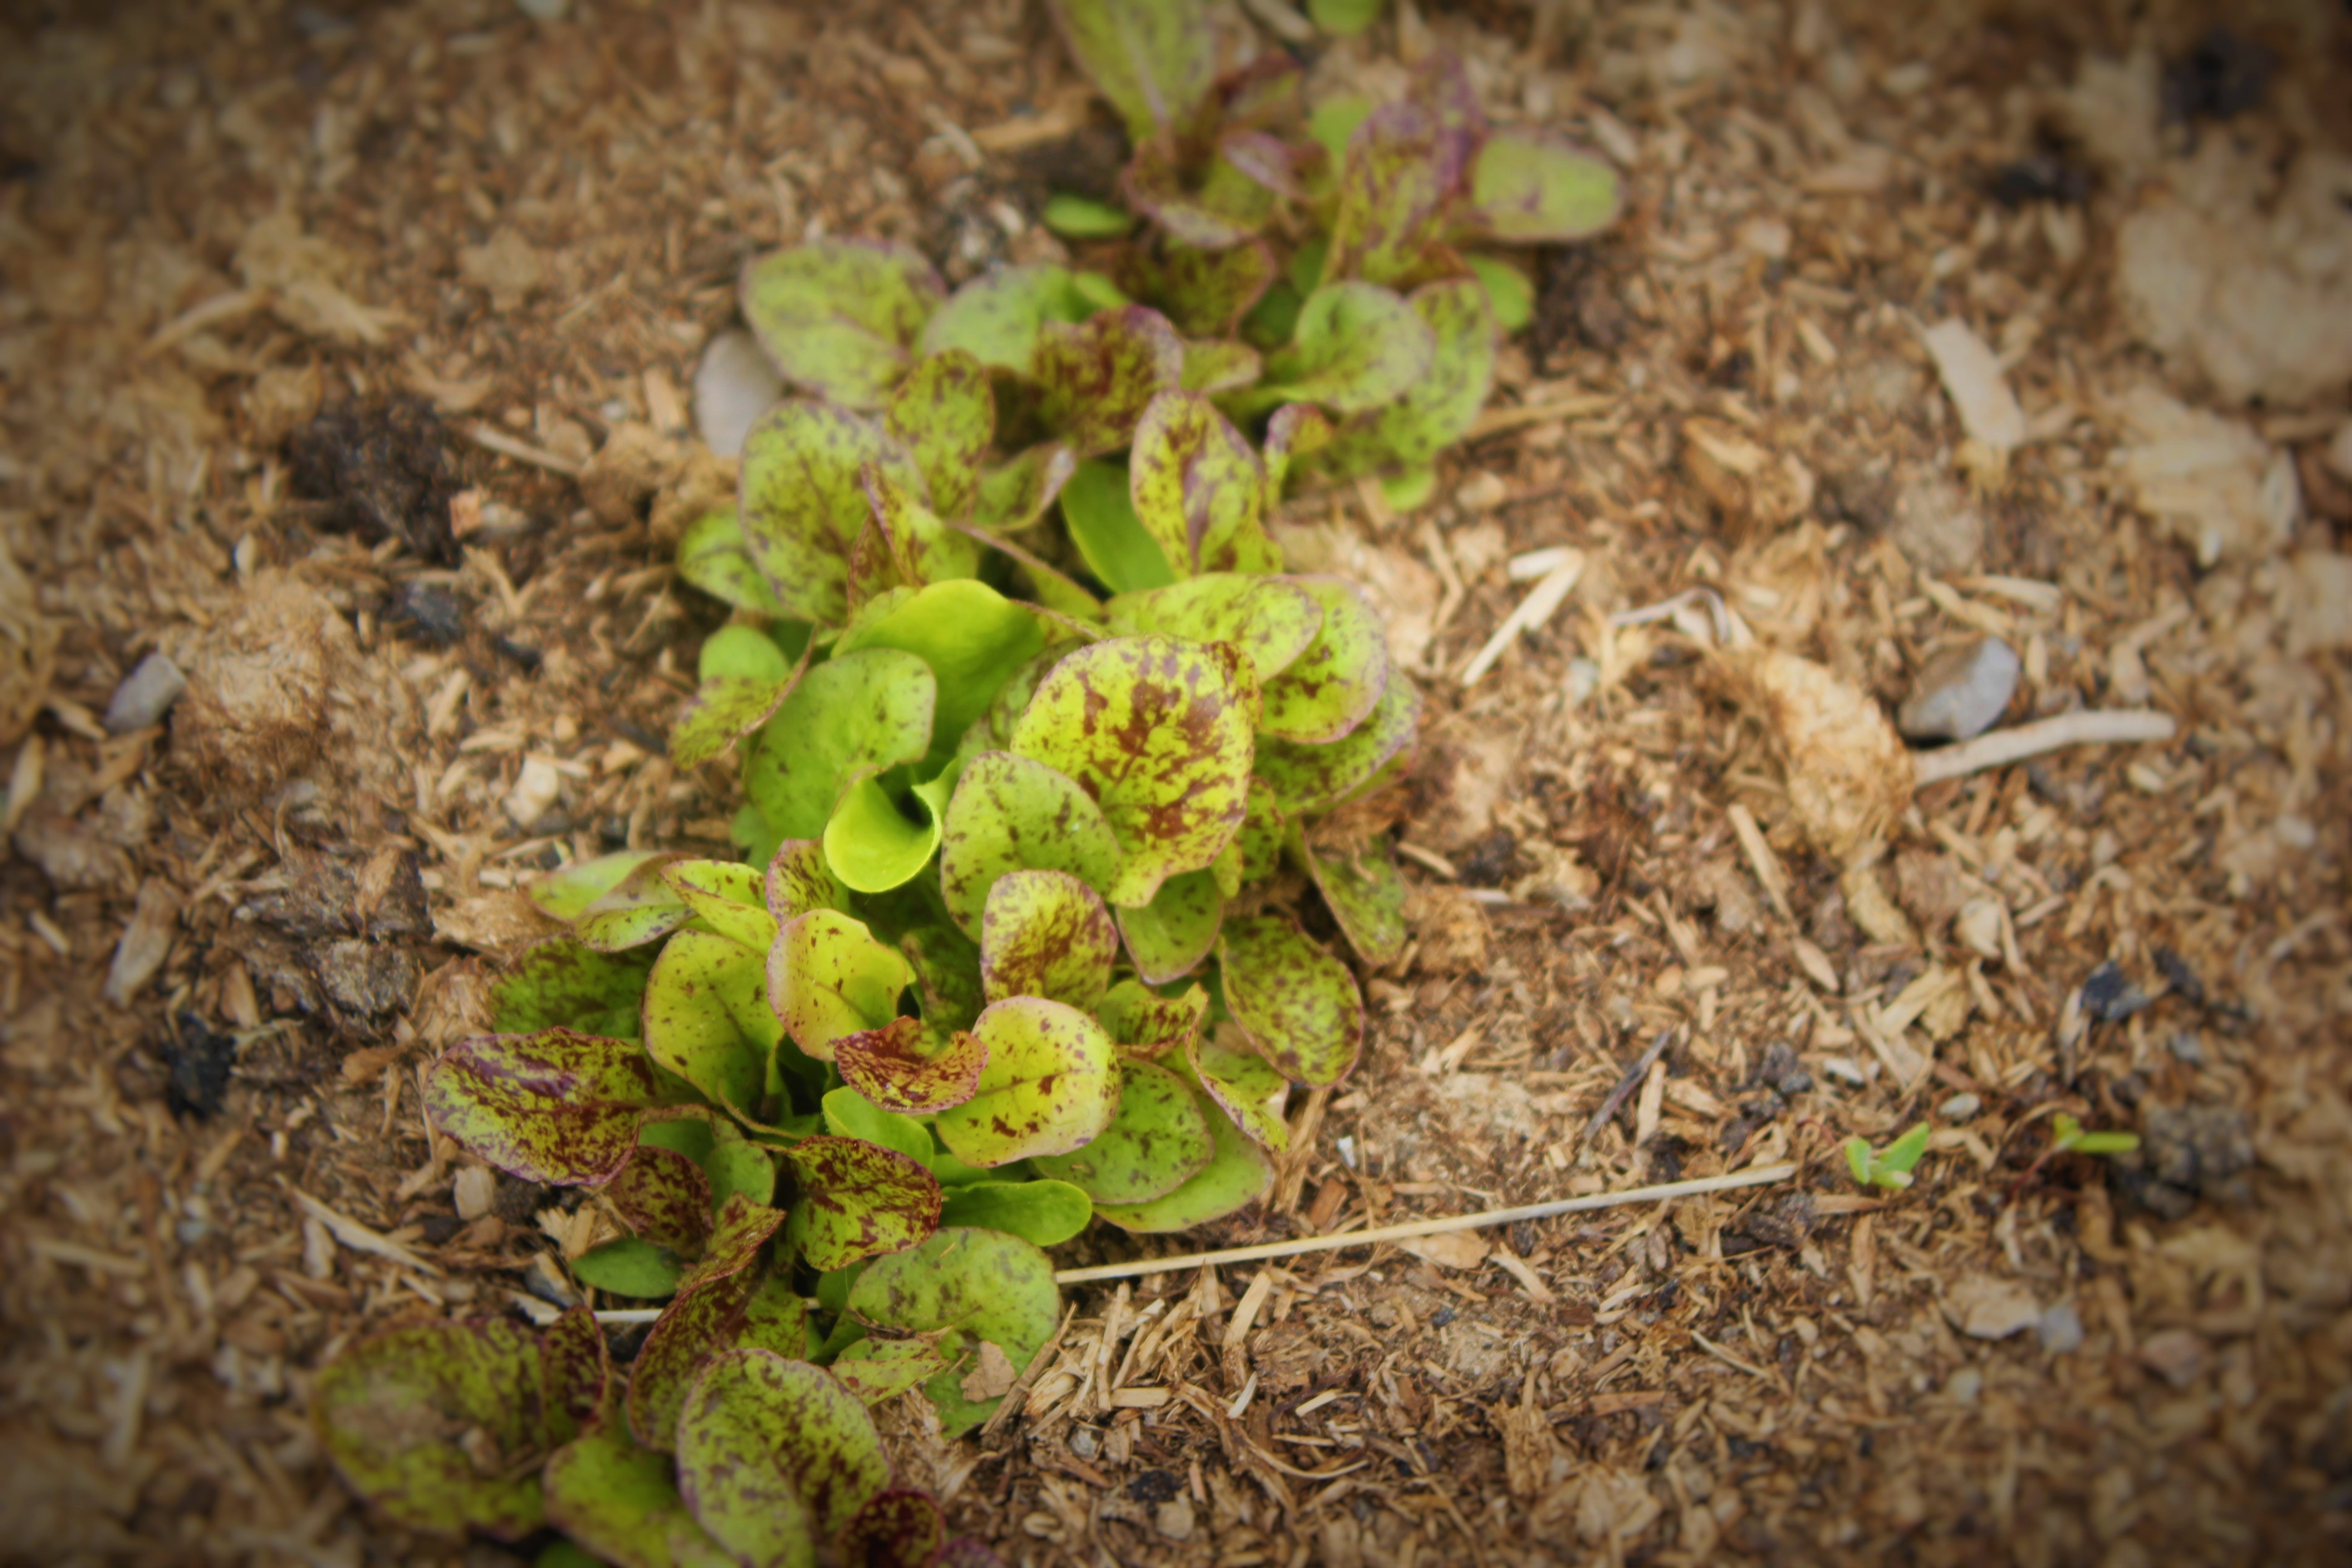 This is close up of one of my leaf lettuces, I am excited about this variety, its named “